| |||
|---|---|---|---|
| |||
開始:
|
首次離開了洛澤林後即被觸發。
| ||
結束:
|
法環
| ||
之前的任務:
|
|||
之後的任務:
|
|||
相關:
|
|||
- 「我就直說了吧:高塔已經不在我們的控制之下了。」 ―格里高爾
頹敗的法環是龍之紀元:起源四個主線任務之一,必須完成後才能進行領主大會。
在伊夏爾之塔(任務)的最後,主角被弗萊瑪斯救出,之後,主角決定去根據條約召援助阻止瘟潮,其中有一個條約就是和法師圓環協定的。這個任務在弗萊瑪斯的小屋談話以及莫麗甘加入後觸發。
在洛澤林和帝國大道之後,這個任務可以在任何時間進行。本任務建議為四個主線中首個進行的任務,首先強力奶溫妮會在這個任務中加入隊伍(你也可以宰了她...),而且在任務中能得到不少屬性獎勵。此外,這個任務完成後,會影響赤崖伯爵中的部分劇情。
要進行任務,便先要到達法環,從卡蘭哈德湖碼頭可以直接進入,在之前,你能夠從例如在洛澤林的布蘭特爵士以及博達·費迪克處得到一些關於法環的傳言。
到達法環底層學徒宿舍時候,你能發現這裡發生了可怕的事,而且,你要注意,當你進入大門後,在完成任務之前無法出來。
攻略:序章[ | ]
卡蘭哈德湖碼頭[ | ]

卡羅爾,聖殿武士...和安緹梵女王?!
卡蘭哈德湖碼頭位於世界地圖,在中央偏西南處。
- 如果已近觸發了任務先遣隊佩劍,那麼可以和入口左邊的拾荒者對話。
- 嬌慣公主酒館在入口下坡後左邊位置。
- 船夫凱斯特在旅店內。如果主角是個法師,凱斯特會提到鄧肯之前渡河的事兒。他還會提到聖殿武士已經沒收了他的渡船,禁止任何人前往。
- 法盟的代表在酒館邊上,接受相關任務可以點擊查看他身邊的袋子。
- 有一個陸標船可以由狗狗在此做「標記」。
- 如果接受了黑石民兵團的任務瀆職,薩麥爾和兩名打手將站在法盟代表和陸標船之間。
- 如果接受了黑石民兵團的任務死亡通告,拉蘭娜則會在嬌慣公主酒館內。
在碼頭,如果要進入法環則必須顯赫卡羅爾交談,當然,卡羅爾肯定會拒絕你的要求,也不會承認你的身份。你可以有不同的方式來處理這種情況:
- 說服他,告訴他上司不會喜歡他這樣。
- 恐嚇他,告訴他你快沒耐心了。
- 即是沒有學習相關技能,你可以選擇說服或恐嚇一次後,又再一次選擇另外一個,卡羅爾也會將你帶到塔內。
- 賄賂他40

- 如果你有以下同伴隨行,他們會有辦法讓你進入塔內。
- 璽偶會跟卡羅爾說她失去了耐心並要打碎他的骨頭。
- 如果主角說「難道我們就不能做點什麼嗎?」以及莫瑞甘再隊伍中,卡羅爾會要求莫瑞甘留下才放行。但是莫瑞甘會告訴他一些可怕的想法,迫使其讓行。
- 如果蕾莉安娜在,她會講故事說服卡羅爾。
- 斯坦不耐煩了,用他的餅乾賄賂了卡羅爾(優先)。
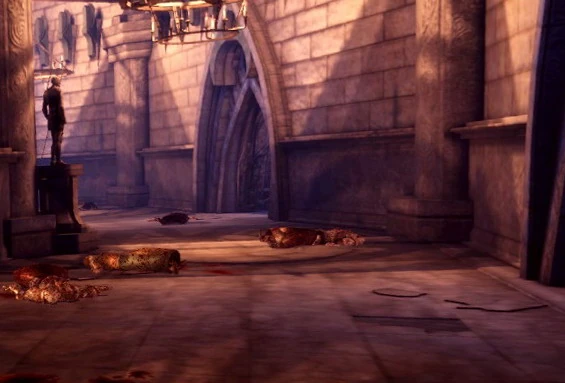
塔內[ | ]
當主角渡河進入到塔中的時候,發現了一件可怕的事,騎士長格里高爾已經下令封鎖了該地。他解釋到,塔內已經被憎惡和惡魔所占領。當然他並不知道具體是怎麼回事,不過他堅信整座塔已經沒救了,所以已經捎信給鄧利姆的教會請求支援以及廢環法權。廢環法權可以直接消滅掉塔內的一切。現在,你可以:
- 選擇尋找生還法師以及拯救法環。
- 清除/殺掉塔內所有生物,說「他們已經沒救了」,同時也讓塔內沒有任何惡魔有逃離的機會。
在這個任務中,關於獲得對抗瘟潮的援助有兩個選擇,第一個是法師,第二是聖殿武士。按格里高爾的說法,他必須要看首席巫師埃爾文才會解除廢環法權,而且埃爾文存活是法師成為援助隊伍的必要條件。格里高爾隨後會允許你進入塔中,當然,你一旦進去,大門就會關閉,直到任務完成之前你都沒法出來。所以,要做好比較充足的準備後再進入。
- 格里高爾身後的軍需官是塔內唯一能夠買賣物品的人物,當你進入大門後就沒法再訪問他了。
- 在首次遇見溫妮的房間呢,可以替換隊員。
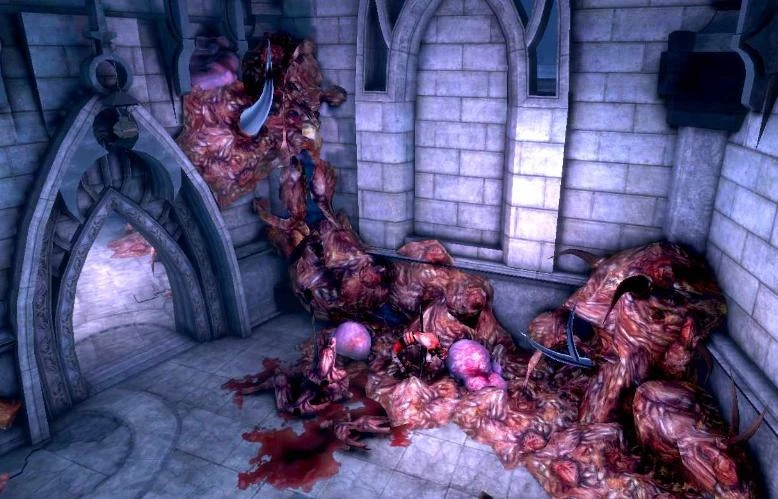
攻略:第一章[ | ]

頹敗的法環中的法環高塔
主角一行人進入大門後,直線朝前走到達一個小房間,在這個房間內,溫妮在一些學徒的幫助下,保護這裡的孩子,他們還設立了一個魔法屏障,以防止任何東西通過。當主角到達房間的時候,溫妮剛剛擊敗了一個狂暴惡魔。然後你就可以和溫妮進行對話,溫妮表示她想知道外面發生了什麼事,以及你是如何來到這個地方的。你可以告訴他格里高爾已經請求廢環法權的事,以及你到達這裡的目的。此外你可以在詢問一些當下的情況等事宜。之後,如果你選擇告訴溫妮你要拯救這座塔,那麼溫妮將會強制加入你的隊伍,如果你告訴她你要毀了這裡,那麼她將會攻擊你。
第一層樓[ | ]
- 參見: 學徒宿舍
不管你做出怎樣的選擇,前方門口的魔法屏障都將解除。在那個房間裡面有個永遠鎖着沒法到達的地下室,不過在進行支線任務守望深遠意志的時候,需要到這個門口來一趟。
在一樓的學徒宿舍,還是有一些比較強大的敵人,比如通往二樓的大廳中,有一個狂暴惡魔BOSS。除了不少可以揀取的物品外,一樓還有不少文獻條目可以找到,支線任務召喚學研究和守望深遠意志均在此地完成。
第二層樓[ | ]
進入二樓後,首先你會看到奧文,搜尋燒焦的屍體可以得到沾水的畫像。如果你是法師,你會知道奧文作為清修者在管理倉庫。歐文可以告訴你一些塔中的情況,並告訴你有個叫尼奧的法師曾來他的庫房裡尋找可用來抵禦血魔法的安卓拉的禱文。
離開奧文後,你會遇到一組血法師,往前走一段進入他們實現後便會觸發戰鬥。戰勝他們之後,一位女性血法師會像你求饒,她會告訴你奧爵德誘惑了他們成為血法師。你可以決定讓她逃走,殺了她,讓他參見法師軍隊。
之後,你可以從附近找到奧萊伊玫瑰。房間一處「遠古文本」堆裡面可以找到巴納斯特捲軸。這層樓大部分敵人和一樓都是差不多的,難度也一般,當然出現了蹣跚的行屍以及一些血法師,敵方法師可以造成非常強的傷害,建議優先處理,或者想辦法控制和打斷他們的魔法。提示,如果你有一個法師會法力碰撞這個魔法,那麼恭喜,只有有敵對法師的戰鬥你都會非常輕鬆,因為這個天賦幾乎可以秒殺絕大多數法師敵人,即便不能秒殺,也能造成巨大傷害。
搜索所有的房間,大部分情況下敵人都是那樣,支線任務守望深遠意志也需要在這一樓進行部分,在東北處房間你可以在這裡找到銀鏈,此外,你會在一個柜子錢發現躲在裡面的法師戈德溫。他會告訴你關於奧爵德的一些消息,在關於奧茲瑪的問題上,你可以選擇說服或恐嚇他,他會告訴你他走私利瑞姆相關的事兒,你可以要求幫他進貨,這會激活支線任務貴金屬礦,你還可以額外說服他在成事兒後多給你一份錢(8![]() )。你還可以殺了他,或者讓他離開,不過他不會走的,他會繼續躲在那個柜子裡面,知道法環任務完成後,他才會出來。
)。你還可以殺了他,或者讓他離開,不過他不會走的,他會繼續躲在那個柜子裡面,知道法環任務完成後,他才會出來。
在之後的一個房間裡面,有兩個法師和一個憎惡在談話,不要急着走過去,他們過一會兒就會在那兒自相殘殺。
繼續前進,來到教堂。搜索一個士兵的屍體可以的到教會掛墜。在一個坍塌的雕像前有一個黑瓶,試圖撿起來後將召喚出一個亡魂,詳情可以見支線任務黑瓶。
在最南面的房間,你會來到首席法師的房間,在這裡你可以得到不少東西,比如一些文獻條目,在埃爾文的箱子的裡面可以得到弗萊瑪斯的魔書(莫瑞甘任務相關),在書桌上也可以找到一個小漆盒,觸發支線任務血手珍妮的朋友。之後,上三樓吧。
第三層樓[ | ]
當你和隊友們到達三樓時候,你們會找個一個箱子後面的雕像。隊伍在進入一個大房間的時候會發現三個沿牆的雕像,在最後面一個房間,裡面有個雕像可以激活支線任務守望深遠意志 ,這些雕像都和這個任務有關。
被控制的聖殿武士和被迷惑的聖殿武士將是這層樓的主要敵人。聖殿武士對法師有一定的克制性,有些聖殿武士則會使用神聖打擊,這個天賦具有群體傷害和眩暈的特質,對法師比較致命。在一個房間中,還會有一個魅魔,魅魔魔法具有較強的控制性,配合其他的聖殿武士敵人是不容小覷的,對於魅魔,建議優先解決,或者儘量控制住其施展法術。在其中一個被迷惑的聖殿武士屍體上,可以找到小金條。
在一些房間,可以找到一些文獻和一些「撕破的書頁」,這些和支線任務五頁紙,四個法師有關。最後一個房間將會是三樓最難對付的一群敵人。除了惡魔和憎惡外,這個房間中間的雕像附近有一些清修者,這些清修者會逐漸轉換成敵人攻擊你,直到憎惡BOSS被擊殺。你還可以從憎惡的屍體裡找到白色符石。
第四層樓[ | ]


魅魔與被魅惑的聖殿武士
第四層相對前幾層而言,敵人分布比較稀疏。在解決掉他們之前最好先避開中央的房間。
這層有兩場比較困難的戰鬥,第一場是左側走廊的第一間房間,你將觸發一段一個魅魔在蠱惑一名聖殿武士的過場動畫。你可以在這裡選擇二話不說跟惡魔對着幹也可以選擇和它交涉。魅魔將告訴你它從這個聖殿武士身上看到了他對家庭生活以及幸福的渴望,這就是它為他製造的幻象,你可以嘗試喚醒他但不會成功。繼續跟它交涉你會發現如果你殺掉惡魔聖殿武士也會跟着死掉。所以你只有兩個選擇:要麼殺死他們倆,要麼放他們走。如果你決定開打聖殿武士會保護她,惡魔也會召喚幾具死屍幫助戰鬥。聖殿武士會使用他的能力,魅魔則是強大的法師。戰鬥結束後你可以從聖殿武士的屍體上獲得聖殿武士鎧甲。
The second encounter will be a much more powerful Blood Mage than has been encountered before who has taken control of a large group of Charmed and Possessed Templars. Keep the party's spell casters away from the door again and kill the mage as soon as possible. With the mage out of the way, the templars are just like those on the third floor: they're tough, but not unmanageable. Loot Archon Robes from the dead Blood Mage, then continue. The chest in the back has a lock difficulty of Very Hard (60).
Now is a good time to rest up, and go back and do the Watchguard of the Reaching side quest if the Warden hasn't already. Once you enter the central chamber on the fourth floor, things are going to change. Walk in the room, and enter an immediate cutscene.
Sloth is an Abomination and so much more. He hovers over the body of an as of yet unnamed mage who may look familiar if you did the Mage origin. No matter the dialogue options you choose, Sloth will put the Warden and party into a sleep. Once the cutscene ends, the Warden will enter a form of hazy reality only ever knowingly visited by Magi. If the Warden is a Mage or saved Connor during the Arl of Redcliffe quest, then he or she will recognize this place as the Fade.
影界:迷失於夢[ | ]
In the Fade the Warden must break the defenses of the demon Sloth and kill him. Here we will discover that the nameless mage that Sloth was standing over is Niall. Because the quest to escape from the Fade and kill Sloth is so long, it will be covered in a separate article. Please see The Fade: Lost in Dreams for details.
攻略:第二章[ | ]
歸來:第四層樓[ | ]

庫倫的囚籠
從影界中出來後,主角將回到塔內第四層,內奧的屍體附近。你可以在屍體身上找到安卓拉的禱文。In the next room kill the Drake (consoles), loot Charred Corpse for The Libertarian's Cowl, then pick up the book Codex entry: The Legend of Calenhad: Chapter 2. As the party continues towards to top of the Tower to confront Uldred, they will be assaulted by Dragonlings and may encounter a drake. This fight is rather simple as long as you have some form of paralysis and avoid the flame breath. There will be some demons and a room that appears empty of all but a chest until the Warden attempts to retrieve its contents. The resulting fight can be rather difficult as you may be low on supplies after the Fade. Luckily there is a multitude of potions around for you to loot. Going for the chest will trigger a trap and spawn several more demons to attack the party. One of the locked chest contains Beastman's Dagger.
By the stairs leading up to the Harrowing Chamber, the Warden will find Cullen, trapped in a magical prison. If the Warden is a Mage, Cullen may react accordingly -- he will even reveal that he harbored feelings for a female mage Warden. Cullen initially believes the party members are illusions the demons sent to torment him.
Once Cullen has been calmed down by the Warden, he will postulate a moral dilemma for the player. Cullen describes his torment as ghastly and explains to you that Uldred is upstairs in the Harrowing Chamber forcing the rest of the living mages to become either Blood Mages, Abominations, or some version of both. He is convinced that not a single mage can be allowed to make it out of that chamber alive, and everyone must be killed.
- The Warden may agree with him, go upstairs, and slaughter everything in sight. Doing so will end all hope of getting the Circle of Magi to help with the Blight but will allow the Templars to be recruited to the final army. Note that agreeing with this course of action causes Wynne to attack the party immediately, forcing the Warden to kill her before being able to proceed. Once you have agreed, you cannot change your mind!
- The Warden can disagree with Cullen outright and try to save the mages. You can still side with the Templars afterward when talking to Greagoir. This option is useful for keeping Wynne in your party and recruiting the Templars into your army.
- The Warden may choose to refrain from making a decision until he or she has gone upstairs and witnessed the situation firsthand. This will put off the decision until Cullen and Irving make their cases to Greagoir. If Sten is in the group, he may support Cullen's recommendation; the Warden may try to persuade him otherwise; a negative approval rating (e.g.:
 Sten: 競爭 (+5)) may result. If you pick the dialogue choice "I have made my decision" when it is first presented, Sten does not interfere nor lose approval -- it seems he simply doesn't like you to change your mind or even debate the point after your initial pick.
With the decision made, the Warden may go upstairs.
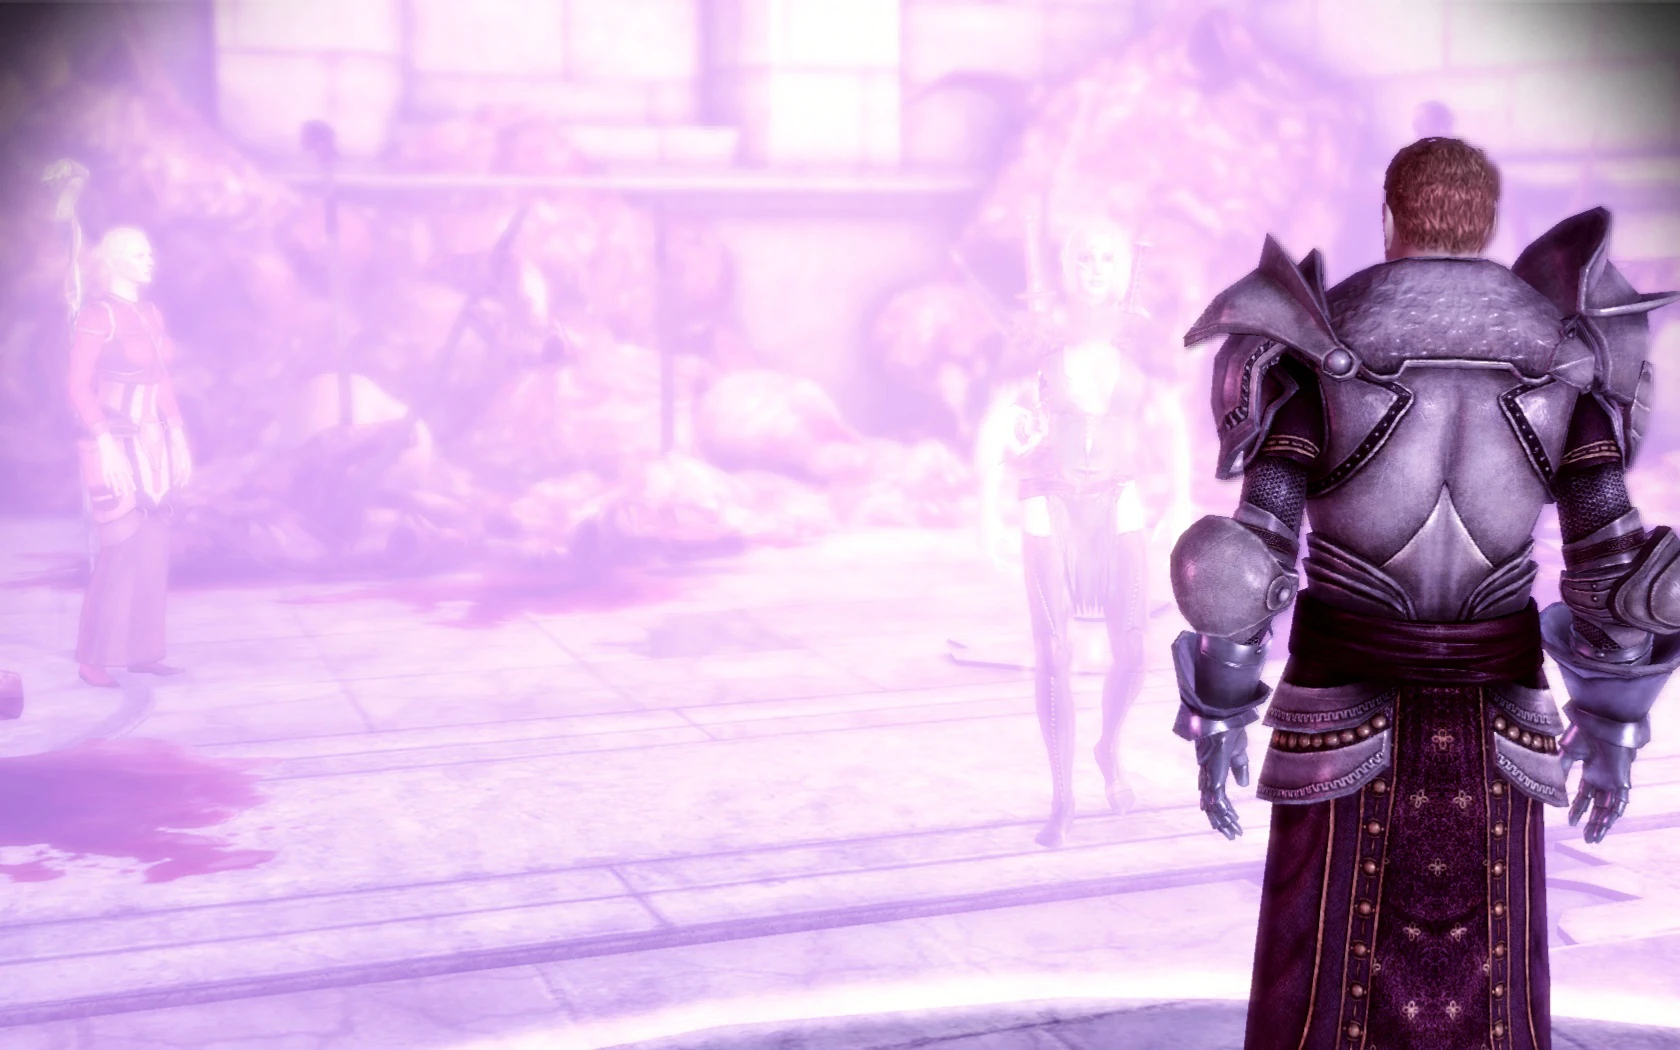
劫禮室[ | ]


Confronting Uldred
In the Harrowing Chamber, the Warden will finally meet Uldred. Uldred was the mage who offered the services of the Circle of Magi to light the beacon during the Battle of Ostagar, before being overruled by the Revered Mother. Since then, he has been busy staging a coup in the Circle Tower and become possessed by a Pride Demon.
A cutscene plays upon entering the Harrowing Chamber wherein Uldred forces a mage to become an Abomination. There is an extended dialogue the Warden may engage in in order to learn more of Uldred's goals and motivations. The Warden is free to choose any number of dialogue options, but ultimately Uldred must be killed.
作戰[ | ]
Once the cutscene ends, Uldred shows his true form as a Pride Demon. He has a lot of health and some very strong abilities. His three lackey Abominations aren't the same as the previous ones the party fought earlier as they are a fair bit stronger.
Uldred himself is incredibly powerful, almost certainly the most powerful foe you've faced so far. Wynne, Morrigan, and Alistair are the ideal companions, although Sten may substitute for Alistair in this mix. Wynne will be invaluable, as she heals the party frequently. Morrigan is likewise valuable, as her many offensive spells seem to have the desired effect when it comes to mass damage. As a spell caster, Mana Clash will do a large amount of damage to Uldred and prevent him from using his powerful spells, but it hits him less often than weaker enemies. Sten/Alistair could either be used to distract Uldred or, ideally, to slay the abominations first. Now, if the Warden usually flanks an opponent, he or she should do so more from the side in this battle as Uldred has a nasty habit of kicking those behind him without turning.
Every so often during the fight, Uldred will attempt to corrupt one of the other Mages who are bound up around the room. Using the Litany of Adralla every time a mage is surrounded by three rings of pulsing light will prevent Uldred from adding another Abomination to the battlefield. If Wynne is in the party, she will tell the Warden to "...use the Litany." In the PC version, the Litany will usually appear on the action bar when it is looted from Niall's dead body; if not, take the time to find it and place it on the action bar. For console players, the Litany is accessed through the radial menu on the advanced tab. As long as just a single mage lives through the fight, the Warden can side with the Magi in the moral decision presented by Cullen.
Once Uldred finally goes down, loot Cinderfel Gauntlets from him, then speak with First Enchanter Irving (or Cullen, should you have killed all the mages). The Warden's dialogue with Irving/Cullen may have lasting effects on the game.
結果[ | ]
When Uldred is killed, First Enchanter Irving or Cullen will take the Warden downstairs to Knight-Commander Greagoir where the matter of the treaty will be discussed. Should you have sided with the mages during the previous discussion with Cullen, he will try to convince Greagoir that all the mages need to be killed; the Warden may fan the flames or vouch for the mages through dialogue options.
To side with the Templars:
- Irving must have died during the fight with Uldred, in which case Greagoir will side with the Warden against the Blight;
- If Irving survived, The Warden must mention to Greagoir that some blood mages may have survived. In that case, Irving will agree with this fact and willingly go into containment and put the mages' lives in the templars' hands. Wynne accepts this decision and stays with the party. This ending results with +12 approval from Morrigan.
To side with the Mages:
- Irving must have survived the fight with Uldred. Then, the Warden just needs to ask Greagoir what he thinks or simply mention that order has been restored to the Circle. This ending results with +7 approval from Wynne.
It is not possible to gain both Templars and Mages. If The Warden asks Greagoir what he thinks and Greagoir had said before that he would accept no less than First Enchanter Irving saying it is safe, he will stick to his word and call off the Annulment. Irving will then confirm that the mages will aid you against the Blight. Later, back at camp, the mage's envoy will state that the Templars have sided with you as well, however this appears to be merely dialogue, as only the mages appear as selectable allies during the Final Battle.
{{Note|Originally, if the Warden was a blood mage, Wynne would report her suspicions to the templars. This was removed from the final game, but an unofficial patch is available to replace the scene for the PC version, it is a smaller optional file available under the larger "Dialogue Tweaks" patch. The Warden can admit to this and end up being forced to fight both the Mages and Templars present. However, with a high enough persuasion the Warden can tell them it is "Grey Warden magic", which First Enchanter Irving eventually accepts, allowing you to keep your chosen allies for the final battle.
{{Note|After you have talked to First Enchanter about Dagna joining as a study you can leave the tower and reenter the tower you will see a white arrow. If you follow that arrow you will come across dagna in the library and you can tell her then.
支線任務[ | ]
All of the following quests may be accessed once Broken Circle has been started.
守望深遠意志
召喚學研究
血手珍妮的朋友
五頁紙,四個法師
獎勵[ | ]
- See Quartermaster for merchant items.
- To open all locked chests in the Circle Tower, a lockpicking score of 60 or more is needed.
收穫[ | ]
Apprentice's Amulet
Archon Robes, source: dropped by a blood mage
Beastman's Dagger, source: locked chest
Buckle of the Winds, source: a pile of fifth
Charged Mitts, source: dropped by a fade rifter (side quest)
Cinderfel Gauntlets, source: dropped by Uldred
Kaddis of the Lady of the Skies, source: a chest
Litany of Adralla, source: Niall's corpse
Love Letter, source: locked chest
Mabari War Harness, source: chest
Sailor's Charm, source: vanity
Scroll of Banastor x2, source: piles of books
Shiver, source: dropped by a desire demon
Small Painted Box, source: First Enchanter's personal desk (quest item)
The Libertarian's Cowl, source: a charred corpse
Yusaris, source: dropped by Shah Wyrd (side quest)
禮物[ | ]
Remarkable Malachite, for Shale, source: from Quartermaster at Apprentice Quarters (first floor)
Black Grimoire, for Morrigan, source: in Irving's Quarters at Senior Mage Quarters (second floor)
Chantry Amulet, for Leliana, source: a templar corpse at Senior Mage Quarters (second floor)
Silver Chain, for Morrigan, source: a vanity at Senior Mage Quarters (second floor)
The Rose of Orlais, for Wynne, source: a pile of books at Senior Mage Quarters (second floor).
Water-Stained Portrait, for Sten, source: a charred corpse at Senior Mage Quarters (second floor)
White Runestone, for Alistair, source: dropped by an abomination at Great Hall (third floor)
Small Gold Bar, for Zevran, source: dropped by a charmed templar in the Great Hall (third floor) or Templar Quarters (fourth floor)
Beef Bone, for Dog, source: a chest at Templar Quarters (fourth floor)
Sun Blonde Vint-1, for Oghren, source: a vanity at Templar Quarters (Fourth Floor)
漏洞[ | ]
- If Uldred is not looted, leaving the Harrowing Chamber and then returning sometimes resets the fight with Uldred, meaning that the player can defeat him multiple times and gain experience each time. Remember that you must never loot him in order to come back and find him. If you ever loot him, he will not spawn anymore no matter what. This can be done if you don't take everything. The same happens for Patch 1.05 version but only a couple of times.
- If you haven't collected "The Litany of Adralla" before the battle against Uldred, once you defeat him you will be returned downstairs to report to Knight-Commander Greagoir but you'll be unable to enter the tower again making it impossible for you to complete the quest and the game.
- If you decide to destroy the circle and tell Leliana that you don't recall asking for her opinion, Alistair's voice could be heard saying that you're getting it regardless even when he's not in your party at the time.