(→Places) |
No edit summary |
||
| Line 1: | Line 1: | ||
| − | <onlyinclude> |
+ | <onlyinclude>{{LocationTransformer |
| ⚫ | |||
| − | {{LocationTransformer |
||
| + | |name = [[The Wounded Coast]] |
||
| ⚫ | |||
| − | | |
+ | |icon = Wounded Coast Icon.png |
| − | | |
+ | |image = Wounded coast.jpg |
| + | |px = 270px |
||
| − | |image= Wounded_coast.jpg |
||
| ⚫ | |||
| − | |px= 250px |
||
| ⚫ | |||
| ⚫ | |||
| + | |inhabitants = [[Magus Tavarin Hall]] |
||
| − | |type= |
||
| ⚫ | |||
| ⚫ | |||
| ⚫ | |||
| − | |sections= |
||
| − | | |
+ | |appearances = [[Dragon Age II]] |
| ⚫ | |||
| ⚫ | |||
| − | |appearances= [[Dragon Age II]] |
||
}}</onlyinclude> |
}}</onlyinclude> |
||
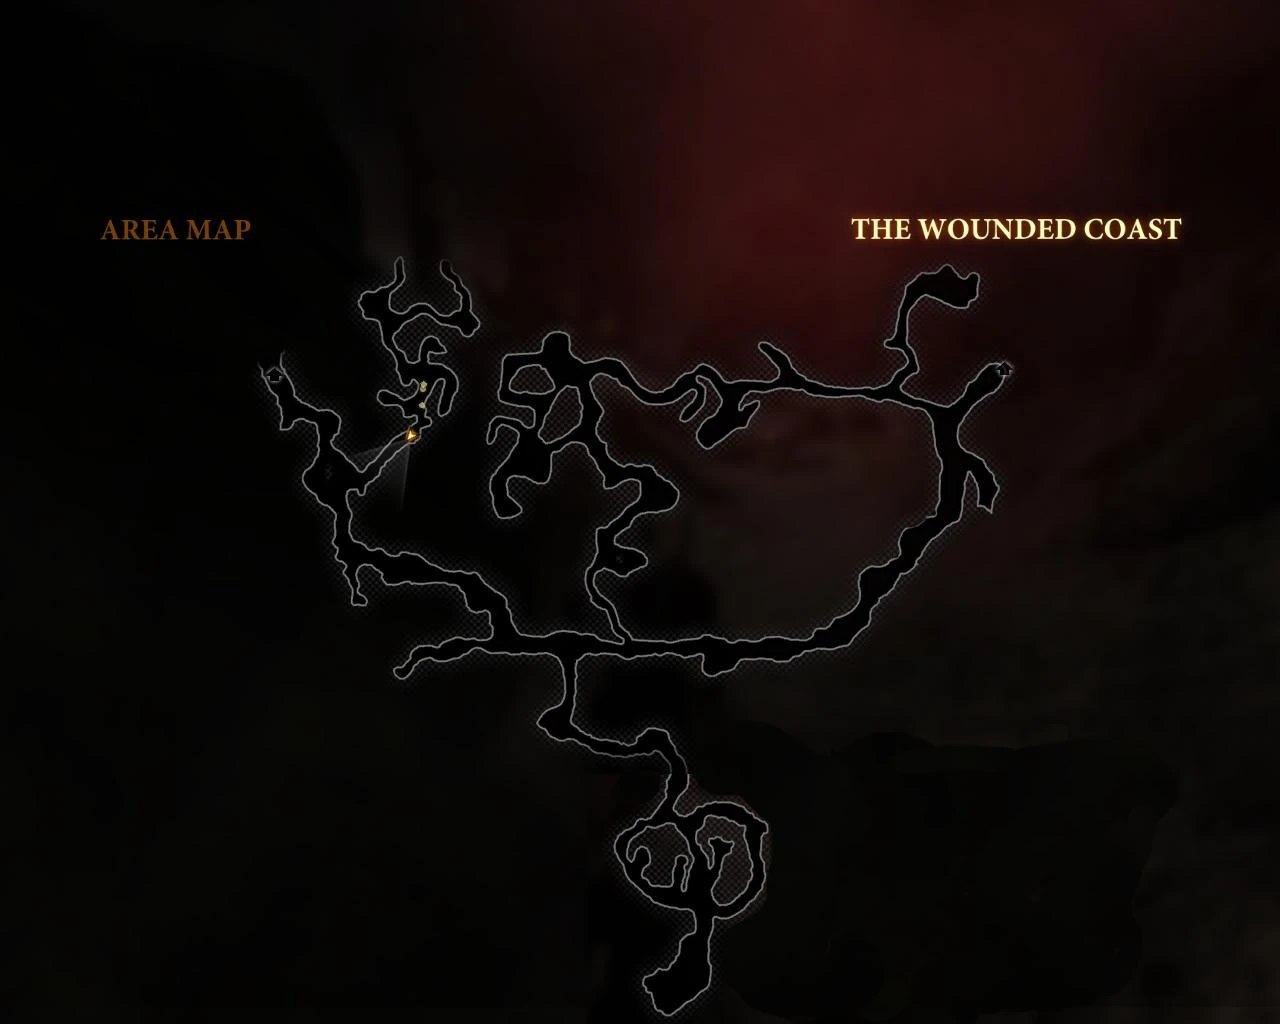
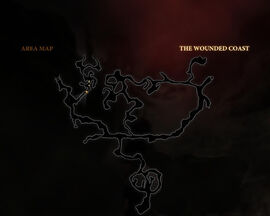
| − | [[File:Wounded_coast_map.jpg|thumb|250px|The map of The Wounded Coast]] |
||
'''The Wounded Coast''' is a feared place, one of the roads that travel into [[Kirkwall]], known for its bandits that hide among the rocky cliffs, as well as the predators that stalk the area. |
'''The Wounded Coast''' is a feared place, one of the roads that travel into [[Kirkwall]], known for its bandits that hide among the rocky cliffs, as well as the predators that stalk the area. |
||
== Places == |
== Places == |
||
| − | |||
{{:Wounded Coast Approach|style=iconmini}} (Act 1){{clrl}} |
{{:Wounded Coast Approach|style=iconmini}} (Act 1){{clrl}} |
||
{{:Slaver Caverns|style=iconmini}} (Act 1){{clrl}} |
{{:Slaver Caverns|style=iconmini}} (Act 1){{clrl}} |
||
| Line 26: | Line 21: | ||
{{:Dank Cave|style=iconmini}} (Act 2){{clrl}} |
{{:Dank Cave|style=iconmini}} (Act 2){{clrl}} |
||
{{:Bounty Hunter Getaway|style=iconmini}} (Act 2){{clrl}} |
{{:Bounty Hunter Getaway|style=iconmini}} (Act 2){{clrl}} |
||
| + | |||
| + | [[File:Wounded coast map.jpg|thumb|270px|Map of the area]] |
||
== Quests == |
== Quests == |
||
| + | |||
| − | === |
+ | === Act 1 === |
{{:Redblossom Special|style=iconmini}}{{clrl}} |
{{:Redblossom Special|style=iconmini}}{{clrl}} |
||
{{:Dark Epiphany |style=iconmini}}{{clrl}} |
{{:Dark Epiphany |style=iconmini}}{{clrl}} |
||
| Line 37: | Line 35: | ||
{{:Blackpowder Promise|style=iconmini}}{{clrl}} |
{{:Blackpowder Promise|style=iconmini}}{{clrl}} |
||
{{:Duty (quest)|style=iconmini}}{{Note|can also be completed in Act 2}}{{clrl}} |
{{:Duty (quest)|style=iconmini}}{{Note|can also be completed in Act 2}}{{clrl}} |
||
| − | ===Act 2=== |
+ | === Act 2 === |
{{:Swatch of the Jackyard|style=iconmini}}{{clrl}} |
{{:Swatch of the Jackyard|style=iconmini}}{{clrl}} |
||
{{:Goosegirl Cameo (quest)|style=iconmini}}{{clrl}} |
{{:Goosegirl Cameo (quest)|style=iconmini}}{{clrl}} |
||
| Line 45: | Line 43: | ||
{{:The Lost Patrol|style=iconmini}}{{clrl}} |
{{:The Lost Patrol|style=iconmini}}{{clrl}} |
||
{{:Elves at Large|style=iconmini}}{{clrl}} |
{{:Elves at Large|style=iconmini}}{{clrl}} |
||
| − | ===Act 3=== |
+ | === Act 3 === |
{{:The Awiergan Scrolls: First Aspect|style=iconmini}}{{clrl}} |
{{:The Awiergan Scrolls: First Aspect|style=iconmini}}{{clrl}} |
||
{{:Who Needs Rescuing?|style=iconmini}}{{clrl}} |
{{:Who Needs Rescuing?|style=iconmini}}{{clrl}} |
||
| Line 59: | Line 57: | ||
* [[Tal-Vashoth]] |
* [[Tal-Vashoth]] |
||
* [[Mabari]] |
* [[Mabari]] |
||
| − | * Slavers |
+ | * [[Slavery|Slavers]] |
| + | * [[Spider]]s |
||
| + | |||
== Notable items == |
== Notable items == |
||
| + | |||
| − | === Crafting |
+ | === Crafting resources === |
Here are the resources in this area for the [[Supplier]] achievement:<br> |
Here are the resources in this area for the [[Supplier]] achievement:<br> |
||
'''Act 1''' |
'''Act 1''' |
||
| Line 79: | Line 80: | ||
{{:Embrium|style=iconmini}} - to the left just short of the far western exit{{clrl}} |
{{:Embrium|style=iconmini}} - to the left just short of the far western exit{{clrl}} |
||
| − | ==Stores== |
+ | == Stores == |
| − | *[[Magnus's Wares]] |
+ | * [[Magnus's Wares]] |
| − | ==Other== |
+ | == Other == |
'''Act 1''' |
'''Act 1''' |
||
{{:Avernus's Experimental Draught|style=iconmini}} - on a Dead Messenger for the quest [[Dark Epiphany]] up to the right from where you came, there is a quest mark on him. {{clrl}} |
{{:Avernus's Experimental Draught|style=iconmini}} - on a Dead Messenger for the quest [[Dark Epiphany]] up to the right from where you came, there is a quest mark on him. {{clrl}} |
||
| Line 91: | Line 92: | ||
== Notes == |
== Notes == |
||
| − | *If [[the Warden]] chose to cure the [[Werewolf|Werewolves]], [[Hawke]] will come across a former Werewolf being harassed. Hawke can side with the [[Elf|elves]], which leads to the man being killed; defend the man, upon which the elves attack you; or convince the elves to leave the man alone. |
+ | * If [[the Warden]] chose to cure the [[Werewolf|Werewolves]], [[Hawke]] will come across a former Werewolf being harassed. Hawke can side with the [[Elf|elves]], which leads to the man being killed; defend the man, upon which the elves attack you; or convince the elves to leave the man alone. |
:* Convincing the assassin killing the human isn't what her mother would have wanted: {{Approval2|Isabela|-5}}. Talking the Dalish out of killing the human nets 510 XP and some silver. This option is only available to a [[Dialogue wheel|diplomatic Hawke]]. |
:* Convincing the assassin killing the human isn't what her mother would have wanted: {{Approval2|Isabela|-5}}. Talking the Dalish out of killing the human nets 510 XP and some silver. This option is only available to a [[Dialogue wheel|diplomatic Hawke]]. |
||
| Line 100: | Line 101: | ||
{{Bug|DA2|This encounter can still trigger even if the warden did not lift the curse, so long as Zathrian's clan was not killed.}} |
{{Bug|DA2|This encounter can still trigger even if the warden did not lift the curse, so long as Zathrian's clan was not killed.}} |
||
| − | *There are two areas that you can access that don't show on the map. One in the northern labyrinth and one in the Tal Vashoth camp to the left before the cave. Both are hidden behind bushes and contain just normal loot. |
+ | * There are two areas that you can access that don't show on the map. One in the northern labyrinth and one in the Tal Vashoth camp to the left before the cave. Both are hidden behind bushes and contain just normal loot. |
{{DEFAULTSORT:Wounded Coast, The}} |
{{DEFAULTSORT:Wounded Coast, The}} |
||
Revision as of 10:15, 20 April 2014
The Wounded Coast is a feared place, one of the roads that travel into Kirkwall, known for its bandits that hide among the rocky cliffs, as well as the predators that stalk the area.
Places
![]() Wounded Coast Approach (Act 1)
Wounded Coast Approach (Act 1)
![]() Slaver Caverns (Act 1)
Slaver Caverns (Act 1)
![]() Tal-Vashoth Cavern (Act 1)
Tal-Vashoth Cavern (Act 1)
![]() Dank Cave (Act 2)
Dank Cave (Act 2)
![]() Bounty Hunter Getaway (Act 2)
Bounty Hunter Getaway (Act 2)
Map of the area
Quests
Act 1
Act 2
Act 3
![]() The Awiergan Scrolls: First Aspect
The Awiergan Scrolls: First Aspect
Enemies
- Dalish Assassin - Dalish Warrior - Dalish Archer
- Raider - Raider Assassin - Raider Archer - Raider Reaver
- Shades
- Abomination
- Tal-Vashoth
- Mabari
- Slavers
- Spiders
Notable items
Crafting resources
Here are the resources in this area for the Supplier achievement:
Act 1
![]() Glitterdust - at the end of the south-pointing dead end on the extreme northeast side of the map.
Glitterdust - at the end of the south-pointing dead end on the extreme northeast side of the map.
![]() Elfroot x2 - one on the south side of the north path just past that first northeast clearing, the other one at the dead end on the far west of the map.
Elfroot x2 - one on the south side of the north path just past that first northeast clearing, the other one at the dead end on the far west of the map.
![]() Spindleweed - on the path to the northeastern clearing
Spindleweed - on the path to the northeastern clearing
![]() Lyrium - Tal-Vashoth cave during Blackpowder Promise quest
Lyrium - Tal-Vashoth cave during Blackpowder Promise quest
![]() Silverite - during the Blackpowder Promise quest, relatively in the same area with Raw Lyrium.
Silverite - during the Blackpowder Promise quest, relatively in the same area with Raw Lyrium.
Act 2
![]() Lyrium - in the Dank Cave during Forbidden Knowledge
Lyrium - in the Dank Cave during Forbidden Knowledge
![]() Elfroot - about halfway down the east-west path on the south side (a little past the first Raiders)
Elfroot - about halfway down the east-west path on the south side (a little past the first Raiders)
![]() Embrium x2 - one on the south path by the blocked mine, one on the north path where it slopes up to the right
Embrium x2 - one on the south path by the blocked mine, one on the north path where it slopes up to the right
Act 3
![]() Elfroot -just past the mine cart on the east-west path
Elfroot -just past the mine cart on the east-west path
![]() Embrium - to the left just short of the far western exit
Embrium - to the left just short of the far western exit
Stores
Other
Act 1
![]() Avernus's Experimental Draught - on a Dead Messenger for the quest Dark Epiphany up to the right from where you came, there is a quest mark on him.
Avernus's Experimental Draught - on a Dead Messenger for the quest Dark Epiphany up to the right from where you came, there is a quest mark on him.
Act 3
Notes
- If the Warden chose to cure the Werewolves, Hawke will come across a former Werewolf being harassed. Hawke can side with the elves, which leads to the man being killed; defend the man, upon which the elves attack you; or convince the elves to leave the man alone.
- Convincing the assassin killing the human isn't what her mother would have wanted:
 Isabela: rivalry (+5). Talking the Dalish out of killing the human nets 510 XP and some silver. This option is only available to a diplomatic Hawke.
 - Allowing the assassin to kill the human results in 500 XP, some coin and Isabela: friendship (+5).
- Defending the human and killing the elves nets most, around 100 XP and some random loot for the kills, plus 500 XP and 50 silver as he thanks you: Isabela: rivalry (+5).
- Before you start the dialogue she will say "Do you even know her name, shem? No? It's Danyla. She's dead." Danyla was part of the Lost to the Curse quest in Dragon Age: Origins.
- Convincing the assassin killing the human isn't what her mother would have wanted:
- There are two areas that you can access that don't show on the map. One in the northern labyrinth and one in the Tal Vashoth camp to the left before the cave. Both are hidden behind bushes and contain just normal loot.