Tags: Visual edit apiedit |
No edit summary |
||
| (5 intermediate revisions by 4 users not shown) | |||
| Line 23: | Line 23: | ||
{{SpoilerDAO| |
{{SpoilerDAO| |
||
=== Ostagar === |
=== Ostagar === |
||
| − | While in [[Ostagar]], make your way across the bridge to the base of the Tower. To avoid flaming rocks, go slowly and pause before crossing a new section of the bridge, dashing by just after each impact near you; the blast radius knocks characters over for a few seconds, but they don't do much damage (and it's not possible to go over the edge and plummet to your death). |
+ | While in [[Ostagar]], make your way across the bridge to the base of the Tower. To avoid flaming rocks, go slowly and pause before crossing a new section of the bridge, dashing by just after each impact near you; the blast radius knocks characters over for a few seconds, but they don't do much damage (and it's not possible to go over the edge and plummet to your death). If you have Indomitable, now would be an excellent time to activate it, the stun/knockdown immunity will protect against the blasts. |
At the base of the tower, you will be met by a [[Tower Guard]], who says the Tower has been overrun by darkspawn, who have come up from some recently discovered tunnels. |
At the base of the tower, you will be met by a [[Tower Guard]], who says the Tower has been overrun by darkspawn, who have come up from some recently discovered tunnels. |
||
| − | * |
+ | *If you are of [[Magi Origin]], the Tower Guard and [[Soldier]] will join your party. |
| − | * |
+ | *If you are of any other [[Origins|Origin]], the Tower Guard and [[Circle Mage]] will join. |
| + | **However, the Tower Guard will not join the party if you are of [[Human Noble Origin]] (and so have [[Dog]] already in the party), meaning that you will only be joined by Circle Mage. |
||
Make your way through the Tower grounds, upwards and counterclockwise: there are a number of [[genlock]]s and [[hurlock]]s fighting a few surviving soldiers. Kill enemies and loot bodies, crates, plants and a locked chest on the way. Most of the containers are off to the right immediately after passing through the gate (which was locked the last time the Warden was here). A [[Hurlock alpha]] is located near the entrance of the Tower. Once the remaining darkspawn are defeated, enter the tower. |
Make your way through the Tower grounds, upwards and counterclockwise: there are a number of [[genlock]]s and [[hurlock]]s fighting a few surviving soldiers. Kill enemies and loot bodies, crates, plants and a locked chest on the way. Most of the containers are off to the right immediately after passing through the gate (which was locked the last time the Warden was here). A [[Hurlock alpha]] is located near the entrance of the Tower. Once the remaining darkspawn are defeated, enter the tower. |
||
| Line 34: | Line 35: | ||
[[File:Toi-firstfloor.jpg|thumb|Tower of Ishal - First Floor]] |
[[File:Toi-firstfloor.jpg|thumb|Tower of Ishal - First Floor]] |
||
Make your way into the centre of the floor. There will be a tripwire that sets off a grease trap that a nearby [[Genlock emissary]] will try to set alight with a [[Fireball (Origins)|Fireball]]. |
Make your way into the centre of the floor. There will be a tripwire that sets off a grease trap that a nearby [[Genlock emissary]] will try to set alight with a [[Fireball (Origins)|Fireball]]. |
||
| − | * |
+ | *Whether you actually set off the trap or not, the emissary is scripted to cast just that one Fireball during the encounter. |
| − | * |
+ | *If you cannot disarm the trap, you ''may'' be able to squeeze past without triggering it by hugging the pillar to the right. |
| − | * |
+ | *Alternatively, command the party to Hold and leave them out of line of sight; then move one character out to get the attention of the Darkspawn (e.g. with a crossbow, for long range), and then move everyone behind cover. This should give at least one hurlock at a time no choice but pursuit. Only the emissary may double back after falling for this trick. Also note that the grease will eventually dissipate, whether or not it is set aflame. |
| + | *If you have it, activate Indomitable and you'll be able to walk right through the grease, fireball and ensuing fire without being knocked over. |
||
The emissary is supported by several pairs of bow-wielding hurlocks spread across the space. Take the emissary down first since it can [[Heal (Origins)|Heal]] (and regenerate Mana), then finish off the hurlocks. The next rooms contain genlocks (to the right) and hurlocks (to the left). The foes on one side will usually (but not always, or not all together) come to the aid of the other side when combat starts. |
The emissary is supported by several pairs of bow-wielding hurlocks spread across the space. Take the emissary down first since it can [[Heal (Origins)|Heal]] (and regenerate Mana), then finish off the hurlocks. The next rooms contain genlocks (to the right) and hurlocks (to the left). The foes on one side will usually (but not always, or not all together) come to the aid of the other side when combat starts. |
||
| Line 47: | Line 49: | ||
[[File:Toi-secondfloor.jpg|thumb|Tower of Ishal - Second Floor]] |
[[File:Toi-secondfloor.jpg|thumb|Tower of Ishal - Second Floor]] |
||
There are significantly more genlocks and hurlocks on this floor, and they will charge as the party makes its way into the large semi-circular room on this level. Fortunately there are also some ballistae nearby, which can be used to impale melee fighters and knock down genlock archers (try to avoid Friendly Fire incidents). |
There are significantly more genlocks and hurlocks on this floor, and they will charge as the party makes its way into the large semi-circular room on this level. Fortunately there are also some ballistae nearby, which can be used to impale melee fighters and knock down genlock archers (try to avoid Friendly Fire incidents). |
||
| − | * |
+ | *Another tactic is to clear out one of the narrow rooms next to the main force of Darkspawn. Then, from inside that room, use some powerful indirect spells on the Darkspawn (such as [[Paralysis Explosion]]) before attacking them. |
Look out for a Discarded Book which unlocks the [[Codex entry: The History of the Chantry: Chapter 1]]. The book is on the floor in front of a bookshelf on the tower's east side. |
Look out for a Discarded Book which unlocks the [[Codex entry: The History of the Chantry: Chapter 1]]. The book is on the floor in front of a bookshelf on the tower's east side. |
||
| Line 57: | Line 59: | ||
Fight past the genlocks in the first room. In the second room are more genlocks supported by a [[Genlock alpha]]. Alistair will suggest using the lever to release the [[Mabari|dogs]] caged in this room - the dogs will help you take down the genlocks and other enemies on this floor. You can loot a [[Warden Recruit Shield]] from the alpha, as well as [[Warpaint of the Wolfhound]] from a locked {{TextContainer|Wooden Chest}}. |
Fight past the genlocks in the first room. In the second room are more genlocks supported by a [[Genlock alpha]]. Alistair will suggest using the lever to release the [[Mabari|dogs]] caged in this room - the dogs will help you take down the genlocks and other enemies on this floor. You can loot a [[Warden Recruit Shield]] from the alpha, as well as [[Warpaint of the Wolfhound]] from a locked {{TextContainer|Wooden Chest}}. |
||
| − | Between the Mabari cages and the stairs to the Upper Floor are three more rooms of darkspawn and {{TextContainer|crates}} (the latter are consistently heavy on [[Lesser Injury Kit]]s). It is advisable |
+ | Between the Mabari cages and the stairs to the Upper Floor are three more rooms of darkspawn and {{TextContainer|crates}} (the latter are consistently heavy on [[Lesser Injury Kit]]s). It is advisable to lure the enemies out so the friendly dogs can join the fight. The final room contains a hurlock, two genlocks, and the stairs to the upper floor. |
=== Upper floor === |
=== Upper floor === |
||
| Line 69: | Line 71: | ||
After watching the awful conclusion to the Battle for Ostagar (which unlocks [[Codex entry: Ser Cauthrien]]), you and Alistair will be overcome (nearly instantly, in a cutscene) by yet more darkspawn. |
After watching the awful conclusion to the Battle for Ostagar (which unlocks [[Codex entry: Ser Cauthrien]]), you and Alistair will be overcome (nearly instantly, in a cutscene) by yet more darkspawn. |
||
| − | You awake (undressed, in a bed, in a hut) to see [[Morrigan]], who can inform you that Loghain |
+ | You awake (undressed, in a bed, in a hut) to see [[Morrigan]], who can inform you that Loghain quit the field; that the king and the Grey Wardens were slaughtered; and that her mother rescued [[Ferelden]]'s only two living Grey Wardens (by transforming into a giant bird and plucking them from the Tower) and has been healing them at her [[Flemeth's Hut|home]]. (The [[Human Noble Origin|human noble]]'s [[Dog]], if applicable, isn't mentioned, but survived as well.) If the Warden is persistent in the pursuit of details, Morrigan will relate that the darkspawn are feasting on the dead... and dragging survivors underground. |
After questioning Morrigan, recovering inventory and stepping outside, the Warden finds Alistair and Morrigan's mother, who now introduces herself as [[Flemeth]] (unlocking [[Codex entry: Flemeth]]). The next course of action is discussed; the Wardens decide to use their [[Ancient Treaties]], and Alistair suggests approaching [[Eamon Guerrin|Arl Eamon]] of [[Redcliffe]] as a potential ally against both the [[Fifth Blight|Blight]] ''and'' Teyrn Loghain (also unlocking [[Codex entry: Arl Eamon Guerrin]]). |
After questioning Morrigan, recovering inventory and stepping outside, the Warden finds Alistair and Morrigan's mother, who now introduces herself as [[Flemeth]] (unlocking [[Codex entry: Flemeth]]). The next course of action is discussed; the Wardens decide to use their [[Ancient Treaties]], and Alistair suggests approaching [[Eamon Guerrin|Arl Eamon]] of [[Redcliffe]] as a potential ally against both the [[Fifth Blight|Blight]] ''and'' Teyrn Loghain (also unlocking [[Codex entry: Arl Eamon Guerrin]]). |
||
| Line 75: | Line 77: | ||
Flemeth also insists that Morrigan accompany the Wardens - suggesting that they consider it "repayment for your lives" if that will make it easier to accept. A generous welcoming of the newest companion can earn up to {{Approval|8}} from her, and if prompted she advises proceeding to the village of [[Lothering]] to gather news and supplies. Alistair should give {{Approval|4}} if his input and hesitations aren't treated too rudely; he is still somewhat overwhelmed by the massacre of his entire order in Ferelden (especially the loss of [[Duncan]]), and his personality clash with Morrigan has only just begun, but he ultimately accepts that any help is vital and should be accepted. |
Flemeth also insists that Morrigan accompany the Wardens - suggesting that they consider it "repayment for your lives" if that will make it easier to accept. A generous welcoming of the newest companion can earn up to {{Approval|8}} from her, and if prompted she advises proceeding to the village of [[Lothering]] to gather news and supplies. Alistair should give {{Approval|4}} if his input and hesitations aren't treated too rudely; he is still somewhat overwhelmed by the massacre of his entire order in Ferelden (especially the loss of [[Duncan]]), and his personality clash with Morrigan has only just begun, but he ultimately accepts that any help is vital and should be accepted. |
||
| − | Before the group's departure, Flemeth may be approached for a few more morsels of wisdom and background information; Alistair may be asked many of the same questions soon to be available in [[Party Camp|Camp]], and have his [[approval]] modified accordingly. |
+ | Before the group's departure, Flemeth may be approached for a few more morsels of wisdom and background information; Alistair may be asked many of the same questions soon to be available in [[Party Camp|Camp]], and have his [[Approval (Origins)|approval]] modified accordingly. |
Once the conversation ends, the quest [[Lothering and the Imperial Highway]] is started. |
Once the conversation ends, the quest [[Lothering and the Imperial Highway]] is started. |
||
| Line 81: | Line 83: | ||
== Rewards == |
== Rewards == |
||
| − | * |
+ | *1500 XP after lighting the beacon |
== Enemies == |
== Enemies == |
||
[[File:Location-TowerOfIshal.jpg|thumb|270px|The Tower of Ishal]] |
[[File:Location-TowerOfIshal.jpg|thumb|270px|The Tower of Ishal]] |
||
| − | * |
+ | *[[Genlock]]s ([[Darkspawn]], [[Normal]]) |
| − | * |
+ | *[[Hurlock]]s ([[Darkspawn]], [[Normal]]) |
| − | * |
+ | *[[Hurlock alpha]] ([[Darkspawn]], [[Elite]]) |
| − | * |
+ | *[[Genlock emissary]] ([[Darkspawn]], [[Elite]]) |
| − | * |
+ | *[[Genlock alpha]] ([[Darkspawn]], [[Elite]]) |
| − | * |
+ | *[[Ogre]] ([[Darkspawn]], [[Boss]]) |
== Notable items== |
== Notable items== |
||
| − | {{:Havard's Aegis|style=iconmini}} - dropped from ogre |
+ | *{{:Havard's Aegis|style=iconmini}} - dropped from ogre |
| − | {{:Journeyman Lightning Rune|style=iconmini}} - dropped from ogre |
+ | *{{:Journeyman Lightning Rune|style=iconmini}} - dropped from ogre |
| − | {{:Silver Bracelet|style=iconmini}} - wooden chest in the first floor |
+ | *{{:Silver Bracelet|style=iconmini}} - wooden chest in the first floor |
| − | {{:Tribal Necklace|style=iconmini}} - barrel in the upper floor |
+ | *{{:Tribal Necklace|style=iconmini}} - barrel in the upper floor |
| − | {{:Warpaint of the Wolfhound|style=iconmini}} - chest in the third floor |
+ | *{{:Warpaint of the Wolfhound|style=iconmini}} - chest in the third floor |
== Codex entries == |
== Codex entries == |
||
| − | {{:Codex entry: Havard's Aegis|style=iconmini |
+ | *{{:Codex entry: Havard's Aegis|style=iconmini}} |
| − | {{:Codex entry: Ogre|style=iconmini |
+ | *{{:Codex entry: Ogre|style=iconmini}} |
| − | {{:Codex entry: The History of the Chantry: Chapter 1|style=iconmini |
+ | *{{:Codex entry: The History of the Chantry: Chapter 1|style=iconmini}} |
| + | |||
| + | [[es:La torre de Ishal (misión)]] |
||
[[Category:Dragon Age: Origins quests]] |
[[Category:Dragon Age: Origins quests]] |
||
[[Category:Ostagar quests]] |
[[Category:Ostagar quests]] |
||
Revision as of 10:04, 5 February 2019
“Loghain better be ready to charge as soon as we light the signal. The king is depending on us!” ―Alistair
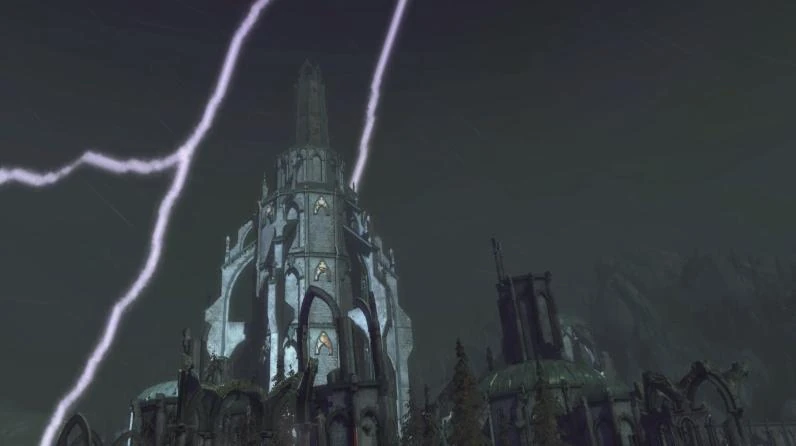
The Tower of Ishal (quest) is a main quest that takes place during the Battle of Ostagar. King Cailan personally requests the Warden and Alistair to light a beacon atop the tower, signaling Loghain's forces to support the king's and Grey Wardens'.
Background
After the Joining, the Warden attends King Cailan's strategy meeting. Cailan's forces and the Grey Wardens are to engage the darkspawn, and, once the darkspawn forces are committed, have a beacon lit atop the Tower. This will be the signal for Loghain's forces to charge, flank the darkspawn, and hopefully provide a decisive victory. The King has requested that the newest Warden and Alistair be the ones to light the beacon. Duncan briefs them, then sends them on their way.
Walkthrough
Ostagar
While in Ostagar, make your way across the bridge to the base of the Tower. To avoid flaming rocks, go slowly and pause before crossing a new section of the bridge, dashing by just after each impact near you; the blast radius knocks characters over for a few seconds, but they don't do much damage (and it's not possible to go over the edge and plummet to your death). If you have Indomitable, now would be an excellent time to activate it, the stun/knockdown immunity will protect against the blasts.
At the base of the tower, you will be met by a Tower Guard, who says the Tower has been overrun by darkspawn, who have come up from some recently discovered tunnels.
- If you are of Magi Origin, the Tower Guard and Soldier will join your party.
- If you are of any other Origin, the Tower Guard and Circle Mage will join.
- However, the Tower Guard will not join the party if you are of Human Noble Origin (and so have Dog already in the party), meaning that you will only be joined by Circle Mage.
Make your way through the Tower grounds, upwards and counterclockwise: there are a number of genlocks and hurlocks fighting a few surviving soldiers. Kill enemies and loot bodies, crates, plants and a locked chest on the way. Most of the containers are off to the right immediately after passing through the gate (which was locked the last time the Warden was here). A Hurlock alpha is located near the entrance of the Tower. Once the remaining darkspawn are defeated, enter the tower.
First floor
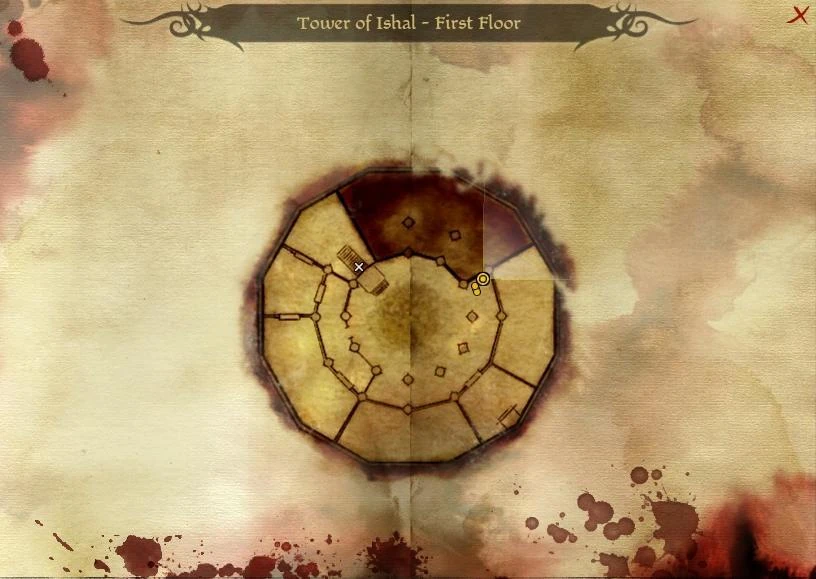
Tower of Ishal - First Floor
Make your way into the centre of the floor. There will be a tripwire that sets off a grease trap that a nearby Genlock emissary will try to set alight with a Fireball.
- Whether you actually set off the trap or not, the emissary is scripted to cast just that one Fireball during the encounter.
- If you cannot disarm the trap, you may be able to squeeze past without triggering it by hugging the pillar to the right.
- Alternatively, command the party to Hold and leave them out of line of sight; then move one character out to get the attention of the Darkspawn (e.g. with a crossbow, for long range), and then move everyone behind cover. This should give at least one hurlock at a time no choice but pursuit. Only the emissary may double back after falling for this trick. Also note that the grease will eventually dissipate, whether or not it is set aflame.
- If you have it, activate Indomitable and you'll be able to walk right through the grease, fireball and ensuing fire without being knocked over.
The emissary is supported by several pairs of bow-wielding hurlocks spread across the space. Take the emissary down first since it can Heal (and regenerate Mana), then finish off the hurlocks. The next rooms contain genlocks (to the right) and hurlocks (to the left). The foes on one side will usually (but not always, or not all together) come to the aid of the other side when combat starts.
The final room contains more genlocks and a stairway to the second floor.
Second floor
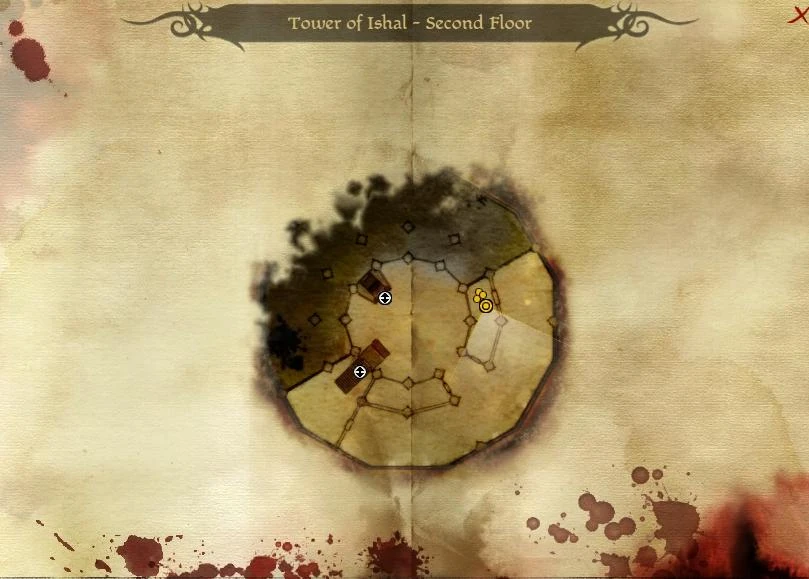
Tower of Ishal - Second Floor
There are significantly more genlocks and hurlocks on this floor, and they will charge as the party makes its way into the large semi-circular room on this level. Fortunately there are also some ballistae nearby, which can be used to impale melee fighters and knock down genlock archers (try to avoid Friendly Fire incidents).
- Another tactic is to clear out one of the narrow rooms next to the main force of Darkspawn. Then, from inside that room, use some powerful indirect spells on the Darkspawn (such as Paralysis Explosion) before attacking them.
Look out for a Discarded Book which unlocks the Codex entry: The History of the Chantry: Chapter 1. The book is on the floor in front of a bookshelf on the tower's east side.
Third floor
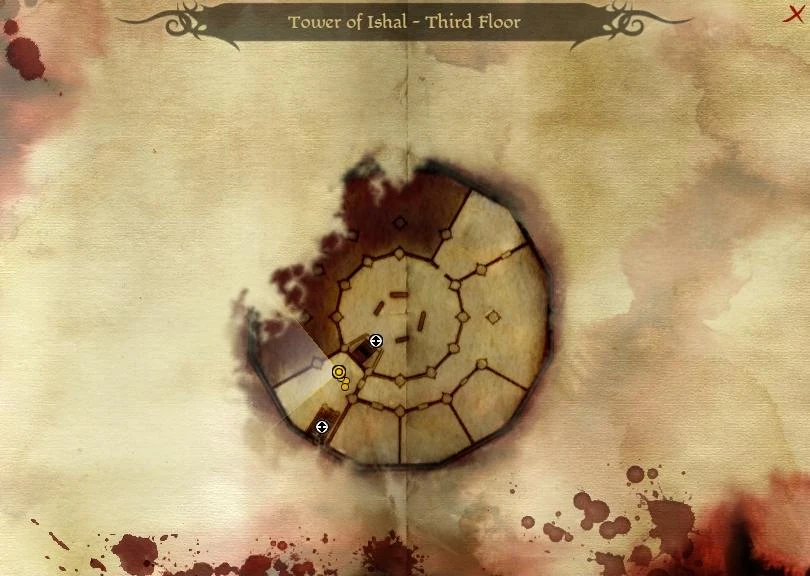
Tower of Ishal - Third Floor
Fight past the genlocks in the first room. In the second room are more genlocks supported by a Genlock alpha. Alistair will suggest using the lever to release the dogs caged in this room - the dogs will help you take down the genlocks and other enemies on this floor. You can loot a Warden Recruit Shield from the alpha, as well as Warpaint of the Wolfhound from a locked Wooden Chest.
Between the Mabari cages and the stairs to the Upper Floor are three more rooms of darkspawn and crates (the latter are consistently heavy on Lesser Injury Kits). It is advisable to lure the enemies out so the friendly dogs can join the fight. The final room contains a hurlock, two genlocks, and the stairs to the upper floor.
Upper floor
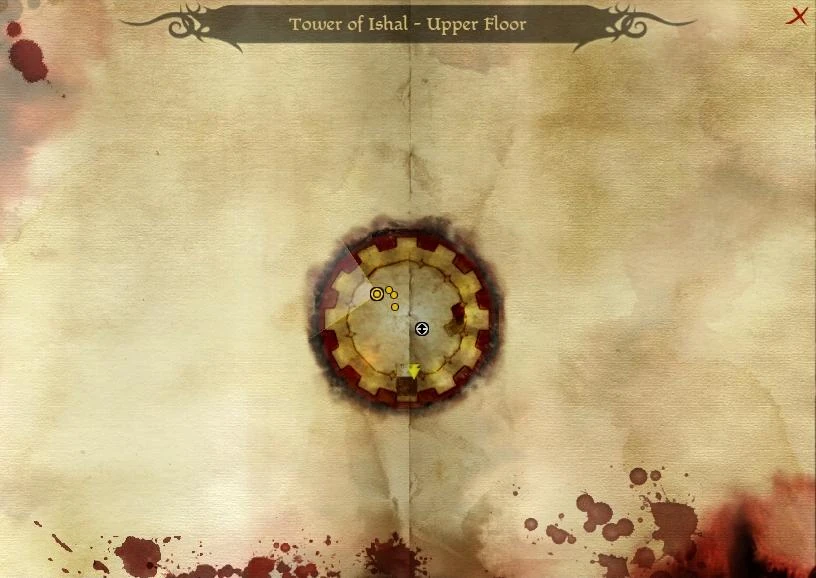

Tower of Ishal - Upper Floor
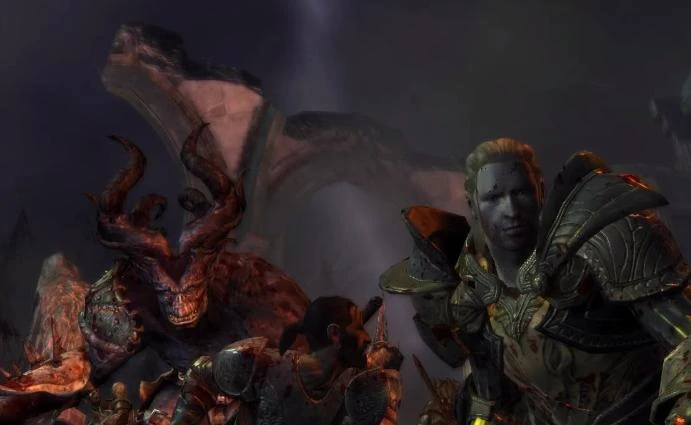
A short cutscene reveals an ogre enjoying a grisly feast. Kill the ogre (see a strategy if you are having trouble) to unlock Codex entry: Ogre. Afterwards, loot Havard's Aegis (which comes with Codex entry: Havard's Aegis) and a Journeyman Lightning Rune from the ogre's body. Don't miss the two Barrels containing a Tribal Necklace and random other loot. Once finished, light the beacon.
Result

"I cannot wait for that glorious moment! The Grey Wardens battle beside the king of Ferelden to stem the tide of evil." –King Cailan Theirin
After watching the awful conclusion to the Battle for Ostagar (which unlocks Codex entry: Ser Cauthrien), you and Alistair will be overcome (nearly instantly, in a cutscene) by yet more darkspawn.
You awake (undressed, in a bed, in a hut) to see Morrigan, who can inform you that Loghain quit the field; that the king and the Grey Wardens were slaughtered; and that her mother rescued Ferelden's only two living Grey Wardens (by transforming into a giant bird and plucking them from the Tower) and has been healing them at her home. (The human noble's Dog, if applicable, isn't mentioned, but survived as well.) If the Warden is persistent in the pursuit of details, Morrigan will relate that the darkspawn are feasting on the dead... and dragging survivors underground.
After questioning Morrigan, recovering inventory and stepping outside, the Warden finds Alistair and Morrigan's mother, who now introduces herself as Flemeth (unlocking Codex entry: Flemeth). The next course of action is discussed; the Wardens decide to use their Ancient Treaties, and Alistair suggests approaching Arl Eamon of Redcliffe as a potential ally against both the Blight and Teyrn Loghain (also unlocking Codex entry: Arl Eamon Guerrin).
Flemeth also insists that Morrigan accompany the Wardens - suggesting that they consider it "repayment for your lives" if that will make it easier to accept. A generous welcoming of the newest companion can earn up to ![]() (+8) from her, and if prompted she advises proceeding to the village of Lothering to gather news and supplies. Alistair should give
(+8) from her, and if prompted she advises proceeding to the village of Lothering to gather news and supplies. Alistair should give ![]() (+4) if his input and hesitations aren't treated too rudely; he is still somewhat overwhelmed by the massacre of his entire order in Ferelden (especially the loss of Duncan), and his personality clash with Morrigan has only just begun, but he ultimately accepts that any help is vital and should be accepted.
(+4) if his input and hesitations aren't treated too rudely; he is still somewhat overwhelmed by the massacre of his entire order in Ferelden (especially the loss of Duncan), and his personality clash with Morrigan has only just begun, but he ultimately accepts that any help is vital and should be accepted.
Before the group's departure, Flemeth may be approached for a few more morsels of wisdom and background information; Alistair may be asked many of the same questions soon to be available in Camp, and have his approval modified accordingly.
Once the conversation ends, the quest Lothering and the Imperial Highway is started.
Rewards
- 1500 XP after lighting the beacon
Enemies

The Tower of Ishal
- Genlocks (Darkspawn, Normal)
- Hurlocks (Darkspawn, Normal)
- Hurlock alpha (Darkspawn, Elite)
- Genlock emissary (Darkspawn, Elite)
- Genlock alpha (Darkspawn, Elite)
- Ogre (Darkspawn, Boss)
Notable items
 Havard's Aegis - dropped from ogre
- Journeyman Lightning Rune - dropped from ogre
- Silver Bracelet - wooden chest in the first floor
- Tribal Necklace - barrel in the upper floor
- Warpaint of the Wolfhound - chest in the third floor