The Lost Mysteries of the Ancients is the main, and only, quest of the Dalish Elf Origin.
Walkthrough
Forest Clearing
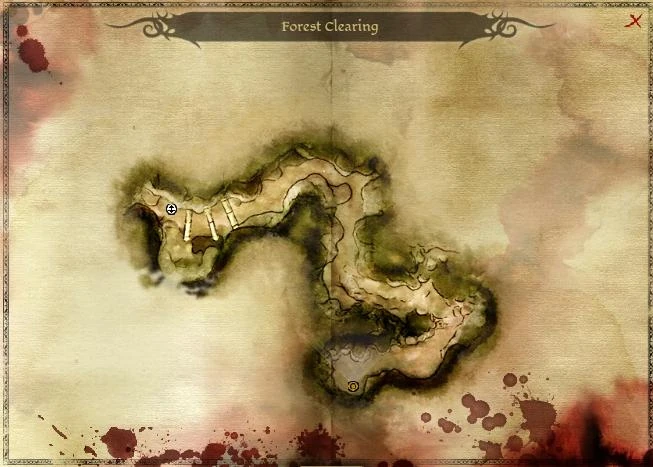
Area Map of Forest Clearing: Starting location is the clearing to the south.
Starting from the clearing to the south, the aim is to reach the cave entrance at the eastern edge of the map.
- Soon, two Wolves will be encountered. Killing them yields Codex Entry: Wolf.
- Further along the path is a Dead Halla that yields Codex Entry: Halla and a half-buried locked Chest.
- Follow the path to find a Tree Stump that yields Codex Entry: The Brecilian Forest.
- There are also two Elfroots and some Rubble to loot before arriving at the cave entrance.
- Tamlen will insist on investigating the cave: accompany him, willingly or unwillingly.
Elven Ruins
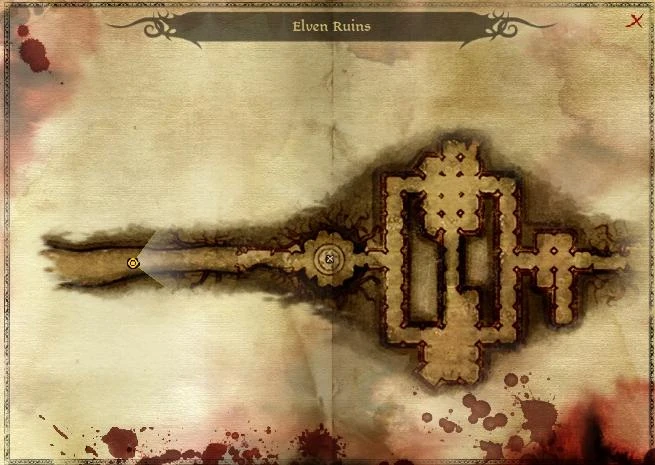
Area Map of Elven Ruins: Starting location is at the far east of the map.
Starting at the far east of the map, the aim is to get to the circular chamber in the middle.
- Loot the Cocoon above almost immediately after entering the ruins and proceed to the first room.
- Here, there are two Giant Spiders, yielding Codex Entry: Giant Spider, and a locked Chest and a Pile of Bones to loot.
- Turn left after proceeding through the first door (it's possible to go in either direction, but this way will involve less doubling back to explore the whole map).
- The next door has a trap immediately behind it, and three more Giant Spiders. There's a Cocoon to loot and a locked door to the west that probably can't be picked.
- Just through the northern door, there's another trap, and one in front of the next door too. Loot the Pile of Bones in between them.
- There are three more Giant Spiders in the northern room, as well as a Pile of Bones and Cocoon to loot and a trap in front of the corridor that would have been the entry point if you had turned right on entering the ruins.
- Follow the corridor to the west as it bends round to the south. Tamlen will comment on an elven statue.
- From this point, head west again. There's a circular pressure plate that will set off a trap dealing damage over time. If it's triggered, stop until the effects wear off so it's not necessary to fight whilst still taking trap damage.
- Approach the door: two of the Skeletons that were lying on the floor animate and attack.
- Once they are dead, go through the door and fight the lieutenant rank Bereskarn in the next room. There's some Rubble and a Sarcophagus to loot. It's possible to see a Chest off to the west, but it's not possible to reach this yet as Tamlen will insist on investigating the Mirror in the centre of the room if you try to leave its vicinity.
- Examine the Mirror: Tamlen will comment on scenes and movement he sees inside it. He touches the Mirror and there is a blinding flash and then ... nothing. After coming to briefly to see Duncan leaning over you, you won't wake for another two days back in your clan's camp.
Dalish Camp
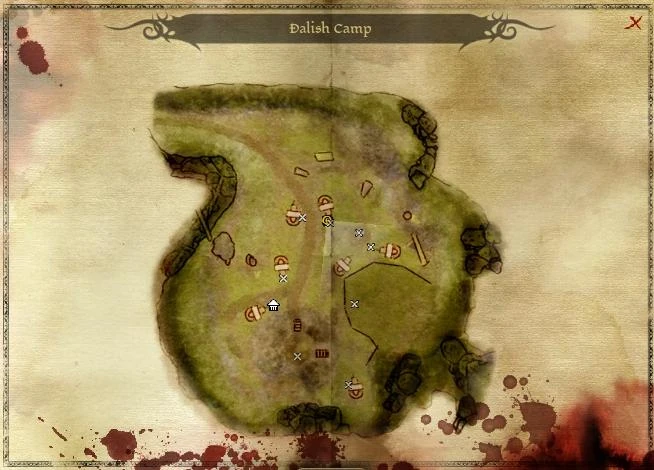
Area Map of Dalish Camp: Starting location is towards the north.
- After awakening, talk to Fenarel who has some information about what has been happening and will fetch Keeper Marethari, the leader of the clan. She will ask you to take her apprentice, Merrill, and head back to the the ruins to search for Tamlen. If asked, she will also explain that the clan needs to move on as the village of the humans encountered earlier with Tamlen has been raised against the clan, and talk a bit about Grey Wardens and darkspawn.
- If you speak to Fenarel, he will ask to accompany you. Turn him down or accept his offer. You can then either check with Keeper Marethari that it's alright that Fenarel goes (she will agree) or, when challenged by Merrill later, lie that the Keeper has given permission.
- There are various people around the camp who will have background information on elven culture, such as Paivel the clan storyteller, Maren the Halla keeper, and Pol, a recent arrival and escapee from The Denerim Alienage, who is being taught to shoot by Junar.
- Ilen is presenting his father's bow to another Dalish Hunter, and can be persuaded to give a bow of his own making to you. He is also a merchant.
- Ashalle, down some steps to the south of the camp, can be persuaded (with 1 rank in Coercion) to speak about your parents and give you the key to a locked white Chest near the storage aravel. This contains the Heirloom Necklace.
- Explore the Camp for other containers to loot: a Pile of Sacks, Sack, Small Wooden Crate, Large Wooden Crate and three locked Chests.
- There are also a number of items that can be examined to yield codex entries:
- Note behind aravel near Merrill at south of camp - Codex Entry: Aravels
- Scroll - Codex Entry: Arlathan: Part One
- Dusty Scroll leaning against a Small Wooden Crate - Codex Entry: Arlathan: Part Two
- Small Scroll on bench by Paivel - Codex Entry: The City Elves
- Scroll in trees at south of camp past Merrill - Codex Entry: The Dales
- Eldest of the Sun skull on side of aravel - Codex Entry: Elgar'nan: God of Vengeance
- Statue of Fen'Harel - Codex Entry: Fen'Harel: The Dread Wolf
- Statue of Ghilan'nain - Codex Entry: Ghilan'nain: Mother of the Halla
- God of the Craft skull on side of aravel near Ilen - Codex Entry: June: God of the Craft
- "Book" (looks like a shrub!) - Codex Entry: History of Ferelden: Chapter 2
- Finally, speak to Merrill to trigger a return to the Forest Clearing. Merrill will join your party.
Return to the Forest Clearing
- This time, there are two Genlocks to encounter along the path, netting Codex Entry: Genlock.
- Further down the path, there is a new and recent campfire. After discussing this with Merrill, three more Genlocks attack.
- Re-enter the Elven Ruins.
Return to the Elven Ruins
- Follow the trail of dead genlocks along the same path as you took previously. In the south room are three Genlocks, and in the north room there are three more. Watch out for the leghold trap when exiting westwards from the north room (there's another one just west of the locked southern door).
- Two Genlocks and a lieutenant Genlock Emissary are waiting by the elven statue Tamlen commented upon during your previous visit.
- Duncan is waiting in the mirror chamber. He destroys the mirror - which he says is Tevinter in origin but that will now corrupt all who touch it - and insists that there is no hope of finding Tamlen. He will suggest leaving for camp together, but you can insist on staying to look around further. The conversation with Duncan will net Codex Entry: The Grey Wardens and Codex Entry: Darkspawn.
- The corridor to the west of the mirror chamber contains a locked Chest and a Strange Statue that, when examined, will result in three skeletons and four skeleton archers reanimating and attacking.
- Once finished exploring the ruins, return to the ruins exit and you will be returned to your camp.
Return to the Dalish Camp
- Keeper Marethari and Duncan will want to talk, and Marethari requests that you speak with Paivel to arrange a memorial service for Tamlen.
- Head to the fire and speak with Paivel.
- Return to the Keeper, to find that Duncan has convinced her that your sickness is the result of darkspawn taint and that your only hope of survival is to leave with Duncan and join the Grey Wardens.
- Keeper Marethari will give you the Keeper's Ring as a parting gift.
Result
You leave with Duncan for Ostagar and start Joining the Grey Wardens.