(Added a newly found bug.) Tags: Visual edit apiedit |
mNo edit summary |
||
| (27 intermediate revisions by 16 users not shown) | |||
| Line 5: | Line 5: | ||
|image = The Knights Tomb.png |
|image = The Knights Tomb.png |
||
|px = 270x360px |
|px = 270x360px |
||
| − | |location = Elgar'nan's Bastion, [[Din'an Hanin]] |
+ | |location = Elgar'nan's Bastion, [[Din'an Hanin]], [[Emerald Graves]] |
| − | |start = |
+ | |start = [[Skyhold]] - [[War table]] |
|end = [[Din'an Hanin]] |
|end = [[Din'an Hanin]] |
||
| + | |rewards = 967 XP<br>Influence 200<br>Power 2 |
||
|previous = [[Investigate Elven Ruins]] |
|previous = [[Investigate Elven Ruins]] |
||
| ⚫ | |||
|next = |
|next = |
||
| + | |qcat = side |
||
| + | |related = |
||
| ⚫ | |||
}}</onlyinclude> |
}}</onlyinclude> |
||
'''The Knights' Tomb''' is a [[Side quests (Inquisition)|side quest]] in ''[[Dragon Age: Inquisition]]''. |
'''The Knights' Tomb''' is a [[Side quests (Inquisition)|side quest]] in ''[[Dragon Age: Inquisition]]''. |
||
| − | {{Blockquote|A group of elves are investigating a tomb somewhere in the [[Emerald Graves]] that may hold secrets of great historical significance to the [[Dalish]].}} |
+ | {{Blockquote|''A group of elves are investigating a tomb somewhere in the [[Emerald Graves]] that may hold secrets of great historical significance to the [[Dalish]].''}} |
== Acquisition == |
== Acquisition == |
||
| − | After [[Wicked Eyes and Wicked Hearts]] a mission will appear at the [[war table]] called [[Investigate Elven Ruins]]. Either |
+ | After [[Wicked Eyes and Wicked Hearts]] a mission will appear at the [[war table]] called [[Investigate Elven Ruins]]. Either after making friendly contact with [[Taven]] and the [[elves]] at Elgar'nan's Bastion, or they will be brought to your attention via this mission. |
== Walkthrough == |
== Walkthrough == |
||
| Line 25: | Line 28: | ||
The first you find in the courtyard. The second and third are in the same area; one is looted from a fallen foe, the other is up the stairs, to the left and behind ajar doors in a pot which you have to use the search function to find. The fourth is located to the right of the first staircase, after that right keep going forward until you reach another set of stairs leading down. Follow the path to another staircase down and a short battle. To the right of the [[Emerald Knights|Emerald Knight]] statue (codex entry) is where you will find the fourth. Travel back up to the top of the first staircase, you will see to the left a set of boards to cross to the other side. Or you may simply take either staircase to the door in the upper floor. |
The first you find in the courtyard. The second and third are in the same area; one is looted from a fallen foe, the other is up the stairs, to the left and behind ajar doors in a pot which you have to use the search function to find. The fourth is located to the right of the first staircase, after that right keep going forward until you reach another set of stairs leading down. Follow the path to another staircase down and a short battle. To the right of the [[Emerald Knights|Emerald Knight]] statue (codex entry) is where you will find the fourth. Travel back up to the top of the first staircase, you will see to the left a set of boards to cross to the other side. Or you may simply take either staircase to the door in the upper floor. |
||
[[File:The_Knights_Tomb_-_a_statue.png|thumb|right|Updates to the codex entry: The Emerald Knights can be found near the statues]] |
[[File:The_Knights_Tomb_-_a_statue.png|thumb|right|Updates to the codex entry: The Emerald Knights can be found near the statues]] |
||
| − | The path is fairly linear once more, you will know you are in the right area when you are told you are in the |
+ | The path is fairly linear once more, you will know you are in the right area when you are told you are in the Hallowed Tombs (named Upper Crypts on the map.) Head right and keep going straight until you find to your right a staircase up. You will be alerted that there is something you must search for nearby; keep going up the stairs and ignore this for now. Follow the path left of the stairs and after a relief on the left there will be fallen debris and a slab, the pot with the fifth piece is behind the slab. |
Double back to the stairs and once down them keep traveling forward. There will be a yellow painting across from the staircase, keeping running toward it then go left and enter into combat. Search the bodies to find the sixth piece. There will be a breakable wall near where the sixth piece is, smash it and enter. There's an [[elven artifacts (Inquisition)|elven artifact]] inside, which, if in your party, [[Solas]] will remark on. Follow the search's direction into the next room and to a pot surrounded by skeletons to find the seventh piece. |
Double back to the stairs and once down them keep traveling forward. There will be a yellow painting across from the staircase, keeping running toward it then go left and enter into combat. Search the bodies to find the sixth piece. There will be a breakable wall near where the sixth piece is, smash it and enter. There's an [[elven artifacts (Inquisition)|elven artifact]] inside, which, if in your party, [[Solas]] will remark on. Follow the search's direction into the next room and to a pot surrounded by skeletons to find the seventh piece. |
||
| − | Exit the fresh hole in the wall and run forward until the area opens up to a staircase downward. After a fight that should give you little trouble at the top of the stairs, the bottom features another painting of white figures under the sun. Soldier on forward to the next mark, a familiar place if you explored further in the previous room. If not, find it by following the path forward. If you notice a fork in the path, go straight first. (In the room with the vines, save the path lit by red for afterward.) Underneath two ladders back up to that place, you'll find the next pot and the eighth Emerald Seal. Return to the room with the vines and go forward into the area with a reddish haze to it. You will practically stumble over the final seal, but there |
+ | Exit the fresh hole in the wall and run forward until the area opens up to a staircase downward. After a fight that should give you little trouble at the top of the stairs, the bottom features another painting of white figures under the sun. Soldier on forward to the next mark, a familiar place if you explored further in the previous room. If not, find it by following the path forward. If you notice a fork in the path, go straight first. (In the room with the vines, save the path lit by red for afterward.) Underneath two ladders back up to that place, you'll find the next pot and the eighth Emerald Seal. Return to the room with the vines and go forward into the area with a reddish haze to it. You will practically stumble over the final seal, but there are also a few enemies waiting for you. |
| − | Once you have all of them, proceed to the large doors which lead to the Tomb of the Emerald Knights (Elandrin's Chamber). You will see a bit of blue glowing light in front of a statue, but leave that alone for now. Prepare for a fight with corpses as you need to light all four of the torches and each one annoys the dead into attacking you until you finally end the battles with a Revenant which drops |
+ | Once you have all of them, proceed to the large doors which lead to the Tomb of the Emerald Knights (Elandrin's Chamber). You will see a bit of blue glowing light in front of a statue, but leave that alone for now. Prepare for a fight with corpses as you need to light all four of the veilfire torches and each one annoys the dead into attacking you until you finally end the battles with a Revenant which drops Estwatch Guard. Once the fourth torch is lit the floor will ascend allowing access to the scroll. |
| − | + | {{Note|With some acrobatics, it is possible to reach the scroll without having to light the verilfire torch and fight the undead. Left and right of the center statue, there are balustrades that can be landed on. Jump onto the balustrade and from there onto the statue's pedestal. This has to be done without stopping on the balustrade, as in doing so the necessary momentum is lost. from the statue, jump towards the scroll. It can be interacted with in midair. Note that, using this method, you miss out on some experience and the unique shield.}} |
|
| − | It is an account of events leading up to the Exalted Marches and you are given two options in how to deal with the scroll. You can sell it to the [[Chantry]] or give it to the Dalish clan in the [[Exalted Plains]]. |
+ | It is an account of events leading up to the Exalted Marches and you are given two options in how to deal with the scroll. You can sell it to the [[Chantry]] or give it to the Dalish clan in the [[Exalted Plains]]. Giving the scroll to either group completes the quest. If you choose the Chantry, give the scroll to Sister [[Andrea]] who is found on the Upper Level of the [[Summer Bazaar]] in [[Val Royeaux]]. If you choose the Dalish, give the scroll to [[Keeper]] [[Hawen]] at the Dalish camp in the [[Exalted Plains]]. |
== Rewards == |
== Rewards == |
||
| + | Completing the quest yields: |
||
* 967 XP |
* 967 XP |
||
| − | * |
+ | * Influence 200 |
| − | * |
+ | * Power 2 |
== Results == |
== Results == |
||
| + | * If the scroll is given to Sister Andrea in [[Val Royeaux]], the Inquisitor receives [[Note: Academic Notes|Academic Notes]]. |
||
| − | If |
+ | * If the scroll is given to Keeper Hawen in the [[Exalted Plains]], the [[war table]] operation [[Bestow Mourning Halla]] will unlock. |
| + | * If the scroll is given to the Dalish, {{Approval3|Dalish Favor +3}} for [[By the Grace of the Dalish]]. |
||
| + | |||
| ⚫ | |||
| ⚫ | |||
| + | * See [[Din'an Hanin]] for additional notable items. |
||
== Codex entries == |
== Codex entries == |
||
| Line 51: | Line 61: | ||
{{:Codex entry: The Emerald Knights|style=iconmini}}<br> |
{{:Codex entry: The Emerald Knights|style=iconmini}}<br> |
||
{{:Codex entry: Epitaphs for the Lost|style=iconmini}} |
{{:Codex entry: Epitaphs for the Lost|style=iconmini}} |
||
| − | |||
| ⚫ | |||
| − | * A [[Collections|collection]] piece for the [[Invasion]] mosaic can be found on the main level of the Knight's Hall, on a pew along the eastern wall. |
||
| ⚫ | |||
== Bugs == |
== Bugs == |
||
| − | * When coming near the breakable wall, beware. There is a bug in the structure, causing you to fall between the walls and get stuck inside them. '''Dying does not solve this''' (confirmed on 5/23/2015 on PC)! Try to move closer to the red templars (if they are still there). Entering combat should make at least one of your characters get back to normal ground. |
+ | * When coming near the breakable wall, beware. There is a bug in the structure, causing you to fall between the walls and get stuck inside them. '''Dying does not solve this''' (confirmed on 5/23/2015 on PC)! Try to move closer to the red templars (if they are still there). Entering combat should make at least one of your characters get back to normal ground. "Reloading game save does not fix". |
| + | * Occasionally, after grabbing the scroll and giving it to the Dalish, this quest will re-appear, instructing the player to "Return to the Tomb." If you do, it will be completely empty on all levels and contain nothing of interest and nobody to talk to. To fix this, enter the tombs via the original Emerald Graves entry, and walk up to the dead Inquisition soldiers near the broken cart and bales of hay. Your Inquisitor will say something along the lines of "these are our men", and the quest will be completed. |
||
| + | * {{Platforms|PS4}} If "Return to the Tomb" appears upon exiting [[Din'an Hanin]], prior to selling the scroll to either the Dalish in the [[Exalted Plains]] or Sister Andrea in [[Val Royeaux]], re-enter [[Din'an Hanin]] then exit, repeat this process as many times as necessary until "Return to the Tomb" no longer appears; confirmed solution for PS4. Also you could try this (enter and exit) method when you first arrive at the tomb if the objective hasn't disappeared upon entering. |
||
{{DEFAULTSORT:Knights' Tomb, The}} |
{{DEFAULTSORT:Knights' Tomb, The}} |
||
[[Category:Dragon Age: Inquisition side quests]] |
[[Category:Dragon Age: Inquisition side quests]] |
||
Revision as of 06:33, 2 July 2020
The Knights' Tomb is a side quest in Dragon Age: Inquisition.
A group of elves are investigating a tomb somewhere in the Emerald Graves that may hold secrets of great historical significance to the Dalish.
Acquisition
After Wicked Eyes and Wicked Hearts a mission will appear at the war table called Investigate Elven Ruins. Either after making friendly contact with Taven and the elves at Elgar'nan's Bastion, or they will be brought to your attention via this mission.
Walkthrough
When you arrive at the quick travel point you will find the camp in disarray and your soldiers missing. As you explore the area there will be two large doors to the right which allow you to enter Din'an Hanin. To your left will be stairs, follow the linear path to a battle where the quest marker suggests. You will be directed to search the bodies to find an Emerald Seal. There are nine in total. Finding them is fairly easy as they are marked on your map. Explore the ruins to find each, using the search function now and then or a battle which requires you to loot their bodies for the pieces.
The first you find in the courtyard. The second and third are in the same area; one is looted from a fallen foe, the other is up the stairs, to the left and behind ajar doors in a pot which you have to use the search function to find. The fourth is located to the right of the first staircase, after that right keep going forward until you reach another set of stairs leading down. Follow the path to another staircase down and a short battle. To the right of the Emerald Knight statue (codex entry) is where you will find the fourth. Travel back up to the top of the first staircase, you will see to the left a set of boards to cross to the other side. Or you may simply take either staircase to the door in the upper floor.
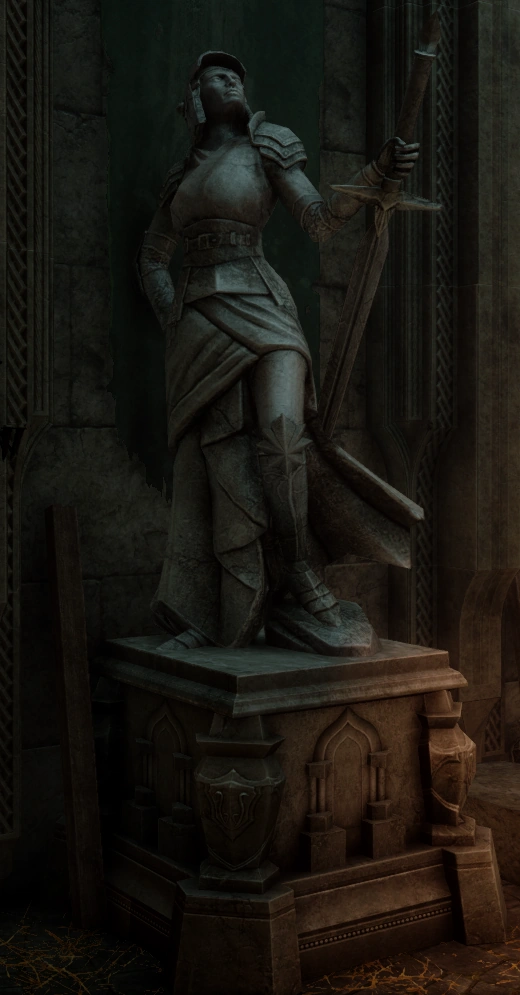
Updates to the codex entry: The Emerald Knights can be found near the statues
The path is fairly linear once more, you will know you are in the right area when you are told you are in the Hallowed Tombs (named Upper Crypts on the map.) Head right and keep going straight until you find to your right a staircase up. You will be alerted that there is something you must search for nearby; keep going up the stairs and ignore this for now. Follow the path left of the stairs and after a relief on the left there will be fallen debris and a slab, the pot with the fifth piece is behind the slab.
Double back to the stairs and once down them keep traveling forward. There will be a yellow painting across from the staircase, keeping running toward it then go left and enter into combat. Search the bodies to find the sixth piece. There will be a breakable wall near where the sixth piece is, smash it and enter. There's an elven artifact inside, which, if in your party, Solas will remark on. Follow the search's direction into the next room and to a pot surrounded by skeletons to find the seventh piece.
Exit the fresh hole in the wall and run forward until the area opens up to a staircase downward. After a fight that should give you little trouble at the top of the stairs, the bottom features another painting of white figures under the sun. Soldier on forward to the next mark, a familiar place if you explored further in the previous room. If not, find it by following the path forward. If you notice a fork in the path, go straight first. (In the room with the vines, save the path lit by red for afterward.) Underneath two ladders back up to that place, you'll find the next pot and the eighth Emerald Seal. Return to the room with the vines and go forward into the area with a reddish haze to it. You will practically stumble over the final seal, but there are also a few enemies waiting for you.
Once you have all of them, proceed to the large doors which lead to the Tomb of the Emerald Knights (Elandrin's Chamber). You will see a bit of blue glowing light in front of a statue, but leave that alone for now. Prepare for a fight with corpses as you need to light all four of the veilfire torches and each one annoys the dead into attacking you until you finally end the battles with a Revenant which drops Estwatch Guard. Once the fourth torch is lit the floor will ascend allowing access to the scroll.
It is an account of events leading up to the Exalted Marches and you are given two options in how to deal with the scroll. You can sell it to the Chantry or give it to the Dalish clan in the Exalted Plains. Giving the scroll to either group completes the quest. If you choose the Chantry, give the scroll to Sister Andrea who is found on the Upper Level of the Summer Bazaar in Val Royeaux. If you choose the Dalish, give the scroll to Keeper Hawen at the Dalish camp in the Exalted Plains.
Rewards
Completing the quest yields:
- 967 XP
- Influence 200
- Power 2
Results
- If the scroll is given to Sister Andrea in Val Royeaux, the Inquisitor receives Academic Notes.
- If the scroll is given to Keeper Hawen in the Exalted Plains, the war table operation Bestow Mourning Halla will unlock.
- If the scroll is given to the Dalish,
 Dalish Favor +3 for By the Grace of the Dalish.
Notable items
 Estwatch Guard - Looted from a Revenant in the final room prior to acquiring the scroll.
- See Din'an Hanin for additional notable items.
Codex entries
![]() Codex entry: Arlathan: Part One
Codex entry: Arlathan: Part One
![]() Codex entry: Arlathan: Part Two
Codex entry: Arlathan: Part Two
![]() Codex entry: The Death of Elandrin
Codex entry: The Death of Elandrin
![]() Codex entry: The Emerald Knights
Codex entry: The Emerald Knights
![]() Codex entry: Epitaphs for the Lost
Codex entry: Epitaphs for the Lost
Bugs
- When coming near the breakable wall, beware. There is a bug in the structure, causing you to fall between the walls and get stuck inside them. Dying does not solve this (confirmed on 5/23/2015 on PC)! Try to move closer to the red templars (if they are still there). Entering combat should make at least one of your characters get back to normal ground. "Reloading game save does not fix".
- Occasionally, after grabbing the scroll and giving it to the Dalish, this quest will re-appear, instructing the player to "Return to the Tomb." If you do, it will be completely empty on all levels and contain nothing of interest and nobody to talk to. To fix this, enter the tombs via the original Emerald Graves entry, and walk up to the dead Inquisition soldiers near the broken cart and bales of hay. Your Inquisitor will say something along the lines of "these are our men", and the quest will be completed.
 If "Return to the Tomb" appears upon exiting Din'an Hanin, prior to selling the scroll to either the Dalish in the Exalted Plains or Sister Andrea in Val Royeaux, re-enter Din'an Hanin then exit, repeat this process as many times as necessary until "Return to the Tomb" no longer appears; confirmed solution for PS4. Also you could try this (enter and exit) method when you first arrive at the tomb if the objective hasn't disappeared upon entering.