m (→Walkthrough) Tag: sourceedit |
DaBarkspawn (talk | contribs) No edit summary |
||
| (33 intermediate revisions by 15 users not shown) | |||
| Line 4: | Line 4: | ||
|act = 1 |
|act = 1 |
||
|image = Deep rodas expedition.jpg |
|image = Deep rodas expedition.jpg |
||
| − | |px = |
+ | |px = 270px |
|icon = Quest icon DA2.png |
|icon = Quest icon DA2.png |
||
|start = [[Hightown]], [[Kirkwall]] |
|start = [[Hightown]], [[Kirkwall]] |
||
| − | |end = |
+ | |end = [[Viscount's Keep]], [[Kirkwall]] |
| − | |location = [[Deep Roads]] |
+ | |location = [[Deep Roads (Dragon Age II)|Deep Roads]] |
| − | |previous = |
||
| − | |next = |
||
|appearances = [[Dragon Age II]] |
|appearances = [[Dragon Age II]] |
||
}}</onlyinclude> |
}}</onlyinclude> |
||
| − | '''The Deep Roads Expedition''' is an Act 1 [[Main quests (Dragon Age II)|main quest]] in ''[[Dragon Age II]]''. |
+ | '''The Deep Roads Expedition''' is an Act 1 [[Main quests (Dragon Age II)|main quest]] in ''[[Dragon Age II]]''. |
| + | |||
| + | == Background == |
||
| + | After being allowed to enter [[Kirkwall]] and working for a year, [[Hawke]] needs to join an expedition to the [[Deep Roads]] to gain money and status within the city. The expedition is run by the brothers [[Bartrand Tethras|Bartrand]] and [[Varric Tethras|Varric]]. |
||
== Acquisition == |
== Acquisition == |
||
| Line 30: | Line 31: | ||
== Walkthrough == |
== Walkthrough == |
||
| − | [[File:Deep Roads Expedition Map.png|thumb| |
+ | [[File:Deep Roads Expedition Map.png|thumb|250px|Map of the Deep Roads]] |
Upon giving Bartrand the 50 sovereigns and completing all other main quests in Act 1 (or letting [[Dougal Gavorn]] pay your fee if you made a deal with him in [[Friends in Low Places]]), [[Leandra]] will appear and attempt to persuade Hawke not to bring their sibling to the [[Deep Roads]] in fear something will happen to them both. Hawke will then be prompted to choose party members, with Varric locked in. |
Upon giving Bartrand the 50 sovereigns and completing all other main quests in Act 1 (or letting [[Dougal Gavorn]] pay your fee if you made a deal with him in [[Friends in Low Places]]), [[Leandra]] will appear and attempt to persuade Hawke not to bring their sibling to the [[Deep Roads]] in fear something will happen to them both. Hawke will then be prompted to choose party members, with Varric locked in. |
||
| − | * {{Approval2|[[Carver Hawke|Carver]]|+10}} or {{Approval2|[[Bethany Hawke|Bethany]]|+ |
+ | * {{Approval2|[[Carver Hawke|Carver]]|+10}} or {{Approval2|[[Bethany Hawke|Bethany]]|+15}} if taken. |
* {{Approval2|Carver|-15}} or {{Approval2|Bethany|-10}} if not. |
* {{Approval2|Carver|-15}} or {{Approval2|Bethany|-10}} if not. |
||
| − | {{Note|Regardless of whether or not Hawke takes Carver or Bethany along on the expedition, you will lose them as a party member for much of the game. Also if Hawke takes Carver or Bethany they die at the end of this quest unless Hawke also takes Anders in the party and listens to his proposal}} |
+ | {{Note|Regardless of whether or not Hawke takes Carver or Bethany along on the expedition, you will lose them as a party member for much of the game. Also, if Hawke takes Carver or Bethany, then they will die at the end of this quest '''unless''' Hawke also takes Anders in the party and listens to his proposal.}} |
| − | |||
=== Finding another route === |
=== Finding another route === |
||
| − | As the party arrives in the Deep Roads, Hawke discovers that the passage is blocked by a collapse, forcing them to find a side passage regardless of the danger. [[Bodahn Feddic|Bodahn]] cries for help, asking Hawke to search for the lost [[Sandal]] as well. |
+ | As the party arrives in the [[Deep Roads (Dragon Age II)|Deep Roads]], Hawke discovers that the passage is blocked by a collapse, forcing them to find a side passage regardless of the danger. [[Bodahn Feddic|Bodahn]] cries for help, asking Hawke to search for the lost [[Sandal]] as well. |
[[File:The Deep Roads Expedition - Keep.png|thumb|270px|''[[Dragon Age Keep]]'' concept art of the expedition]] |
[[File:The Deep Roads Expedition - Keep.png|thumb|270px|''[[Dragon Age Keep]]'' concept art of the expedition]] |
||
If Hawke agrees to search for Sandal: |
If Hawke agrees to search for Sandal: |
||
* {{Approval2|Aveline|+5}} |
* {{Approval2|Aveline|+5}} |
||
* {{Approval2|Varric|+5}} |
* {{Approval2|Varric|+5}} |
||
| ⚫ | |||
If Hawke refuses: |
If Hawke refuses: |
||
| Line 54: | Line 53: | ||
{{Note|The rivalry gained does not appear in your quest log.}} |
{{Note|The rivalry gained does not appear in your quest log.}} |
||
| + | With your objective(s) set, proceed down the passage. Eventually you'll come across a wave of [[darkspawn]], who are weak against the Nature and Spirit elements. Note that the challenge of this quest is not so much the fights themselves, but making it all the way to the final boss of Act 1 with enough resources to take on that battle as well. The layout of the Deep Roads allows any fight to be completed without injury or item consumption by holding position at more defensible positions and closing doorways where they are present to break the enemy's line of sight. |
||
| − | Proceed down the passage and battle the various [[darkspawn]]. Beside the first set of stairs is a [[Deep Mushroom (Dragon Age II)|Deep Mushroom]]. Around the corner is a chest with [[Oath-Breaker]]. Continue along and you will come to a room where you must fight a darkspawn [[emissary]]. The pit on the right contains [[Silverite]], and ascending the stairs in the pit activates a trap, spawning a [[monstrous spider]]. |
||
| + | Beside the first set of stairs is a [[Deep Mushroom (Dragon Age II)|Deep Mushroom]]. Hold position at the bridge and lure the next group of darkspawn into view, hitting them with ranged attacks. The column on the left protects from bolter shots. Around the corner is a chest with [[Oath-Breaker]]. Continue along and you will come to a room where you must fight a darkspawn [[emissary]]. Close the door to break their line-of-sight and force them to come closer. When the door opens, focus fire on the emissary to defeat it before it can unleash an AoE spell. |
||
| − | {{SpoilerDA2| |
||
| + | |||
| − | The [[monstrous spider]] is too big to fit through the door at top of the stairs, so if you can pick the lock before it shows up and have the entire party run into the chest room, you can sit back and AoE the [[monstrous spider]] and any other spiders at your leisure as the [[monstrous spider]] blocks the smaller spiders from reaching the door. |
||
| + | The pit on the right contains two chests, a Standard-ranked locked chest and a [[Silverite]] deposit. Ascending the stairs in the pit triggers an encounter with several [[Giant Spider|Giant Spiders]], followed by a Boss-ranked [[monstrous spider]]. The easiest way to defeat them is to return to the main path while focusing on the poisonous spiders first, then killing the giant spiders as they crawl up the steps. When the Monstrous Spider spawns, it will not be able to physically fit up the steps, allowing you to simply bombard it with ranged attacks. At half health, a batch of reinforcements will spawn, but the Monstrous Spider will be blocking their path, allowing a Firestorm to eliminate the lot of them. |
||
| − | }} |
||
{{Note|In the spider pit, there is a small room with a locked door. As soon as you approach the door for lockpicking, the spiders spawn. To make sure you get the XP for lockpicking, you must do it during the fight. Otherwise, the door is open and you miss the XP for picking the lock.}} |
{{Note|In the spider pit, there is a small room with a locked door. As soon as you approach the door for lockpicking, the spiders spawn. To make sure you get the XP for lockpicking, you must do it during the fight. Otherwise, the door is open and you miss the XP for picking the lock.}} |
||
| − | {{Note|{{PC}} If you are in this room when the fight is over, there is a bug where the door to the room closes. Opening the door leaves a translucent door that can't be opened and prevents selecting the ground beyond it. That can be worked around by selecting an object (like spider drop) outside instead of the ground.{{confirm}}}} |
||
| − | The left path is blocked so proceed straight ahead. In the next room, you will find another [[Deep Mushroom (Dragon Age II)|Deep Mushroom]]. |
+ | The left path is blocked so proceed straight ahead. In the next room, you will find another [[Deep Mushroom (Dragon Age II)|Deep Mushroom]]. The [[Hurlock bolter]]s in this room may not chase the party even if you flee out of sight, so rush them and try not to die. Reinforcements spawn back the way you came, so use your best AoE abilities. Continue through this chamber to find Sandal, who has managed to wipe out the darkspawn and freeze an ogre in stasis by some mysterious means. |
| − | [[File:SandalsOgre.jpg|thumb|Sandal's ogre]] |
+ | [[File:SandalsOgre.jpg|thumb|250px|Sandal's ogre]] |
| − | + | Reaching this point yields 400 XP for quest progression, and Sandal hands over a [[Rune of Frost]], which can be enchanted into a weapon later. Pick up the nearby [[Raw Lyrium]] and then continue your search for a another route. You should also have obtained [[Stone's Breath]], a powerful staff for this particular area of the game, so consider equipping it. |
|
| + | Climb the stairs and emerge at a path across the lava, along with a stone column that has the [[Codex entry: Deep Roads]]. A fight with two waves of darkspawn including a [[darkspawn emissary]], the path curves back around to the west. Get their attention, then hold position back by the stairs to stay on top of their spawn points, eliminating them with similar tactics as before. Consider using the rubble as a chokepoint for the first group as well. Cross the bridge and head downstairs to face more bolters, using the corner at the bottom of the stairs for cover. With them slain you can pick up some [[Raw Lyrium]] against a column on the south wall and the [[Blade of Red Birth]] from a chest near the stairs leading west. |
||
| − | {{Note|Shortly after exiting the room where [[Sandal]] and the frozen [[Ogre]] were, you will see a stone column with the [[Codex entry: Deep Roads]].}} |
||
| + | At the top of this foreboding set of stairs is an encounter with an ogre. The confined space and presence of 6 Complex-ranked traps (which require 30 Cunning or more to detect and disarm) makes staying in this room a bad idea. For best results, retreat back downstairs to a roomier battlefield with no traps, then spread everyone out so its ram attack can be easily dodged without jeopardizing multiple companions. Use stun, freezing, and slowing abilities to reduce the frequency of its attacks, kite it with manual control of its primary target, and eventually the full power of the party will defeat it. Return to the ogre's original chamber and disarm the traps, if you are able to do so. |
||
| − | After a fight with two waves of darkspawn including a [[Darkspawn Emissary]], the path curves back around to the west. After a fight at the bottom of a staircase you can pick up some [[Raw Lyrium]] against a column on the south wall. |
||
| ⚫ | Follow the winding path to a large open room with a Boss-ranked [[Dragon (variation)|dragon]] and reinforcements of several [[dragonling]]s. Use similar tactics as those from [[The Bone Pit (quest)]] to deal with the dragon: kite it with their primary target while ranged characters attack. The simplest solution is to pull the dragon back into the winding path; the southernmost point provides plenty of room to dance around the dragon while evading the dragonling reinforcements entirely. Those who want a challenge can remain in the large room and use the stairs to kite the enemy. Another strategy is not to retreat so far, but to fight the dragon in the hallway without entering the large room. The dragon will probably spawn and aggro before you get anywhere near the room proper. Slow it down and stop it with any crowd control you have while your party holds position in the hallway. Have your ranged attackers burn down its health as much as possible before it reaches you. When you cannot halt its advance any more, have a [[Warrior (Dragon Age II)|warrior]] [[Taunt (Dragon Age II)|Taunt]] the dragon and allow melee to engage. Continue dragging it farther back into the hallway until your crowd control cooldowns are up, and repeat. By this time, you should be far enough back that only one or two of the second wave dragonlings will enter combat, if any. Be sure to keep ranged attackers and healers out of the way of flame breath. Once the large dragon is dead, you can return to the large room and handle the rest of the dragonlings separately, which shouldn't be troublesome. The dragon drops several valuable loot items, including: |
||
| − | {{Note|In the room with the living [[ogre]], be careful of the many (6) complex traps, they require 30 cunning to detect and disarm. Also, letting the ogre charge is advisable, ducking back out of the door and avoiding the charge causes the ogre to get its horns stuck in the opposite wall. This trivializes the fight on any difficulty setting. But, be careful, as the ogre can hurl rocks outside the room and can occasionally glitch when charging and go through the door. Also, the ogre's slam can instantly kill weaker party members. As such, a safer approach is to walk up the stairs to the landing (about 12 steps down from the door), select hold party members' movement, then run inside the door and back out. The ogre will charge and often will slam afterwards which can hit party members too close to the door. After running back outside of the room, have those with area effect and long range abilities attack the ogre while using your active character to distract the ogre so that it does not hurl rocks at the group outside the room. Then, after you kill the ogre and loot its corpse, bring your rogue inside to disarm the 6 complex traps. There is 1 trap in each corner (approximately), and 2 in front of the door on the west side (straight across from the entrance) of the room}} |
||
| − | |||
| ⚫ | |||
Depending on Hawke's class: |
Depending on Hawke's class: |
||
| − | {{:Last Descent Armor|style=iconmini}} |
+ | {{:Last Descent Armor|style=iconmini}}<br> |
| − | {{:Warplate of the Fallen|style=iconmini}} |
+ | {{:Warplate of the Fallen|style=iconmini}}<br> |
| − | {{:Robes of the Spiral Eye|style=iconmini}} |
+ | {{:Robes of the Spiral Eye|style=iconmini}}<br> |
| + | |||
No matter Hawke's class: |
No matter Hawke's class: |
||
| − | {{:Winter-Weight|style=iconmini}} |
+ | {{:Winter-Weight|style=iconmini}}<br> |
| − | {{:Nevarran Lancer|style=iconmini}} |
+ | {{:Nevarran Lancer|style=iconmini}}<br> |
| − | |||
| − | Hawke returns to Bartrand, who is "pleased" that the expedition is moving again. |
||
| + | Complete the armor set to raise Hawke's stats, then continue up the stairs to discover the way through. The party automatically returns to Bartrand, who is "pleased" that the expedition is moving again. |
||
=== The Primeval Thaig === |
=== The Primeval Thaig === |
||
| − | After the |
+ | After the cutscene with Bartrand, Hawke and company arrive at an undiscovered [[thaig]], the [[Primeval Thaig]], which Hawke must explore. |
| + | |||
| − | {{Note|[[Bodahn]] has a shop if you need potions or anything of the sort, and Sandal makes rune enchantments.}} |
||
| + | Despite serving as a moment's rest, the party does not heal any injuries obtained in the upper Deep Roads, so use Injury Kits if necessary and purchase additional healing items from [[Bodahn]] if needed. Use the Enchantment Apparatus to enchant the Rune of Frost into a weapon, preferably [[Bianca]] or [[Stone's Breath]] if the former already has one, and the player can talk to Bodahn to receive thanks for saving Sandal. |
||
| + | |||
| + | Beyond Bartrand's camp is a passage to the northwest where the party battles a number of shades and a stone golem. The confined space favors the golem, so retreat back to the camp to have more room to spread out. Claim the deposit of [[Orichalcum]] before entering the Primeval Thaig proper. |
||
| − | [[File:DR-Notsplittingthatthreeways.jpg|thumb|"I'm not splitting that three ways."]] |
+ | [[File:DR-Notsplittingthatthreeways.jpg|thumb|250px|"I'm not splitting that three ways."]] |
| − | Beyond that point, the party enters the Primeval Thaig, where they discover a pure [[lyrium idol]]. Bartrand, unwilling to share the profits of the expedition, takes the idol and locks them in the thaig. |
+ | Beyond that point, the party enters the Primeval Thaig, where they discover a pure [[lyrium idol]]. Bartrand, unwilling to share the profits of the expedition, takes the idol and locks them in the thaig. |
| − | + | The party needs to find a way out and decides to start with the opposite door. The small room to the east just after entering the crypt contains 4 chests of random loot, but be prepared for a fight upon entering. The party will face a stone golem and 8 shades initially, with several more shades spawning after killing the first wave. It is possible to defeat them without much trouble even on Nightmare difficulty by retreating to the lyrium idol chamber. Drop out of combat between batches of shades to recover rather than taking them all on in one sitting. |
|
| − | + | The long, narrow, level halls of the thaig are perfect for a ranged party, as the enemies are mostly melee and the intact architecture means they have no line-of-sight breakers. There are also doors at critical junctures the party can use against the enemies. After proceeding through some hallways slaying shades, the party will come upon a room with two staircases leading down. Holding position here allows the shades to be funneled to the hallway and killed like their predecessors. At the bottom of this chamber the party encounters [[profane]]s, which are immune to electricity on Nightmare difficulty. The next hallway combines shades and profanes into encounters, with one immune to the other's vulnerability, making the collaborations somewhat annoying if you were relying on electricity to damage shades or spirit to damage profanes. In the next chamber you'll fight more profanes until stopped by a [[hunger demon]] in the form of a profane. It offers a deal: stop killing the profanes (he feeds off their hunger), kill a [[rock wraith]] up ahead, and he will tell Hawke the location of a key to a locked door that leads to higher tunnels. |
|
Hawke accepts the deal: |
Hawke accepts the deal: |
||
| Line 110: | Line 109: | ||
* {{Approval2|Merrill|-10}} |
* {{Approval2|Merrill|-10}} |
||
| − | + | Asking [[Merrill]] to kill the demon ('''[[Dialogue wheel (Dragon Age II)|Call on companion]]''') results in '''no change'''. |
|
| − | [[File:Rock demon.jpg|thumb| |
+ | [[File:Rock demon.jpg|thumb|250px|The rock demon who makes Hawke an offer]] |
| − | + | Refusing its deal (or asking [[Merrill]] to kill it if in the party - she attacks it but doesn't damage it) results in a battle with it and more [[shade]]s, [[profane]]s, and an [[abomination]] (arises from the former rock demon). Warriors have a [[Dialogue wheel (Dragon Age II)|special choice]] in which Hawke refuses the deal in a unique way. This results in no approval change, the same as if Merrill tried to kill it. |
|
| − | {{Note|If you're interested in maximizing your experience and profits, refusing the deal results in more enemies to kill (22 vs. 7) and about 200 more experience points.}} |
+ | {{Note|If you're interested in maximizing your experience and profits, refusing the deal results in more enemies to kill (22 vs. 7) and about 200 more experience points. Even if you refuse you can retreat to the previous hallway and close the door, killing them from far back as they drag themselves inside. All that's left after such a tactic is the abomination.}} |
| + | One final hallway with shades and profanes, as well as a corpse with 2 healing, mana, and stamina potions and an auto-save, if the option is enabled. Take this time to create manual saves, optimize the party's equipment, mend any injuries, and adjust Tactics and Behavior if necessary. |
||
| ⚫ | |||
| ⚫ | Head up the stairs to enter what Varric calls the "Vault" and battle the [[Ancient rock wraith]], the final boss of Act 1. Keep the party moving to avoid its massively-powerful melee attacks and hit it from range. At certain points in the fight when it has lost enough health, the wraith will disappear and respawn in the center of the four pillars and emit red radiation which damages all party members, regardless of range. This damage is rather severe, but can be avoided by having the party hide behind one of the four pillars, away from the rock wraith. After this attack, the creature's armor will collapse and it raise profanes to protect it, however this is its most vulnerable point. After enough time has passed, the armor reassembles and the wraith picks up new attacks. For more detailed information on defeating it on higher difficulties, consult the [[Ancient rock wraith (strategy)]]. |
||
| ⚫ | |||
| ⚫ | |||
| ⚫ | |||
| ⚫ | |||
| ⚫ | |||
| + | |||
| ⚫ | |||
{{Note|You might want to go back to where you fought the rock wraith to pick up loot that it dropped before leaving the area.}} |
{{Note|You might want to go back to where you fought the rock wraith to pick up loot that it dropped before leaving the area.}} |
||
| Line 133: | Line 134: | ||
* Attack the demon, leading to combat with it and its minions. |
* Attack the demon, leading to combat with it and its minions. |
||
* Hawke tells the demon that they only want the key, in which case it summons minions and attacks you anyway. |
* Hawke tells the demon that they only want the key, in which case it summons minions and attacks you anyway. |
||
| − | * Tell the demon to back off as a special choice if Hawke's personality is aggressive. If not, it attacks |
+ | * Tell the demon to back off as a special choice if Hawke's personality is aggressive. If not, it attacks anyway. |
| − | When the party exits the Ancient Crypt, you will get a |
+ | When the party exits the Ancient Crypt, you will get a cutscene featuring discussion with Varric showing that you are back at the original campsite. They then head for Kirkwall the way they got down. |
| + | ==== Bethany or Carver ==== |
||
| − | {{SpoilerDA2| |
||
| − | Should Hawke have Bethany or Carver in the party, there is an extended |
+ | Should Hawke have Bethany or Carver in the party, there is an extended cutscene in which their sibling collapses due to symptoms of the [[Blight]] corruption. Regardless of any dialogue option selected, the sibling will die. However, if [[Anders]] is in the party, he will propose that Hawke search for a [[Grey Wardens|Grey Warden]], [[Stroud]]. Doing so will allow the sibling to survive. |
| − | |||
| ⚫ | |||
If Hawke takes Carver to the Grey Wardens: |
If Hawke takes Carver to the Grey Wardens: |
||
| Line 150: | Line 149: | ||
* {{Approval2|Anders|+5}} |
* {{Approval2|Anders|+5}} |
||
* {{Approval2|Varric|+5}} |
* {{Approval2|Varric|+5}} |
||
| − | }} |
||
| + | If accepted the party will start looking for the Wardens and will have to fight more darkspawn. Make sure to loot them before they are all taken out because you won't be able to do that afterwards. Once the darkspawn are taken out, the Grey Warden [[Stroud]] and his party will arrive and exchange a few words with Anders. Stroud will initially be reluctant to allow Bethany or Carver to attempt the [[Joining]] but he is easily convinced. |
||
| − | == Result == |
||
| + | |||
| − | * over 20 {{g}} (from the treasure) |
||
| ⚫ | |||
| − | * over 10 500 XP (from the Ancient Rock Wraith) |
||
| + | |||
| − | Hawke and their companions arrive safely in Kirkwall, and Act 2 begins. |
||
| + | If Hawke makes a diplomatic or humorous response to Stroud: |
||
| ⚫ | |||
| + | |||
| + | If Hawke makes an aggressive response to Stroud: |
||
| + | * {{Approval2|Varric|-5}} |
||
| + | Should Hawke have left their sibling at home instead, Bethany will have been discovered by the [[Templar Order|templars]] while Hawke was away, with Knight-Captain [[Cullen]] personally escorting her to the Gallows. Carver will have joined the templars, either to spite their [[mage]] sibling or in an attempt to step out of their shadow. |
||
| − | If Hawke did not accept [[Dougal Gavorn]]'s proposal, Varric pays him/her back the 50 sovereigns, serving as profit from the expedition. Otherwise, he will visit the [[Hawke Estate]] to extort money from Hawke, which can be refused. |
||
| + | No matter what, Hawke's remaining sibling is removed from their day-to-day lives. Act 1 of Varric's tale of the Champion concludes as Leandra collapses on the floor, lamenting what has happened. |
||
| − | {{SpoilerDA2| |
||
| − | If the sibling was not taken to the Deep Roads, Carver is recruited to the templars, while Bethany is captured by the templars to be taken to the Circle; both of them leave. [[Consoling Words]] shows up in the quest log. |
||
| − | }} |
||
== Crafting resources == |
== Crafting resources == |
||
| Line 169: | Line 170: | ||
** The first is located to the west side of the stairs in the very first room you encounter dark spawn. |
** The first is located to the west side of the stairs in the very first room you encounter dark spawn. |
||
** The second is located in the blue room where you fight the emissary |
** The second is located in the blue room where you fight the emissary |
||
| − | * 1 [[Silverite]] located in the SE valley where the [[monstrous spider]] attacks you. |
+ | * 1 [[Silverite]] located in the SE valley where the [[monstrous spider]] attacks you. |
* 2 [[Raw Lyrium]] |
* 2 [[Raw Lyrium]] |
||
** The first is located next to the frozen ogre that [[Sandal]] mysteriously froze. |
** The first is located next to the frozen ogre that [[Sandal]] mysteriously froze. |
||
Revision as of 14:14, 13 May 2020
The Deep Roads Expedition is an Act 1 main quest in Dragon Age II.
Background
After being allowed to enter Kirkwall and working for a year, Hawke needs to join an expedition to the Deep Roads to gain money and status within the city. The expedition is run by the brothers Bartrand and Varric.
Acquisition
This quest begins after Hawke's year of servitude ends. Hawke and their surviving sibling try to unsuccessfully persuade Bartrand to let them join the expedition. After speaking to the dwarf, a pickpocket attempts to steal Hawke's money, but is caught by Varric. The latter then offers Hawke the opportunity to become business partners with himself and Bartrand.
The quest requires 50![]() to start, and you must complete the following quests:
to start, and you must complete the following quests:
- Tranquility
- Wayward Son
- Enemies Among Us
- A Friend in the Guard
- Long Way Home
- Act of Mercy
- Blackpowder Promise
- Shepherding Wolves
Walkthrough
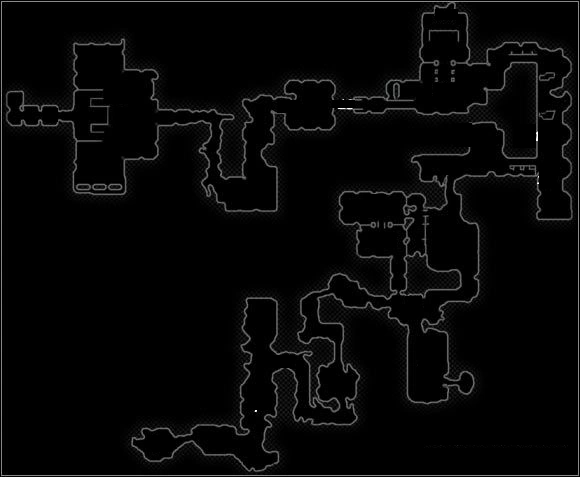
Map of the Deep Roads
Upon giving Bartrand the 50 sovereigns and completing all other main quests in Act 1 (or letting Dougal Gavorn pay your fee if you made a deal with him in Friends in Low Places), Leandra will appear and attempt to persuade Hawke not to bring their sibling to the Deep Roads in fear something will happen to them both. Hawke will then be prompted to choose party members, with Varric locked in.
 Carver: friendship (+10) or
  Bethany: friendship (+15) if taken.
- Carver: rivalry (+15) or Bethany: rivalry (+10) if not.
Finding another route
As the party arrives in the Deep Roads, Hawke discovers that the passage is blocked by a collapse, forcing them to find a side passage regardless of the danger. Bodahn cries for help, asking Hawke to search for the lost Sandal as well.
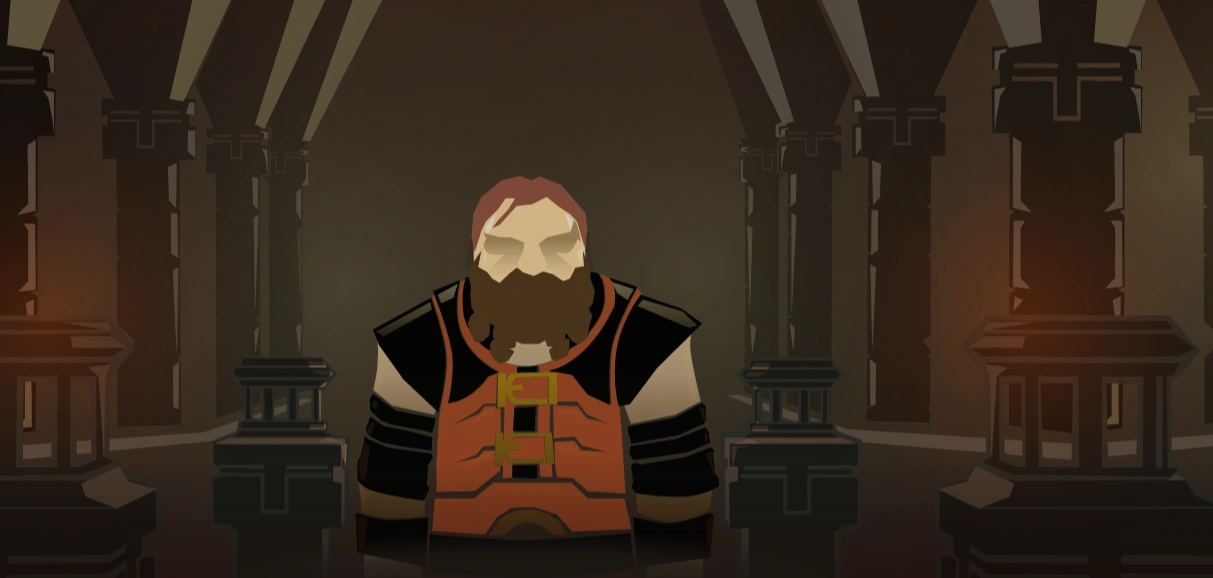

Dragon Age Keep concept art of the expedition
If Hawke agrees to search for Sandal:
- Aveline: friendship (+5)
- Varric: friendship (+5)
If Hawke refuses:
- Aveline: rivalry (+5)
- Varric: rivalry (+5)
Choosing this option will make Hawke save Bodahn, who attempted to find his son himself, and later Sandal, but without a quest entry.
With your objective(s) set, proceed down the passage. Eventually you'll come across a wave of darkspawn, who are weak against the Nature and Spirit elements. Note that the challenge of this quest is not so much the fights themselves, but making it all the way to the final boss of Act 1 with enough resources to take on that battle as well. The layout of the Deep Roads allows any fight to be completed without injury or item consumption by holding position at more defensible positions and closing doorways where they are present to break the enemy's line of sight.
Beside the first set of stairs is a Deep Mushroom. Hold position at the bridge and lure the next group of darkspawn into view, hitting them with ranged attacks. The column on the left protects from bolter shots. Around the corner is a chest with Oath-Breaker. Continue along and you will come to a room where you must fight a darkspawn emissary. Close the door to break their line-of-sight and force them to come closer. When the door opens, focus fire on the emissary to defeat it before it can unleash an AoE spell.
The pit on the right contains two chests, a Standard-ranked locked chest and a Silverite deposit. Ascending the stairs in the pit triggers an encounter with several Giant Spiders, followed by a Boss-ranked monstrous spider. The easiest way to defeat them is to return to the main path while focusing on the poisonous spiders first, then killing the giant spiders as they crawl up the steps. When the Monstrous Spider spawns, it will not be able to physically fit up the steps, allowing you to simply bombard it with ranged attacks. At half health, a batch of reinforcements will spawn, but the Monstrous Spider will be blocking their path, allowing a Firestorm to eliminate the lot of them.
The left path is blocked so proceed straight ahead. In the next room, you will find another Deep Mushroom. The Hurlock bolters in this room may not chase the party even if you flee out of sight, so rush them and try not to die. Reinforcements spawn back the way you came, so use your best AoE abilities. Continue through this chamber to find Sandal, who has managed to wipe out the darkspawn and freeze an ogre in stasis by some mysterious means.
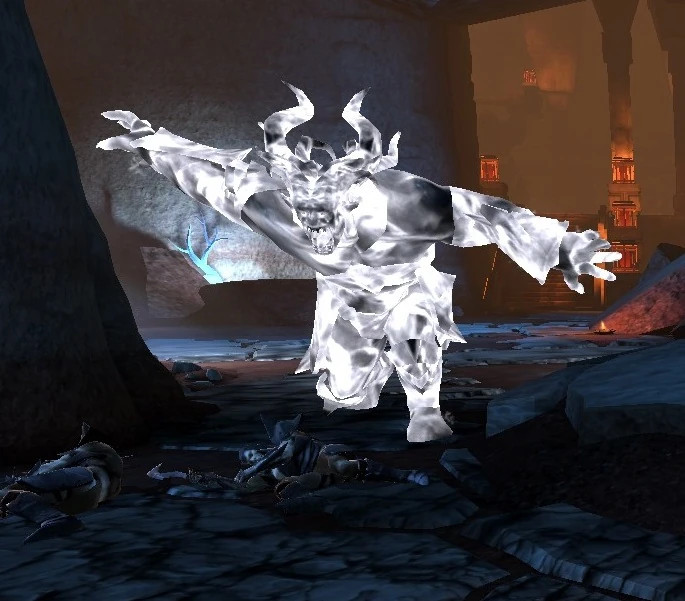

Sandal's ogre
Reaching this point yields 400 XP for quest progression, and Sandal hands over a Rune of Frost, which can be enchanted into a weapon later. Pick up the nearby Raw Lyrium and then continue your search for a another route. You should also have obtained Stone's Breath, a powerful staff for this particular area of the game, so consider equipping it.
Climb the stairs and emerge at a path across the lava, along with a stone column that has the Codex entry: Deep Roads. A fight with two waves of darkspawn including a darkspawn emissary, the path curves back around to the west. Get their attention, then hold position back by the stairs to stay on top of their spawn points, eliminating them with similar tactics as before. Consider using the rubble as a chokepoint for the first group as well. Cross the bridge and head downstairs to face more bolters, using the corner at the bottom of the stairs for cover. With them slain you can pick up some Raw Lyrium against a column on the south wall and the Blade of Red Birth from a chest near the stairs leading west.
At the top of this foreboding set of stairs is an encounter with an ogre. The confined space and presence of 6 Complex-ranked traps (which require 30 Cunning or more to detect and disarm) makes staying in this room a bad idea. For best results, retreat back downstairs to a roomier battlefield with no traps, then spread everyone out so its ram attack can be easily dodged without jeopardizing multiple companions. Use stun, freezing, and slowing abilities to reduce the frequency of its attacks, kite it with manual control of its primary target, and eventually the full power of the party will defeat it. Return to the ogre's original chamber and disarm the traps, if you are able to do so.
Follow the winding path to a large open room with a Boss-ranked dragon and reinforcements of several dragonlings. Use similar tactics as those from The Bone Pit (quest) to deal with the dragon: kite it with their primary target while ranged characters attack. The simplest solution is to pull the dragon back into the winding path; the southernmost point provides plenty of room to dance around the dragon while evading the dragonling reinforcements entirely. Those who want a challenge can remain in the large room and use the stairs to kite the enemy. Another strategy is not to retreat so far, but to fight the dragon in the hallway without entering the large room. The dragon will probably spawn and aggro before you get anywhere near the room proper. Slow it down and stop it with any crowd control you have while your party holds position in the hallway. Have your ranged attackers burn down its health as much as possible before it reaches you. When you cannot halt its advance any more, have a warrior Taunt the dragon and allow melee to engage. Continue dragging it farther back into the hallway until your crowd control cooldowns are up, and repeat. By this time, you should be far enough back that only one or two of the second wave dragonlings will enter combat, if any. Be sure to keep ranged attackers and healers out of the way of flame breath. Once the large dragon is dead, you can return to the large room and handle the rest of the dragonlings separately, which shouldn't be troublesome. The dragon drops several valuable loot items, including:
Depending on Hawke's class:
![]() Last Descent Armor
Last Descent Armor
![]() Warplate of the Fallen
Warplate of the Fallen
![]() Robes of the Spiral Eye
Robes of the Spiral Eye
No matter Hawke's class:
![]() Winter-Weight
Winter-Weight
![]() Nevarran Lancer
Nevarran Lancer
Complete the armor set to raise Hawke's stats, then continue up the stairs to discover the way through. The party automatically returns to Bartrand, who is "pleased" that the expedition is moving again.
The Primeval Thaig
After the cutscene with Bartrand, Hawke and company arrive at an undiscovered thaig, the Primeval Thaig, which Hawke must explore.
Despite serving as a moment's rest, the party does not heal any injuries obtained in the upper Deep Roads, so use Injury Kits if necessary and purchase additional healing items from Bodahn if needed. Use the Enchantment Apparatus to enchant the Rune of Frost into a weapon, preferably Bianca or Stone's Breath if the former already has one, and the player can talk to Bodahn to receive thanks for saving Sandal.
Beyond Bartrand's camp is a passage to the northwest where the party battles a number of shades and a stone golem. The confined space favors the golem, so retreat back to the camp to have more room to spread out. Claim the deposit of Orichalcum before entering the Primeval Thaig proper.

"I'm not splitting that three ways."
Beyond that point, the party enters the Primeval Thaig, where they discover a pure lyrium idol. Bartrand, unwilling to share the profits of the expedition, takes the idol and locks them in the thaig.
The party needs to find a way out and decides to start with the opposite door. The small room to the east just after entering the crypt contains 4 chests of random loot, but be prepared for a fight upon entering. The party will face a stone golem and 8 shades initially, with several more shades spawning after killing the first wave. It is possible to defeat them without much trouble even on Nightmare difficulty by retreating to the lyrium idol chamber. Drop out of combat between batches of shades to recover rather than taking them all on in one sitting.
The long, narrow, level halls of the thaig are perfect for a ranged party, as the enemies are mostly melee and the intact architecture means they have no line-of-sight breakers. There are also doors at critical junctures the party can use against the enemies. After proceeding through some hallways slaying shades, the party will come upon a room with two staircases leading down. Holding position here allows the shades to be funneled to the hallway and killed like their predecessors. At the bottom of this chamber the party encounters profanes, which are immune to electricity on Nightmare difficulty. The next hallway combines shades and profanes into encounters, with one immune to the other's vulnerability, making the collaborations somewhat annoying if you were relying on electricity to damage shades or spirit to damage profanes. In the next chamber you'll fight more profanes until stopped by a hunger demon in the form of a profane. It offers a deal: stop killing the profanes (he feeds off their hunger), kill a rock wraith up ahead, and he will tell Hawke the location of a key to a locked door that leads to higher tunnels.
Hawke accepts the deal:
- Anders: rivalry (+15)
- Aveline: rivalry (+5)
- Fenris: rivalry (+5)
Hawke refuses the deal:
- Anders: friendship (+10)
- Aveline: friendship (+5)
- Merrill: rivalry (+10)
Asking Merrill to kill the demon (Call on companion) results in no change.

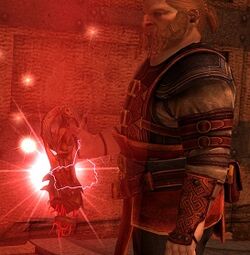
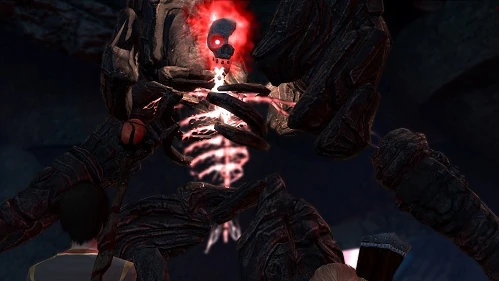
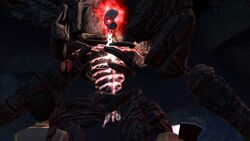
The rock demon who makes Hawke an offer
Refusing its deal (or asking Merrill to kill it if in the party - she attacks it but doesn't damage it) results in a battle with it and more shades, profanes, and an abomination (arises from the former rock demon). Warriors have a special choice in which Hawke refuses the deal in a unique way. This results in no approval change, the same as if Merrill tried to kill it.
One final hallway with shades and profanes, as well as a corpse with 2 healing, mana, and stamina potions and an auto-save, if the option is enabled. Take this time to create manual saves, optimize the party's equipment, mend any injuries, and adjust Tactics and Behavior if necessary.
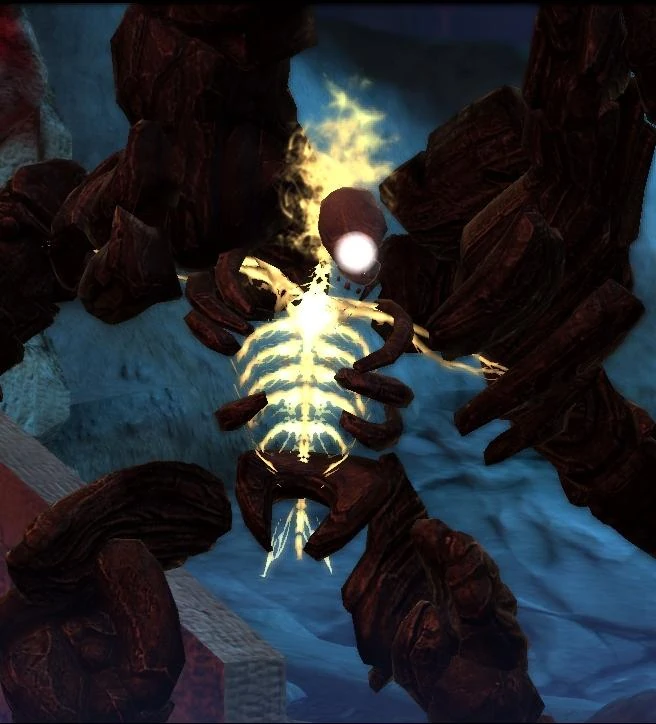
Head up the stairs to enter what Varric calls the "Vault" and battle the Ancient rock wraith, the final boss of Act 1. Keep the party moving to avoid its massively-powerful melee attacks and hit it from range. At certain points in the fight when it has lost enough health, the wraith will disappear and respawn in the center of the four pillars and emit red radiation which damages all party members, regardless of range. This damage is rather severe, but can be avoided by having the party hide behind one of the four pillars, away from the rock wraith. After this attack, the creature's armor will collapse and it raise profanes to protect it, however this is its most vulnerable point. After enough time has passed, the armor reassembles and the wraith picks up new attacks. For more detailed information on defeating it on higher difficulties, consult the Ancient rock wraith (strategy).
The Ancient Rock Wraith
The rock wraith is worth 10468 XP at Level 12. The number of Profanes slain has no effect on this total. After the rock wraith is defeated, there is a cutscene where the party walks forward to a stash of treasure chests, one of which contains the key to let them out of the crypt.
If Hawke made a deal with the demon, it will appear before they lay claim to the treasure, telling them to take only the key and leave the rest. Hawke has several options at this point:
- Varric: friendship (+10) if Hawke lets Varric kill the demon ("Call on companion"), leading to a fight with only its followers.
- Attack the demon, leading to combat with it and its minions.
- Hawke tells the demon that they only want the key, in which case it summons minions and attacks you anyway.
- Tell the demon to back off as a special choice if Hawke's personality is aggressive. If not, it attacks anyway.
When the party exits the Ancient Crypt, you will get a cutscene featuring discussion with Varric showing that you are back at the original campsite. They then head for Kirkwall the way they got down.
Bethany or Carver
Should Hawke have Bethany or Carver in the party, there is an extended cutscene in which their sibling collapses due to symptoms of the Blight corruption. Regardless of any dialogue option selected, the sibling will die. However, if Anders is in the party, he will propose that Hawke search for a Grey Warden, Stroud. Doing so will allow the sibling to survive.
If Hawke takes Carver to the Grey Wardens:
- Anders: friendship (+5)
- Varric: friendship (+5)
- Carver: friendship (+5)
If Hawke takes Bethany to the Grey Wardens:
- Anders: friendship (+5)
- Varric: friendship (+5)
If accepted the party will start looking for the Wardens and will have to fight more darkspawn. Make sure to loot them before they are all taken out because you won't be able to do that afterwards. Once the darkspawn are taken out, the Grey Warden Stroud and his party will arrive and exchange a few words with Anders. Stroud will initially be reluctant to allow Bethany or Carver to attempt the Joining but he is easily convinced.
If Hawke makes a diplomatic or humorous response to Stroud:
- Varric: friendship (+5)
If Hawke makes an aggressive response to Stroud:
- Varric: rivalry (+5)
Should Hawke have left their sibling at home instead, Bethany will have been discovered by the templars while Hawke was away, with Knight-Captain Cullen personally escorting her to the Gallows. Carver will have joined the templars, either to spite their mage sibling or in an attempt to step out of their shadow.
No matter what, Hawke's remaining sibling is removed from their day-to-day lives. Act 1 of Varric's tale of the Champion concludes as Leandra collapses on the floor, lamenting what has happened.
Crafting resources
If you are seeking the Supplier achievement, be sure to grab:
- 2 Deep Mushroom
- The first is located to the west side of the stairs in the very first room you encounter dark spawn.
- The second is located in the blue room where you fight the emissary
- 1 Silverite located in the SE valley where the monstrous spider attacks you.
- 2 Raw Lyrium
- The first is located next to the frozen ogre that Sandal mysteriously froze.
- The second is located in the room with the pillars immediately before you fight an Ogre yourself.
- 1 Orichalcum located in the Primeval Ruins in the room where you first encounter shades and a golem.