Nature of the Beast is one of the four main quest lines in Dragon Age: Origins that must be completed before calling the Landsmeet.
Background
The Dalish elves are being destroyed by a virulent disease which is turning them all into werewolves. The clan keeper, Zathrian, asks for your assistance in ridding them of the curse. He requests that you find the first werewolf, Witherfang, and return with his heart to end the curse destroying his people. The quest takes you through the Brecilian Forest to track down the lead werewolf.
Walkthrough
The Dalish Camp
When the Warden travels to the Brecilian Outskirts, [s]he will be greeted by Mithra, a Dalish elf leading a patrol. After a brief exchange (nothing to be gained by withholding the truth in this dialogue; let her know you have business with her leader, and that you are a Grey Warden), she will lead the Warden to Keeper Zathrian in the Dalish Camp. He will explain that the Dalish elves cannot help the Warden in the fight against the Blight because they have been fighting against Werewolves since they entered this part of the forest. Zathrian will explain that the lycanthropy spreads like a disease but is linked to its original source, a werewolf known as Witherfang and that, with the monster's heart, he may be able to find a cure. If the Warden offers to help, Zathrian will share a few parting tips (e.g.: watch for the white wolves to find Witherfang) and promptly direct you to his assistants, Lanaya and Sarel. If pressed about equipment and aids, he will mention Varathorn, the only merchant in the Camp.
The Warden may want to explore the camp before moving to, to grab the side quests and some spare loot. One locked Chest, right next to Zathrian, will trigger seriously negative reactions from the Elves if tampered (once the nature of the Beast quest is concluded, the chest can be opened to retrieve a Song Book, unlocking the Codex Entry: In_Uthenera). However, another locked Chest nearby is much more accessible, and contains a letter for the Correspondence Interruptus quest.
West Brecilian Forest
After checking out the Dalish Camp, the Warden can use the exit in the North-East corner of the camp. This will lead the party to a new unlocked area: West Brecilian Forest. The path through the forest is patrolled by groups of Wolves, Blight Wolves and Werewolves. Along the North-West path from the entrance, the Warden will find a Great Bear guarding a Corpse with some loot and one Andraste's Grace nearby.
In the Northern central portion of the map, next to the waterfalls, there is a small island with 3 bridges. All of the paths West of the waterfalls lead here. As the party approaches, 3 werewolves stand to attention. One of them is named Swiftrunner, and will appear multiple times while the Warden resolves this quest line. On this first occasion, it is possible to use the Warden's Coercion attribute to Intimidate or Persuade Swiftrunner and avoid a confrontation. The dialogue hints that the werewolves have their own perspective on the dispute with the Dalish Elves. If, however, the Warden ends up fighting Swiftrunner and his aids, they will flee once their health is too low.
After meeting Swiftrunner, the Warden can cross the waterfall heading Eastward, and fight another group of werewolves. Crossing the next bridge will lead the party to a group composed of Darkspawn (Hurlocks) and an Ogre.
Notes:
- Deygan, a Dalish elf, lies seriously wounded just past the encounter with Swiftrunner. See the Wounded in the Forest side quest for details.
- Just South of the path, where the Ogre is found, the Warden can inspect a Mystical Site of Power for the Places of Power quest.
- In the same spot as the Mystical Site of Power, the Warden can inspect a Gravestone that "gives you an uneasy feeling", but for the time being the only option given is to "Leave the tombstone alone". This Gravestone belongs to The Mage's Treasure quest, but cannot be inspected/activated until another Gravestone is activated - see also the Northern Ancient Tombstone section below)
- A Pile of Rubble around the same area may yield an Ox Bone and a Painted Skyball.
- To the North of this area, the Warden can retrieve a piece of Ironbark from a Fallen Tree, for the Rare Ironbark quest.
The Grand Oak
The path splits into a Northern branch leading to the North Exit to East Forest (guarded by a Wild Sylvan), and a Southern branch. The latter leads to the South Exit to East Forest (guarded by a group of Werewolves, some of the Rabid variety), but also to a clearing further South, marked on the map as Grand Oak Clearing. This branch of the path is guarded by Wild Sylvans, but leads to The Grand Oak. Amidst the rhymes, the oak will offer a new quest: Recover the stolen acorn from the Mad Hermit (more on this later, see the The Magical Barrier section below). Essentially, the Warden will have to cross a Forest Barrier (see below), and can do so either with the help of the Mad Hermit or The Grand Oak.
Notes:
- The Warden may also chose to attack The Grand Oak during this encounter, as well as later in the quest line. See The Grand Oak entry for further details.
- A Landmark Tree lies just East of the Grand Oak. if Dog is in your party, you may use this to your advantage, should you chose to fight in this area.
- Just South of the Grand Oak, a small bridge gives access to what appears to be an abandoned camp site. See West Bracilian Forest entry for details.
- Meeting the Grand oak is one of the events in the quest line that triggers the spawning of new groups of enemies (Werewolves) throughout the Forest.
East Brecilian Forest
As mentioned, the Warden can enter the East Brecilian Forest from the West Bracilian Forest via either of two passages. The Northern passage is guarded by a group of Werewolves, while the Southern passage is guarded by a Wild Sylvan.
The two Western paths lead to a central crossing, while 3 paths leave in the general Eastern direction:
- North-East path: leads to the Northern Ancient Tombstone;
- East path: leads to the Mad Hermit Clearing
- South-East path: leads to the Magical Barrier
The North-East and East paths are also connected after the respective landmarks. See below for more details on each section.
The Magical Barrier
The South-East passage leads to a misty magical barrier: as the companions approach it, a cut-scene shows them magically turned around, walking out of the mist in the same location where they entered it. The main quest line (Nature of the Beast) will be updated to reflect that the Warden needs to find a way to cross this barrier.
There are two main options to achieve this:
- Side with the Mad Hermit found in the Western Forest:
- he will ask the Warden to kill The Grand Oak, and offer passage through the barrier in exchange;
- Side with The Grand Oak found in the Eastern Forest:
- retrieve the Grand Oak Acorn from the Mad Hermit and the Oak will give the Warden an Oak Branch that allows passage through the barrier.
Northern Ancient Tombstone
The clearing in front of the ruins in this area is guarded by 2 Ogres.
Notes:
- This is referred to as the Northern Ancient Tombstone since there are two landmarks in this section of the Forest marked as Ancient Tombstone on the map. The second one is found past the Magical barrier, further South, and is referred to as the Southern Ancient Tombstone.
- Among the piles of rubble and corpses in this clearing, there is a Gravestone, similar to the one found in the Western Bracilian Forest. Inspecting it, the Warden will find that "the air seems unnaturally cold around this ancient tombstone. Runes of warding are carved into the surface". If the Warden choses to "Disturb the Wards", then The Mage's Treasure quest is added to the journal, the Codex Entry: Legend of the Juggernaut is unlocked, and the party will be attacked by a Revenant and his undead minions.
- Once The Mage's Treasure quest is added to the Journal, the Warden can travel back to the Western bracilian Forest to activate the Gravestone found there. Defeating that Revenant is one of the events in the Forest that triggers the spawning of new groups of enemies (Great Bears and Black Bears).
- Once the Mage's Treasure quest is obtained, if the Warden has received the Thy Brother's Killer quest, and leaves the Eastern Bracilian Forest, a group of Maleficar will spawn in the Northern Ancient Tombstone Clearing (towards the East-most path that leads to the Mad hermit Clearing).
- On the path between the Northern Ancient Tombstone Clearing and the Mad Hermit Clearing, the Warden can find Aneirin, for the Wynne's Regret quest.
The Mad Hermit
When the Warden approaches the Mad Hermit Clearing, he will teleport in the middle of the camp, swinging fists to the empty air, dancing and overall being faithful to his name. Engage him in dialogue, and he'll offer to help you reach the center of the Forest if you kill The Grand Oak in the Western Bracilian Forest. The Warden has now various options, as described in the Mad Hermit entry, to receive the help [s]he requires to cross the magical barrier in the Forest. They all involve a trip back to The Grand Oak so, keep your eyes open for newly spawned patrols in the Forest.
Southern Ancient Tombstone
On the other side of the Magic Barrier, the Warden will meet Swiftrunner once again. The dialogue may lead to more unanswered questions about the conforntation between the Dalish Elves and the Werewolves, but will also lead to an unavoidable fight with Swiftrunner and 3 Rabid Werewolves. When Swiftrunner's health gets too low, Witherfang will make an appearance, and bring the fighting to an abrupt end, allowing Swiftrunner to flee. Just ahead lies the Southern Ancient Tombstone.
Past the Southern Ancient Tombstone the Warden will have a brief encounter with another named werewolf, the Gatekeeper, and a couple of his aids. The run away before the Warden can do anything, but drop a hint about a "Lady" to be protected. Beyond this point lies the entrance to the Ruins, a.k.a. The Elven Tombs.
The Elven Tombs
The Ruins in the Forest include two levels leading to the werewolves' lair. See The Elven Tombs entry for other details.
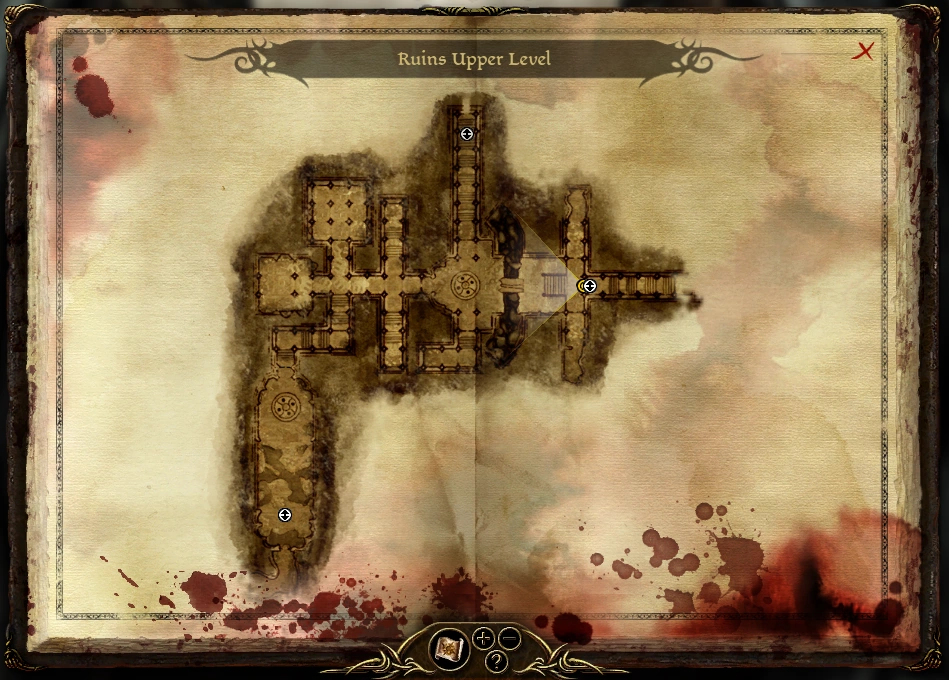
Ruins Upper Level
Map of the Ruins Upper Level
The Warden enters this level from the Eastern corridor, in a large room where a couple of Werewolves give the party their own brand of welcome. The stairs leading down and North-ward from this room lead to the Lair of the Werewolves, the Warden's objective. However, the door is locked and to reach the lair the Warden will have to travel through the upper and lower level of the Ruins to find a second entrance.
Notes:
- The Elven Tombs have many secret doors. They look like bricked-up arches, but once the party gets close enough, they are recognized for what they are. Loot and enemies are found behind these doors, and sometimes multiple doors are connected so that opening one will open a second door (behind you).
- One such secret door is found to the left of the first flight of stairs; a locked chest behind it yields a letter for the Correspondence Interruptus side quest.
- Watch out for Traps throughout the Ruins: keep a trap-making character up front to try and detect them.
The only way is beyond the door facing West, where the Warden will meet Giant Spiders, and Web Traps. Straight ahead, and to the North the Warden will find a couple of small rooms with columns, some Pile of Rubble and Cocoons. The party should follow the South branch, leading downstairs to a larger room with a few corpses laying around and a round mosaic in the center. There will be an Auto-Save, in case you need an extra hint. The room at the end of the stairs includes a number of traps surrounding the mosaic, and a Dragon that will swoop from above when the party crosses the mosaic. If the party includes a character that can disable traps, some of them can be rendered useless before starting the fight with the Dragon.
The Dragon may drop a generic armor chestpiece although it doesn't have any constant drops. The corpses, chests, and the Dragon's Hoard in the room will make up for it. The Hoard may yield Falon'Din's Reach and a Silver Medallion. Just past the traps, the Dragon and the loot a new flight of stairs will bring the Warden to the Lower Ruins.
Lower Ruins

Map of the Lower Ruins
The Warden enters this level from the Northern path in the middle of the map. The first thing the companions are likely to notice is a Ghostly Elf just ahead of the group. The spirit will move away as the party approaches, but a group of undead (Skeletons and corpses) will raise up and attack. The two side rooms just ahead hold more Skeletons, and the passage beyond that (just before the collapsed portion) will bring a Web Trap and Spiders.
The collapsed corridor will force the Warden to a detour East-ward, leading to a larger room with a round mosaic in the center. A group of undead will ambush the companions here. A side room contains a Sarcophagus that yields a Fancy Scroll, and a Tablet.
The group should continue East, and turn South-ward at the end of the corridor (North-ward to complete The Elven Ritual and subsequently The Mage's Treasure quests). A group of Skeletons will be waiting at the bottom of a flight of stairs. Once the group is defeated, a larger group of Skeletons will spawn around the party.
At the next crossing, the companions will meet 2 groups of undead (one from the side room to the East, the other from the corridor up ahead), while a third group waits behind the closed door to the West. The main path lies beyond that door.
Approach this door with care, since the large room behind holds many enemies (mostly Skeletons), and traps (5 pressure plates surround you as soon as you step through the door, just to get you started). Keep the group from entering the door, and pull the skeletons to you (they have archers so you may have to run behind a corner to force them closer, or close the door after getting their attention). If the party can disarm traps, do so between pulling groups; otherwise walk carefully each party member past the door and hugging the wall. The skeleton groups and traps don't stop right past the door, so keep an eye on the movement of your companions.
Once the room is disarmed, the party can move through the door on the West side, into the corridor that was beyond the collapsed section at the beginning of the level. A Metal Door (and an Auto-Save) lies ahead, leading to the largest room of the Lower Ruins. Skeletons of all kinds will greet the Warden past this point. Once the initial groups are dealt with, the party can descend the first flight of stairs into this enormous room. Don't let the statues and paraphernalia distract you, because an Arcane Horror will spawn as soon as the Warden gets close enough.
The Arcane Horror will teleport from one corner of the room to the other at regular intervals (speculation: it teleports away as soon as one of the companions gets within the stone circle where he is standing, making it impossible to melee? Answer: Let a couple of your party die and you can enter the stone circle without him teleporting away), making it difficult to close range. At the same time, a large number of Skeletons and Corpses from the surrounding balconies and ancillary passages will pour into the room and attack the party. Eventually, the skeletons will be dealt with, and the Arcane Horror can be burnt at range. He will drop (among other things), a pair of Ashen Gloves. More loot can be found down the flight of stairs facing South from this room (an Ancient Elven Armor, a Legacy White Shear)—one of the chests has a lock difficulty of Very Hard (60).
A few more Corpses await the Warden on the path heading North from this room, but the entrance to the Werewolf Lair is just past them.
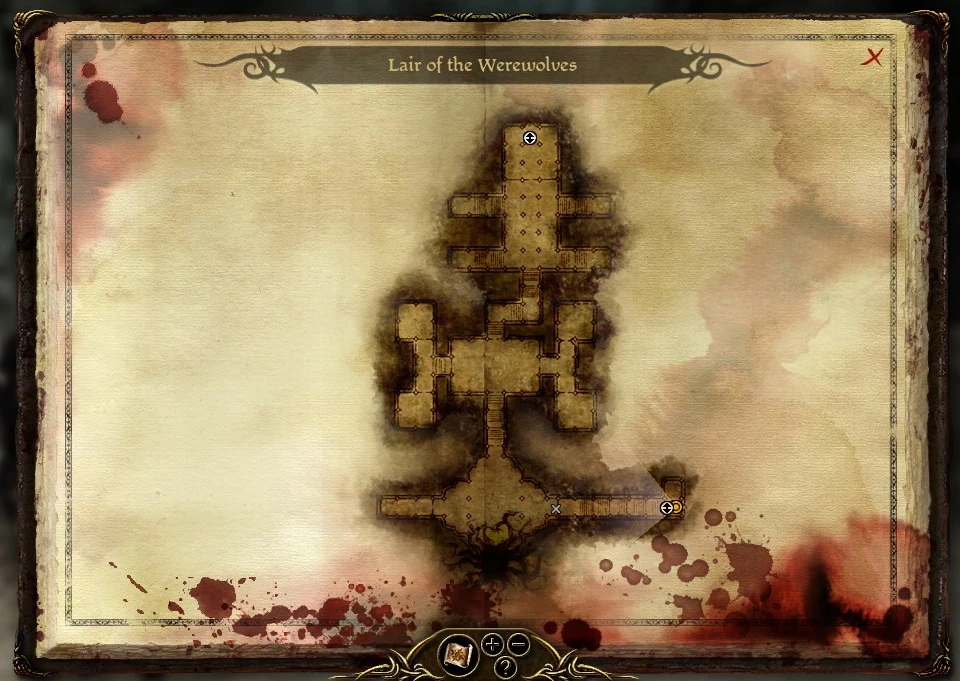
Lair of the Werewolves
Map of the Lair of the Werewolves
- See also: [[:Werewolf Lair|Werewolf Lair]]
The Warden enters the Lair through a passage in the Lower Ruins, arriving into the North-most room of the level, a small and safe area separated from the large room ahead by a door. Beyond the door, a large group of Werewolves and Shadow Werewolves stands guard and will attack as soon as the Warden opens the door. Once this group is defeated, the party can start exploring the large room ahead: be careful of traps and more Werewolves (including hidden Shadow Werewolves) sentinel ahead. The companions can use the barricades for cover and to lure the Werewolves to them when they are ready. The flights of stairs to the sides may yield some loot, but lead nowhere. The only option is to move forward and down the stairs headed South.
Past the door at the bottom of these stairs, the party will find Gatekeeper (and a couple of aids). He has been sent by The Lady to offer an opportunity to parley. The alternative, of course, is to attack the group.
From this point on, the Warden has a number of options available on how the quest line should be completed.
The Warden's Choices
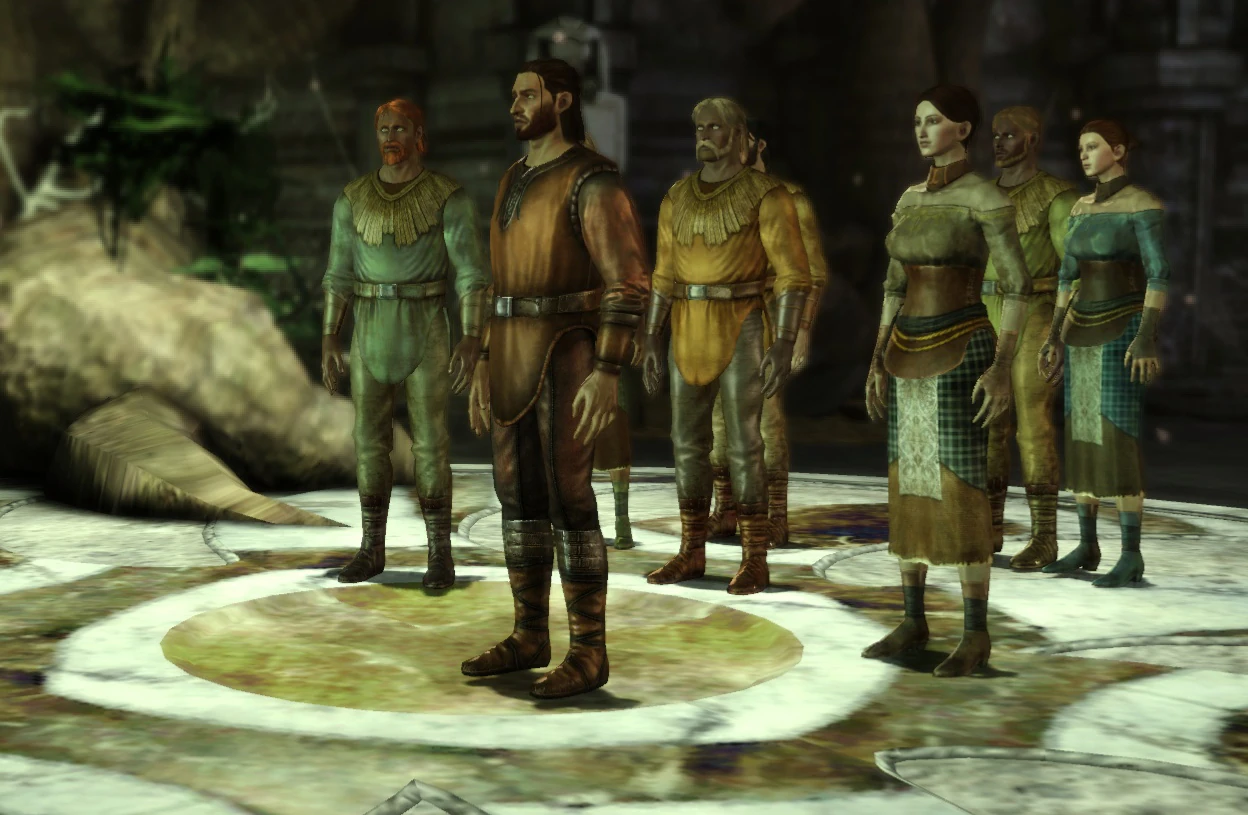
The conversation with The Lady of the Forest will explain the origin of the conflict between the Werewolves and the Dalish Elves: Zathrian cursed into Werewolf form a group of human settlers who had murdered his son and raped his daughter. The Werewolves currently in the Forest are not those who committed these crimes, but the unfortunates who wandered into the forest since. The Lady asks the Warden to bring Zathrian to the chamber so they may talk.
Ultimately, the Warden will have to side with the Werewolves, or the Elves. The decision will have an impact towards the forces available in the The Final Battle, as well as the approval of the Warden's Companions.
Siding with the Werewolves: Kill the Elves
One option is to Persuade the Lady that the best course of action is to kill all the elves. This is the only option that leads to the Werewolves siding with the Warden for the Final Battle. In addition, this course of action will trigger the following approval changes from the Companions:
 Morrigan approves (+4)
- Shale approves (+4)
- Alistair unaffected.
- Wynne disapproves (-3) (after 1 more persuasion check versus your companions)
- Leliana unaffected.
- Zevran strongly disapproves unless you pass a persuasion check with him and he loses no approval.
- May be Persuaded to avoid this drop in the approval rating.
Siding with the Elves: Kill the Werewolves
The Warden may agree to bring Zathrian to the Lady. In that case, the party will meet the Keeper as they exit the ruins. Once Zathrian is brought to the Lady the Warden can choose to engage the werewolves with Zathrian's help.
After the battle is over, the Warden may speak to Zathrian once again. If, before the fight, the Warden had asked for a reward in exchange of his/her help, the Keeper will give a Griffon's Beak.
Companions' approval changes when this course of action is selected:
- Morrigan approves (+2)
- Leliana disapproves (-10)
Double-Crossing Zathrian
The Warden may choose to side with the Elves but, once the fight with Witherfang is over, also attack Zathrian. He will be supported by 4 Sylvans, 2 Yellow Shades, and the remaining Werewolves. However, Zathrian does not heal at the end of the battle with Witherfang so he will be substantially damaged. This option leads to substantially more XP and loot than the other alternatives.
Convince Both Parties to Lift the Curse
Curse Lifted
If the Warden brings Zathrian to the Lady of the Forest, the idea of sacrificing both leaders to lift the curse will be raised(only after a forced fight with Zathrian, if you don't support him). Zathrian will then initiate a fight, pitting the Warden and his/her Companions with the support of Witherfang (initially paralyzed by a spell), and the Werewolves against Zathrian.
When the keeper's health is too low, he will give up and accept the sacrifice. The lady and Zathrian will die, the curse will be lifted, and all Werewolves will return to their original form.
Companions' approval changes when this course of action is selected:
- Oghren disapproves (-5)
- Alistair approves (+2)
- Morrigan approves (+2)
- Leliana approves (+6)
- Wynne approves (+7)
Double-Crossing the Werewolves
Once the curse is lifted, the Warden may chose to double-cross the former Werewolves. During the dialogue with Swiftrunner, after obtaining his shield as a reward, the Warden may say "Not enough", which will trigger an attack from all the former Werewolves in the area. The party may focus on Swiftrunner at first, since he is the only one doing any considerable damage.
Fighting Zathrian
The fight with Zathrian consists of two Greater Shades, several sylvans, and of course Zathrian himself, who is a powerful caster. The werewolves themselves cannot initially join in the fight because they are each encaged within a forcefield of sorts. To make the fight exponentially easier, have a party member cast a dispelling spell (such as Alistair's Cleanse Area) close to the werewolves to release them. Most of the werewolves should automatically engage Zathrian, interrupting many of his large AoE spells. Another strategy is to ignore all other enemies and focus on Zathrian, or to pull back into the side corridor to the right of the chamber, where Zathrian cannot reach you with his spells, and as he does not move unless you target him directly, and his backup is slow to react to your position, the fight becomes considerably easier. Note that the fight ends as soon as Zathrian is defeated; just hold out long enough for Witherfang and company to do their part.
Result
Once the curse has been lifted, not only are the ailing Dalish cured (if you did not kill them) but the werewolves again become human and immediately leave the ruin. If you sided with the elves, Lanaya (Zathrian's second) will agree to send troops to assist you in fighting the blight. If siding with the elves, once the werewolves have reverted back into humans, you can demand Swiftrunner's Shield as a reward. You are now free to explore the Forest to complete the Mage's Treasure Quest. The Mad Hermit's camp is now inhabited by bandits and the area beyond the forest barrier is now inhabited by reasonably-tough darkspawn.
If you decided to attack the Elves and side with the Werewolves, you will have Werewolves march to war with you at endgame rather than Elves. This will also mean losing access to the only infinite source of elfroot, deathroot and toxin extract in the game, Varathorn. So stock up in advance if you intend to follow this path. Also, if you enter the West Brecilian Forest at a later time, you may run into the rest of the Dalish elves who will confront you.
After this quest is completed, when you speak with Leliana at the party camp, she will sing "In Uthenera".
Side quests
There are four side quests that can be taken in the Dalish Camp once Nature of the Beast has been started. Some of them cannot be completed after resolving the werewolf/elf conflict. None of them can be completed if you side with the werewolves (as all the elves will be dead).
- Cammen's Lament — Ends upon return to camp if you did not visit Cammen prior to ending the curse. This quest is easily completed with a coercion skill of 3 though during your first encounter with Cammen prior to entering the Brecilian Forest.
- Elora's Halla — Can be completed at any time.
- Lost to the Curse — Speak to Danyla's husband before entering the Forest; complete by discussing her fate with him upon your return.
- Rare Ironbark — Begin this before you enter the Forest; it will remain open after completing the main quest.
Codex objects
These entries can be unlocked in other areas before reaching this area.
- One of The Black Vials
- One of the pieces of Ancient Elven Armor
Notes
- Stealing from the Hermit's tree stump will result in him turning hostile, forcing you to kill him. However, you actually steal the acorn, so the quest can be continued.
- When you find the Arcane Warrior phylactery, it will begin vibrating. If you say, Nah, you may have a use later, it will stop vibrating & the light will go away. However, you still get to choose the Specialization. On the Xbox, the Phylactery might remain clickable without being usable.
- On the console version, you can gain the Slayer achievement even if you side with the Elves. Save the game before entering the lair and after you gain Slayer. Reload and then choose to slay the wolves, you will keep the achievement yet choose to aid the Elves. (This is true for all achievements on all platforms--once unlocked always unlocked. The other common situations where this is used include acquiring the Blood Mage and Reaver specializations. Or, you could actually finish a playthrough without infinite elfroot to spam potions...)
- When agreeing to find Zathrian, before you leave you may be able to kill the werewolves surrounding the Lady of The Forest with the exception of Witherfang, this can be accomplished by casting a 4th tier area of effect spell like Inferno, you'll get extra experience and loot without actual battle (however doing so will also result in a lack of support inthe battle against Zathrian as they are all dead. (tested on PC, patch 1.02)
- The humans who result from lifting the curse all have greenish-yellow eyes, have longer than normal hair (as well as the men having pronounced facial hair), run with a loping gait and somehow recover their clothes despite being formerly naked.The effects may be an irreversible side effect of the curse, whilst either Zathrian or the Lady may have generated clothes for them.
Bugs
- Trading the Hermit for the Acorn will allow the Warden to loot the tree stump, receiving the Golden Ring instead of the Acorn.
- After movie of the cure, you might not be able to exit; the doors somehow lose their activation icon. Save and reload game.
- (XBox) Some players have reported a glitch where werewolf pelts disappear from inventory, preventing access to the ruins through the Hermit. Only matters if the player has already killed the Grand Oak.
- Talk to the Grand Oak before killing the hermit (or checking the stump, which will force his death). If he dies first, you can be stuck without a way to complete the quest; the Hermit will be dead, the stump useless, leaving you no way to cross the barrier.
- (PS3) When siding with the werewolves, it is possible to get blocked from completing the Nature of the Beast quest. Only Swiftrunner and Witherfang appear, standing near the forest entrance after the battle. This can happen when the battle ends prematurely if not all the elves in the Dalish camp are defeated. To ensure this does not happpen, make sure you run into all the elves by checking around the area. A cutscene should play shortly after all the elves are defeated.
- Trading the hermit for the helmet then saving and reloading the game will glitch the game, it will allow you to talk to the Grand Oak with the option as if you had the acorn. Proceeding with the option will not cause you to lose the helmet, and it will proceed as if you traded for the acorn. However talking to the Hermit will still result in him saying he still has the book and the acorn. You can still advance normally without actually getting the acorn from the hermit. (Tested on the X-box 360).
- (PS3) Even when using Cleanse Area and releasing some of the werewolves from being "paralyzed " they do not engage Zathrian and continue standing where they were for the entire battle.