Theophilis (talk | contribs) (Please do NOIT remove which quests will no longer be doable, links to this page specify to look into the page note for additional help in what needs to be completed prior to going to skyhold.) Tag: Visual edit |
Theophilis (talk | contribs) No edit summary Tag: Visual edit |
||
| Line 23: | Line 23: | ||
}}</onlyinclude> |
}}</onlyinclude> |
||
| − | '''In Your Heart Shall Burn''' is a [[ |
+ | '''In Your Heart Shall Burn''' is a [[Quests (Inquisition)|main quest]] in ''[[Dragon Age: Inquisition]]'', featuring the Herald closing the Breach with the help of their new allies. Although seemingly a successful operation, the events later take an unexpected turn as Haven is attacked by unknown enemy forces. |
| − | {{Blockquote|''With the |
+ | {{Blockquote|''With the Inquisition's hard-won allies, it is time to march on the Breach and close it.''}} |
{{Note|This quest marks a major point of no return. After accepting this quest, certain quests and content, as well as access to Haven, will no longer be available; see [[In Your Heart Shall Burn#Notes|Notes]] for details.}} |
{{Note|This quest marks a major point of no return. After accepting this quest, certain quests and content, as well as access to Haven, will no longer be available; see [[In Your Heart Shall Burn#Notes|Notes]] for details.}} |
||
| Line 50: | Line 50: | ||
If the mages were recruited, the enemies will consist of [[red templars]], led by [[Samson]]. If the templars were recruited, the enemies will consist of the [[Venatori]], with Calpernia leading them. |
If the mages were recruited, the enemies will consist of [[red templars]], led by [[Samson]]. If the templars were recruited, the enemies will consist of the [[Venatori]], with Calpernia leading them. |
||
| − | {{Note| |
+ | {{Note|If you are playing on higher difficulties, it is recommended that you avoid using the supply cache at the north trebuchet if at all possible until after the cutscene in the Chantry.}} |
=== Defend the north trebuchet === |
=== Defend the north trebuchet === |
||
| Line 62: | Line 62: | ||
=== Return to the gates === |
=== Return to the gates === |
||
| − | {{Note|All of the rescues must be done quickly, however there is no rush in between rescues, |
+ | {{Note|All of the rescues must be done quickly, however there is no rush in between rescues. Thus, there is time to gather loot from fallen enemies as long as the next rescue hasn't triggered.}} |
==== Help Harritt ==== |
==== Help Harritt ==== |
||
| Line 73: | Line 73: | ||
Immediately move up the stairs and to the right to rescue Lysette. She will be fighting a couple enemies initially, but more will climb over the nearby wall. |
Immediately move up the stairs and to the right to rescue Lysette. She will be fighting a couple enemies initially, but more will climb over the nearby wall. |
||
| − | {{Note|If |
+ | {{Note|If you ignore Lysette, she will still survive Haven and be present in Skyhold.}} |
==== Rescue Seggrit ==== |
==== Rescue Seggrit ==== |
||
| Line 102: | Line 102: | ||
If all six townspeople were helped/rescued (only party members): |
If all six townspeople were helped/rescued (only party members): |
||
| − | + | *'''''Varric {{Approval3|Greatly Approves}}''''' |
|
:*'''''Vivienne {{Approval3|Approves}}''''' |
:*'''''Vivienne {{Approval3|Approves}}''''' |
||
| − | If |
+ | If you don't save all six townspeople, but do manage to save at least one (only party members): |
| − | + | *'''''Varric {{Approval3|Slightly Approves}}''''' |
|
| − | :*'''''Vivienne {{Approval3|Slightly Approves}} |
+ | :*'''''Vivienne '''''{{Approval3|Slightly Approves}} |
Enter the chantry and a scene will play in which a wounded [[Roderick Asignon|Chancellor Roderick]] ushers in the party and other survivors. After a bit of discussion, it is learned that the Herald is likely the target of the Elder One, and not the entire Inquisition. |
Enter the chantry and a scene will play in which a wounded [[Roderick Asignon|Chancellor Roderick]] ushers in the party and other survivors. After a bit of discussion, it is learned that the Herald is likely the target of the Elder One, and not the entire Inquisition. |
||
| Line 145: | Line 145: | ||
Several scenes will play out. In the first, the advisors are arguing while the Herald speaks to [[Mother Giselle]]. The first set of choices do not have any impact, but the second set may affect the choices in the ceremony at Skyhold and establish whether the Herald is considered "faithful" or "non-faithful" by the game. However, it appears that the [[Cassandra Pentaghast/Approval#Did I do the right thing?|first cutscene conversation]] with Cassandra in Haven where she asks the Herald if they believe in the Maker has a huge impact on whether it is possible to establish the Herald as non-faithful. |
Several scenes will play out. In the first, the advisors are arguing while the Herald speaks to [[Mother Giselle]]. The first set of choices do not have any impact, but the second set may affect the choices in the ceremony at Skyhold and establish whether the Herald is considered "faithful" or "non-faithful" by the game. However, it appears that the [[Cassandra Pentaghast/Approval#Did I do the right thing?|first cutscene conversation]] with Cassandra in Haven where she asks the Herald if they believe in the Maker has a huge impact on whether it is possible to establish the Herald as non-faithful. |
||
| − | {{Note| |
+ | {{Note|Found that the choice in the conversation with Chancellor Roderick, Cassandra and Leliana tends to set whether player is faithful, not faithful, or peaceful.}} |
'''Mother Giselle: That is hard to accept, no? What "we" have been called to endure? What "we", perhaps, must come to believe?''' |
'''Mother Giselle: That is hard to accept, no? What "we" have been called to endure? What "we", perhaps, must come to believe?''' |
||
| + | <br /> |
||
| ⚫ | |||
| ⚫ | |||
| − | :*I believe, but it didn't help - '''''Confirms belief''''' |
||
| ⚫ | |||
| ⚫ | |||
| − | :*I've lost faith. - '''''Confirms belief'''''}} |
||
| − | + | * ''<u>If the Herald previously answered that they believe in the Maker:</u>'' [Investigate options]: I didn't die and come back./Should we believe Corypheus? (leads to "He said the heavens are empty") |
|
| − | + | ** We need more than faith. - Confirms belief |
|
| − | + | ** I believe, but it didn't help - Confirms belief |
|
| − | + | ** Fanatical belief is to blame. - Confirms belief |
|
| − | + | ** This is a waste of time. - Confirms belief |
|
| − | + | ** I've lost faith. - Confirms belief |
|
| + | <br /> |
||
| ⚫ | |||
| + | |||
| ⚫ | |||
| ⚫ | |||
| + | ** I believe, but is that enough? (may say "I want to believe" instead) - Establishes belief |
||
| ⚫ | |||
| ⚫ | |||
| + | ** I still don't believe. - Confirms non-belief <br /> |
||
| + | * If the Herald previously answered that they they didn't know: [Investigate options]: I didn't die and come back./Should we believe Corypheus? (leads to "He said the heavens are empty") |
||
| + | ** We need more than faith. - Confirms peaceful. |
||
| + | ** I believe, but is that enough? (may say "I want to believe" instead) - Establishes belief |
||
| + | ** Fanatical belief is to blame. - Confirms ''uncertain''. |
||
| + | ** This is a waste of time. - Confirms non-belief |
||
| + | ** I still don't believe. - Confirms non-belief |
||
| + | |||
| + | |||
| ⚫ | Only a '''faith-based''' Inquisitor will be able to declare the Inquisition for '''faith (I'll be a servant of faith.)''' at Skyhold. Conversely, a '''non-faith''' based Inquisitor will be able to declare the Inquisition for '''order (I fight for order, not faith.).''' And finally, a peaceful Inquisitor can declare for either '''order (I fight for order, not faith.) /or/ Inquisition (I'll do it because it's right.).''' Each answer effects Divine election differently. |
||
Afterwards, Solas will ask the Herald for a word in private. He will explain that the orb Corypheus wields is of elven origin. Solas' dialogue will differ and the conversation options will give different approvals if the Inquisitor is Dalish. |
Afterwards, Solas will ask the Herald for a word in private. He will explain that the orb Corypheus wields is of elven origin. Solas' dialogue will differ and the conversation options will give different approvals if the Inquisitor is Dalish. |
||
| Line 255: | Line 266: | ||
:{{:Rune Crafting|style=iconmini}} |
:{{:Rune Crafting|style=iconmini}} |
||
| − | + | Unlock five [[Skyhold Customization Items]]: |
|
:{{:Inquisition Throne|style=iconmini}} |
:{{:Inquisition Throne|style=iconmini}} |
||
:{{:Basic Drapery|style=iconmini}} |
:{{:Basic Drapery|style=iconmini}} |
||
| Line 327: | Line 338: | ||
== Notes == |
== Notes == |
||
| − | * [[War table]] operations started at [[Haven]] and are "in progress" when the quest is started will show up as completed or may still remain "in progress" on the [[Skyhold]] war table |
+ | * [[War table]] operations started at [[Haven]] and are "in progress" when the quest is started will show up as completed or may still remain "in progress" on the [[Skyhold]] war table, some War table missions will need be completed prior to starting this quest. |
* The two opportunities to soften [[Softened|Leliana]] are no longer available after accepting this mission. |
* The two opportunities to soften [[Softened|Leliana]] are no longer available after accepting this mission. |
||
* [[Codex (Inquisition)|Codex entries]] from Haven that have not yet been obtained prior to completion of this quest will become available for purchase from [[Willvan]] in [[Val Royeaux]] for {{CurrencyInquisition|17}} after the Inquisition relocates to Skyhold. |
* [[Codex (Inquisition)|Codex entries]] from Haven that have not yet been obtained prior to completion of this quest will become available for purchase from [[Willvan]] in [[Val Royeaux]] for {{CurrencyInquisition|17}} after the Inquisition relocates to Skyhold. |
||
| + | *[[Clemence]] will not be available as an agent after this point, you can find him in the Redcliff tavern. |
||
*Quests [[Templars to the West]], and [[Apostates in Witchwood]] need to be completed prior to doing this quest, other wise they will be moved to completed or unable to attain after this point. |
*Quests [[Templars to the West]], and [[Apostates in Witchwood]] need to be completed prior to doing this quest, other wise they will be moved to completed or unable to attain after this point. |
||
| − | * |
+ | *[[Blackwall]] Can still be recruited after this point, however you will lose some interesting details. |
| − | * |
+ | *[[Iron Bull]] Can still be recruited after this point, however, if [[Cremisius Aclassi]] (Krem) gets bugged and doesn't show up at the tavern in [[Skyhold]], then you will not be able to recruit him. |
| + | *[[Belle]] Needs to be recruited before leaving [[Val Royeaux]] the first time, she will never show up again. |
||
== Trivia == |
== Trivia == |
||
Revision as of 09:45, 30 December 2020
In Your Heart Shall Burn is a main quest in Dragon Age: Inquisition, featuring the Herald closing the Breach with the help of their new allies. Although seemingly a successful operation, the events later take an unexpected turn as Haven is attacked by unknown enemy forces.
With the Inquisition's hard-won allies, it is time to march on the Breach and close it.
Acquisition
The quest is automatically acquired after the conclusion of either Champions of the Just or In Hushed Whispers.
Walkthrough
[Join forces with your new allies to assault the heart of the Breach and close it once and for all. Recommended Levels: 8 to 11]
Closing the Breach
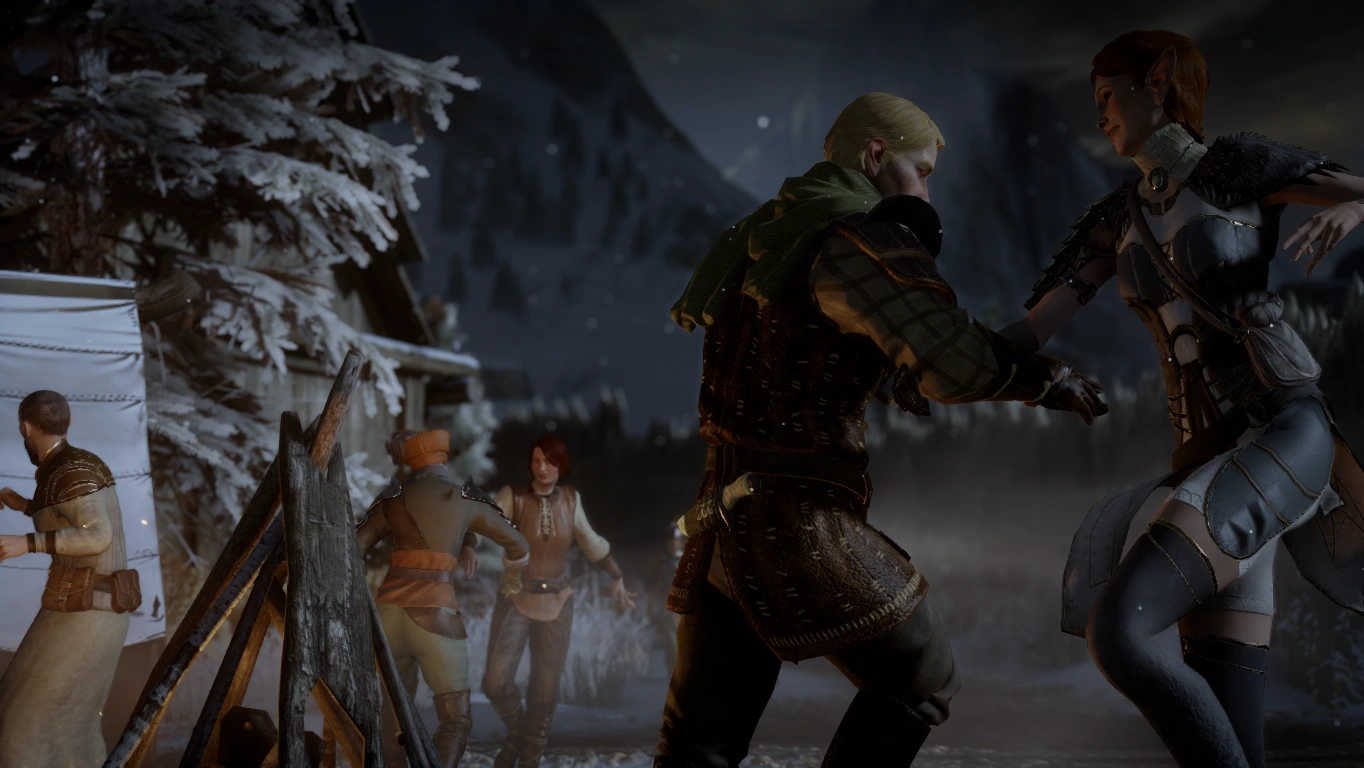
People celebrating closing the Breach
A scene of the Herald, along with the chosen allied force (Templars or Mages), closing the Breach will play. The scene will then shift to Haven, as everyone celebrates the Inquisition's success. The festivities are soon interrupted as an unknown force can be seen marching towards them in the distance.
Head to the gates
Before heading to the gate, take a moment to note the location of some of Haven's townspeople. Threnn is right behind the party by the requisition table, along with a Supply Cache. Seggrit is just ahead at the top of the stairs. Heading to the left, Flissa will be at her usual spot in the tavern. And heading past the tavern, Adan and Minaeve can be found in the general area where Solas is usually at. Head towards the main gate, and after descending the stairs, turn left and note Lysette's position. All of these townspeople will need to be saved later.
When ready, head to the main gate and a scene plays. Either Dorian or Cole will ask for the gate to be opened:
Either way, the Herald will see the Elder One for the first time. A plan to use the trebuchets to attack the invading force is then formed.
If the mages were recruited, the enemies will consist of red templars, led by Samson. If the templars were recruited, the enemies will consist of the Venatori, with Calpernia leading them.
Defend the north trebuchet
There is a gauge in the upper right corner. The party will need to defend the trebuchet crew by defeating a total of three enemy waves. The gauge will increase by one-third after each wave is eliminated. After the final wave, the trebuchet is fired and the party is told that the southern trebuchet isn't firing and they will need to investigate. As with much of this quest, be sure to grab any drops before proceeding to the next stage as there will be no going back to get them later.
Retake the south trebuchet
There is a supply cache near the smithy. There will be a group of enemies surrounding the trebuchet. Another group will approach from the southwest as soon as the first group is defeated. There is another supply cache to the right of the trebuchet.
Man the trebuchet
The wheel on the trebuchet must then be turned until the gauge is full. A cutscene plays of the shot connecting with the mountainside, causing an avalanche that envelops much of the enemy force. Soon after, a dragon flies overhead and destroys the trebuchet.
Return to the gates
Help Harritt
On the way back to the gates, the blacksmith, Harritt, will ask for help getting into the nearby building. This begins the sub-quest, Evacuating Haven. Destroy the boxes that are blocking the door - a warrior can break them with their weapon or a mage can Mind Blast in close proximity. A rogue archer can use Explosive Shot. It is advised to save manually before proceeding to the main gate to meet up with Cullen and after each rescue that follows.
Regroup at the Chantry
Note that rescuing Haven's townspeople is entirely optional, but the rewards are substantial. Each townsperson rescued is worth 128 XP and 80 Influence. After being rescued, each townsperson will head to the Chantry. It is useful to save the game after each rescue to minimize redoing work if a rescue is botched, particularly Adan and Minaeve.
Rescue Lysette
Immediately move up the stairs and to the right to rescue Lysette. She will be fighting a couple enemies initially, but more will climb over the nearby wall.
Rescue Seggrit
Stick to the left side of the stairs, turn left at Varric's campfire and approach the burning building to hear Seggrit call out for help. Even sticking to the left side, it's possible the nearby enemies will engage. Consider ordering the party to hold position at the bottom of the stairs.
There are a few potential ways to rescue Seggrit.
- climb up the ladder left of the building, go down the "catwalk" and jump into the house through the roof. Rescue Seggrit and destroy the boxes blocking the door to escape.
- climb onto the barrel at the right corner of the building, then onto the adjacent stack of wood. Jump to the top of the stack and into the building.
- destroy the boxes from the outside
- a warrior with Charging Bull
- a mage with Mind Blast
- a rogue with Explosive Shot
Make sure to loot the large chest before exiting.
Rescue Flissa
Move straight ahead to encounter the next group of enemies, if they weren't already killed. If the party gets too close to the tavern, then Flissa's rescue will trigger, and there's not a lot of time to get to her before the roof collapses. Command the party to hold position and let the enemies come to them. Another group will jump over the wall as the party gets close to the tavern entrance. Enter the tavern and perform the rescue. Do not let the fighting move past the tavern, or Adan and Minaeve's rescue will trigger too soon. Move the party and engage enemies inside the tavern if necessary.
However, this rescue will only trigger during the fight if your controlled character moves too close to the tavern. This means it is possible to clear out the enemies before triggering Flissa's rescue by controlling a ranged attacker, such as an archer or mage, and staying back from the tavern as soon as the enemies spawn on the ramparts. Party members that are not controlled can approach the tavern without triggering the rescue. This gives plenty of time to rescue Flissa and leave by the tavern's front door, not the side door, which also avoids accidentally triggering the rescue of Adan and Minaeve.
Rescue Adan and Minaeve
There is not a lot of time to do this. After the previous battle is over, run up the stairs and do not stop. The dragon will launch a fireball and light the nearby buildings on fire. Adan will yell that fire is approaching the pots. If it reaches the pots, they will explode and one or both will die (NOTE: Rescue Adan first, as he inevitably dies if he does not get away from the pots when they explode - whereas Minaeve has a better chance of surviving the explosion.) There really is just barely enough time to rescue both of them. Consider ordering the party to hold position on the stairs to make sure they don't get in the way, or ordering a party member to hold position next to Minaeve so you can switch to them quickly once Adan has been saved. There is a supply cache in front of the apothecary and a large loot chest inside.
Rescue Threnn
Move to the front of the Chantry. Kill the enemies and make sure she survives.
If all six townspeople were helped/rescued (only party members):
- Varric
 Greatly Approves
- Vivienne Approves
- Vivienne
If you don't save all six townspeople, but do manage to save at least one (only party members):
- Varric
 Slightly Approves
- Vivienne Slightly Approves
- Vivienne
Enter the chantry and a scene will play in which a wounded Chancellor Roderick ushers in the party and other survivors. After a bit of discussion, it is learned that the Herald is likely the target of the Elder One, and not the entire Inquisition.
Dorian: From what I gathered in Redcliffe, it marched all of this way to take your Herald.
Cole: The Elder One doesn't care about the village. He only wants the Herald.
- I'd give myself to save Haven. - Varric Approves; Blackwall Slightly Approves; Sera Slightly Disapproves; Solas Disapproves
- Why? Why does he want me? - Solas Slightly Approves
- How do I stop him? - Vivienne/Iron Bull Slightly Approves
- I'd give myself to save Haven. - Varric
Roderick will suggest that a secret path out of the chantry could be used by the Inquisition to escape. Meanwhile, the Herald intends to bury Haven using another trebuchet shot at the mountainside.
Roderick: She must have shown me. Andraste must have shown me so I could... tell you.
- Q What do you mean?
- Cullen, can you get them out?
- Rocks won't stop a dragon. - Varric/Sera Slightly Approves
- Go. I'll distract them.
Reach the trebuchet
Several enemies will approach the party. Once they're dealt with, move towards the spot where Varric hung out and eliminate another group. As the party approaches the trebuchet, a couple groups of enemies will appear. There is a supply cache near the trebuchet.
Aim the trebuchet


Elder One and his dragon
As soon as a party member begins turning the wheel, the radar will show enemies approaching but they don't arrive all at once. The wheel can only be turned so much, and then a larger group of enemies will spawn who need to be eliminated before the trebuchet can be rotated further. This pattern will repeat two more times. In the third enemy group either Knight-Captain Denam or Fiona will appear. They are both Elite rank. Once the third group has been dispatched, the trebuchet can be fully aimed without further interruption.
There are walls in front of the wood fences which can be reached by a cluster of rocks near the trebuchet and used for ranged/AoE attacks. They can also cause enemies to run into the stronghold and cluster together outside the tavern. AoE spells are very effective from this position. It is a good idea to keep your party clustered together at the start of each wave until as many enemies as possible are close enough to be taunted into attacking your warrior(s). Once enemy focus is on the warriors, move your mage and rogue party members out of the line of fire. In the last wave, focus on the lesser enemies and save Knight-Captain Denam or Fiona for last. Take out any archers first as they can do significant damage with one shot.
Once the trebuchet is fully aimed a scene plays in which the Herald will speak to the Elder One and learn his true identity as Corypheus. The Herald fires the trebuchet, and an avalanche consumes Haven. The Herald falls underground as the scene ends.
Find a way forward
Continue moving forward and eventually a group of demons spawns. A tutorial will begin on focus abilities, and the Mark of the Rift ability will be unlocked and automatically assigned to the quick bar, overwriting the first slot.
The cavern exit will soon be reached after the battle. Move ahead slowly, possibly examining a couple of abandoned campfire pits, until lights can be seen on the horizon.
Several scenes will play out. In the first, the advisors are arguing while the Herald speaks to Mother Giselle. The first set of choices do not have any impact, but the second set may affect the choices in the ceremony at Skyhold and establish whether the Herald is considered "faithful" or "non-faithful" by the game. However, it appears that the first cutscene conversation with Cassandra in Haven where she asks the Herald if they believe in the Maker has a huge impact on whether it is possible to establish the Herald as non-faithful.
Mother Giselle: That is hard to accept, no? What "we" have been called to endure? What "we", perhaps, must come to believe?
- If the Herald previously answered that they believe in the Maker: [Investigate options]: I didn't die and come back./Should we believe Corypheus? (leads to "He said the heavens are empty")
- We need more than faith. - Confirms belief
- I believe, but it didn't help - Confirms belief
- Fanatical belief is to blame. - Confirms belief
- This is a waste of time. - Confirms belief
- I've lost faith. - Confirms belief
- If the Herald previously answered that they did not believe in the Maker. [Investigate options]: I didn't die and come back./Should we believe Corypheus? (leads to "He said the heavens are empty")
- We need more than faith. - Confirms non-belief.
- I believe, but is that enough? (may say "I want to believe" instead) - Establishes belief
- Fanatical belief is to blame. - Confirms non-belief
- This is a waste of time. - Confirms non-belief
- I still don't believe. - Confirms non-belief
- If the Herald previously answered that they they didn't know: [Investigate options]: I didn't die and come back./Should we believe Corypheus? (leads to "He said the heavens are empty")
- We need more than faith. - Confirms peaceful.
- I believe, but is that enough? (may say "I want to believe" instead) - Establishes belief
- Fanatical belief is to blame. - Confirms uncertain.
- This is a waste of time. - Confirms non-belief
- I still don't believe. - Confirms non-belief
Only a faith-based Inquisitor will be able to declare the Inquisition for faith (I'll be a servant of faith.) at Skyhold. Conversely, a non-faith based Inquisitor will be able to declare the Inquisition for order (I fight for order, not faith.). And finally, a peaceful Inquisitor can declare for either order (I fight for order, not faith.) /or/ Inquisition (I'll do it because it's right.). Each answer effects Divine election differently.
Afterwards, Solas will ask the Herald for a word in private. He will explain that the orb Corypheus wields is of elven origin. Solas' dialogue will differ and the conversation options will give different approvals if the Inquisitor is Dalish.
- Q How do you know this? (repeat w/o option) - Solas Slightly Approves
- I won't worry. They trust me. - No approval
- Lost here, it won't matter. - No approval
- They'll blame us eventually. - Solas Slightly Approves
- Q How do you know this? (repeat w/o option) - Solas Slightly Approves
- You're right to be worried. - Solas Slightly Approves
- Lost here, it won't matter. - No approval
- So prove yourself. - No approval
- You're right to be worried. - Solas
Solas will inform the Herald of a place that the Inquisition can rebuild: Skyhold.
The Ceremony
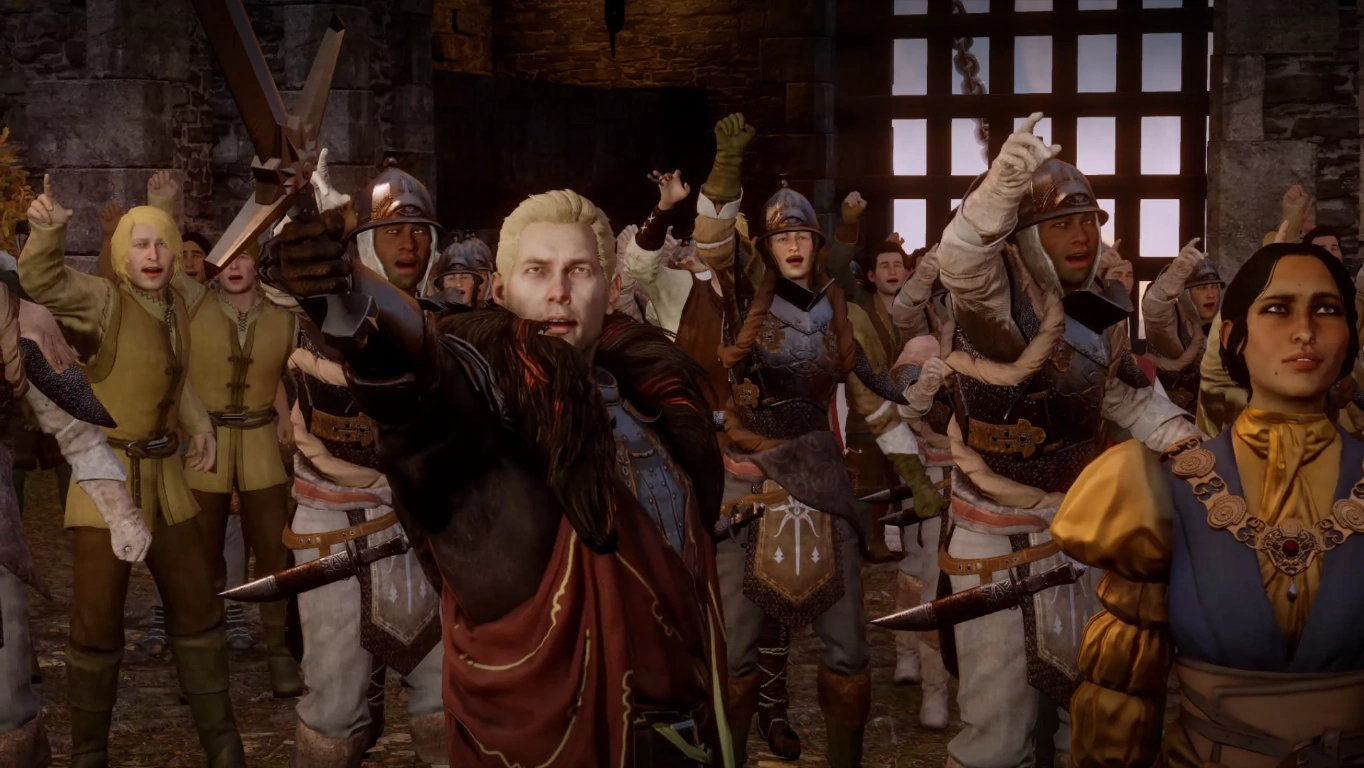

Cullen and others enjoying selection of the new Inquisitor
A scene plays in which the Herald is named the Inquisitor. The dialogue choices here can be affected by whether the Herald is faithful or non-faithful, as well as the choice made during the earlier conversation with Mother Giselle.
Cassandra: You.
- (Surprised) But I'm not your chosen one! - Vivienne Slightly Disapproves
- (Pleased) I'm honored./My faith is rewarded. - Cassandra Slightly Approves
- (Confused) Everyone agreed to this?
- But I'm not even human. (non-human only)
- You trust this to a mage? (mage only)
- (Mad) I don't want this! - Blackwall Disapproves
- (Surprised) But I'm not your chosen one! - Vivienne
Cassandra: There would be no Inquisition without you. How it will serve, how you lead: that must be yours to decide.
- Race/class restricted:
- A dwarf will stand for us all. (Dwarven only) - Sera Approves;
- Divine Election - Leliana +1, Cassandra -1, Vivienne -1
- Declares the Inquisition for the Inquisitor
- An elf will stand for us all. (Elven only) - Solas Slightly Approves; Sera Disapproves; Dorian Slightly Approves
- Divine Election - Leliana +1, Cassandra -1, Vivienne -1
- Declares the Inquisition for the Inquisitor
- A qunari will stand for us all. (Qunari only) - Sera Approves; Iron Bull Approves; Dorian Slightly Approves
- Divine Election - Leliana +1, Cassandra -1, Vivienne -1
- Declares the Inquisition for the Inquisitor
- I'll set an example as a mage. (Mage only) - Dorian Approves; Solas/Sera Slightly Approves; Vivienne Greatly Approves
- Divine Election - Leliana +1, Vivienne +5
- Declares the Inquisition for the Inquisitor
- A dwarf will stand for us all. (Dwarven only) - Sera
- Faithful only:
- I'll be a servant of faith. - Cassandra Greatly Approves; Vivienne Approves; Solas/Sera Disapproves, Dorian Slightly Disapproves
- Divine Election - Cassandra +5, Vivienne +1
- Declares the Inquisition for Faith
- I'll be a servant of faith. - Cassandra
- Non-faithful only:
- I fight for order, not faith. - Varric Slightly Approves; Cassandra/Sera Approves
- Divine Election - Cassandra +1, Vivienne -1
- Declares the Inquisition for Order
- I'll do it because it's right. - Sera Greatly Approves; Blackwall Approves; Varric/Solas/Iron Bull Slightly Approves
- Divine Election - Leliana +5
- Declares the Inquisition for the Inquisitor
- I fight for order, not faith. - Varric
- Available to all:
- Corypheus must be stopped. - Dorian Greatly Approves; Sera Approves; Iron Bull/Blackwall Slightly Approves
- Declares the Inquisition for the Inquisitor
- I will lead them to vengeance. - Sera Approves; Cassandra/Solas/Iron Bull Slightly Disapproves; Varric Disapproves
- Divine Election - Leliana +1, Vivienne -5
- Declares the Inquisition for the Inquisitor
- I'll do it for my own power. - Cassandra/Varric/Solas/Sera/Blackwall Greatly Disapproves; Dorian Disapproves
- Divine Election - Leliana +5, Cassandra -1
- Declares the Inquisition for the Inquisitor
- Corypheus must be stopped. - Dorian
The quest ends as the Inquisition plans its next move.
Rewards

Skyhold scene concept
Completing the quest yields:
- 971 XP
- Influence 2,000
Each towns-person rescued yields:
- 128 XP
- Influence 80
Results
Haven is destroyed and can no longer be accessed.
- The Inquisition relocates to Skyhold.
- The Elder One is revealed.
Unlocks three "Skyhold introduction" side quests:
Unlock five Skyhold Customization Items:
The following quests are no longer available after initiating In Your Heart Shall Burn:
The following war table operations are no longer available:
After initiating In Your Heart Shall Burn
- Address a Nobleman's Concerns
- Red Jenny says "Drop and Grab"
- The Chantry Remains
- The University of Orlais
- Grand Cleric Iona
- The Cult of Andraste
- The Secrets of Andraste
- Upon the Waking Sea
After the main quest In Hushed Whispers is completed
After the main quest Champions of the Just is completed
Tips for harder difficulties
This quest can be very challenging on harder difficulties. Here are some tips to make completing the quest easier on hard or nightmare.
Supply caches
It is highly recommended that you save as many of the supply caches inside Haven until after the cutscene in the chantry. (Supply caches in the first part of the quest, outside Haven's walls, will not be accessible later and can be used freely.) Your party will be brought to full health and resupplied after the cutscene, but you will face a series of hard fights after that point, and conserving the supply caches will let you refill in between waves as needed.
Crafting
It is a good idea to make use of the crafting system before beginning the quest. Crafting grants access to equipment with better base statistics than you will get from loot, particularly since crafted equipment has no level restrictions. Using even low tier materials with high tier schematics gained by synchronizing with the Golden Nug will also produce significantly better than base armor and weapons. Affordable schematics can be bought from the Dwarven Bookseller in Redcliffe. If you have gold to spare, you can buy higher-tier but more expensive schematics from the schematics merchant in Val Royeaux, but the Redcliffe schematics should be good enough even on nightmare.
Focus on crafting weapons that give "% chance to heal on kill" (by using cotton or samite in a cloth offense slot in a weapon schematic) and armour that gives a healing bonus (by using cotton in a cloth defense slot in an armour schematic). This gives a character a chance to heal some or all of the damage they've received every time they defeat an enemy, which means you can save potions for when you really need them. If you're still having trouble, consider using drakestone or summer stone in a metal defense slot to boost a character's maximum health.
Party set up
Your party set up will greatly impact your survival. Here are two potential set ups to help you survive the quest, depending on your preferred play style.
Option 1:
Set up a party of two mages and two warriors. There are no locks to open during the quest so you don't lose anything by not taking a rogue. The warriors should both have weapon and shield abilities and equipment. Set taunting abilities such as War Cry and Challenge as preferred abilities in your warriors' tactics; these will keep enemies focussed on the warriors while also generating guard to protect them.
Having two mages allows you to have each mage renew the party's barrier each time it falls, while you wait for the other mage's barrier ability to reset. It is a good idea to keep active control of a mage to avoid them both casting barriers at the same time which may leave you stuck without a barrier just when you need it. If an enemy targets a mage, have them use mind blast or an ability that causes panic such as Flashfire to get away (note: Flashfire may not panic fire-resistant enemies). Use the tactical camera to move your mages out of the line of fire and use your warriors' taunting abilities to keep enemies clustered around them.
The downside to this option is that disengaging from enemies if you find yourself overwhelmed can be very difficult. This option works best in combination with the crafted gear described above to help keep the party alive.
Option 2:
Have an archer rogue with stealth in the party and keep them on the edge of the fight. When the larger groups of enemies spawn, use your rogue to run out of the immediate battle area, far enough that you disengage. The party, including any fallen party members, will respawn next to your archer. After respawning, try to engage only one or two enemies at a time. Their health will not reset, so you can gradually wear them down.
You must keep the rogue alive and in good health at all costs. Set the healing potion reserve to at least two and only use those last few healing potions for your rogue. Save stealth for when you need to run away from enemies. This is a slightly more risky option because fallen party members will have very little health once they revive, so you will need a lot of potions and/or patience, but it can be done with an under-levelled party and/or a party with weak gear.
This tactic will not work for some difficult fights where leaving the battlefield resets the enemies (such as fade rifts or dragons), but it is often useful in areas with a lot of room to run around (such as Suledin Keep), so keep it in mind.
Notable items
Looted from Fiona:
Looted from Denam:
Codex entries
Notes
- War table operations started at Haven and are "in progress" when the quest is started will show up as completed or may still remain "in progress" on the Skyhold war table, some War table missions will need be completed prior to starting this quest.
- The two opportunities to soften Leliana are no longer available after accepting this mission.
- Codex entries from Haven that have not yet been obtained prior to completion of this quest will become available for purchase from Willvan in Val Royeaux for 17 after the Inquisition relocates to Skyhold.
- Clemence will not be available as an agent after this point, you can find him in the Redcliff tavern.
- Quests Templars to the West, and Apostates in Witchwood need to be completed prior to doing this quest, other wise they will be moved to completed or unable to attain after this point.
- Blackwall Can still be recruited after this point, however you will lose some interesting details.
- Iron Bull Can still be recruited after this point, however, if Cremisius Aclassi (Krem) gets bugged and doesn't show up at the tavern in Skyhold, then you will not be able to recruit him.
- Belle Needs to be recruited before leaving Val Royeaux the first time, she will never show up again.
Trivia
- Most of the quest names in the main plot of Inquisition refer to specific verses of the Chant of Light. "In your heart shall burn" is from the Canticle of Threnodies 5:7.
- Initiating In Your Heart Shall Burn and then loading the milestone save from just prior to entering the War Room can cause companions to refer to the Herald as "Inquisitor," and may unlock dialogue regarding the new title prior to actually being named the Inquisitor.
- Some memories of the event linger in the Fade and can be read later.
- This quest was written by Lukas Kristjanson.[1]