No edit summary |
|||
| (362 intermediate revisions by more than 100 users not shown) | |||
| Line 1: | Line 1: | ||
| + | <onlyinclude>{{CreatureTransformer |
||
| − | {{Creature |
||
| + | |style = {{{style|}}} |
||
| ⚫ | |||
| − | |name=High |
+ | |name = [[High dragon]] |
| ⚫ | |||
| − | |image=Dragons 2.jpg |
||
| + | |image = Concept-HighDragon.jpg |
||
| ⚫ | |||
| + | |px = 270px |
||
| − | |level = 15 |
||
| ⚫ | |||
| − | |class = |
||
| + | |location = [[Mountain Top]] <br> [[Dragonbone Wastes]] <br> [[Bone Pit]] <br> [[Silent Grove]] <br> [[Hinterlands]] <br> [[Crestwood]] <br> [[Western Approach]] <br> [[Exalted Plains]] <br> [[Emerald Graves]] <br> [[Emprise Du Lion]] <br> [[Storm Coast]] <br> [[Hissing Wastes]] <br> [[Altar of Mythal]] <br> [[Frostback Basin]] <br> [[The Darvaarad]] |
||
| ⚫ | |||
| + | |skills = [[Breath]] <br> [[Buffet]] <br> [[Fire Spit]] <br> [[Grab]] <br> [[Massive Attack]] <br> [[Roar]] <br> [[Slap]] <br> [[Sweep]] |
||
| ⚫ | |||
| + | |variations = [[Dragonling]] <br> [[Drake]] <br> [[Dragon]] <br> [[Mature dragon]] <br> [[High dragon]] <br> [[Great dragon]] |
||
| − | |skills=Flame Breath |
||
| + | |appearances = [[Dragon Age: The Stolen Throne]] <br> [[Dragon Age: The Calling]] <br> [[Dragon Age: Dawn of the Seeker]] <br> [[Dragon Age: Origins]] <br> [[Dragon Age: Origins - Awakening]] <br> [[Dragon Age II]] <br> [[Dragon Age: The Silent Grove]] <br> [[Dragon Age: Until We Sleep]] <small>(mentioned)</small> <br> [[Heroes of Dragon Age]] <br> [[Dragon Age: Inquisition]] <br> [[Jaws of Hakkon]] <br> [[Trespasser]] |
||
| ⚫ | |||
| + | }}</onlyinclude> |
||
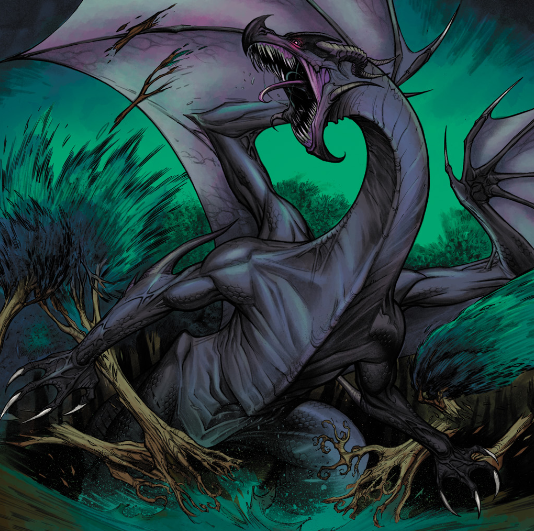
| + | '''High dragons''' are fully mature adult female [[dragon]]s, one of the rarest of all dragonkin. At the end of the [[Blessed Age]], many in [[Thedas]] believed that all the dragons had vanished until one went on a rampage in the [[Frostback Mountains|Frostbacks]]. [[Divine]] Faustine II declared the next age to be the [[Dragon Age (time period)|Dragon Age]].<ref>[[Codex entry: Thedas Calendar]]</ref> The sight of the dragon's rise was thought to be a good omen for [[Loghain Mac Tir]] and the rebels, who went on to defeat the [[Orlais|Orlesian]] army at [[River Dane]].<ref>[[Codex entry: Thedas Calendar]], [[Dragon Age: The Stolen Throne]]</ref> |
||
| − | <center>''"A fully mature adult female dragon is the high dragon: the great monster of legend, the rarest of all dragonkind. These dragons hollow out massive lairs for themselves, for they need the space to house their harem of drakes as well as their eggs and the dragonlings..."''</center> |
||
| + | == Behavior == |
||
| ⚫ | |||
| + | High dragons hollow out massive lairs for themselves, for they need the space to house their harem of [[drake]]s as well as their eggs and the [[dragonling]]s. Living for more than a thousand years, they are seldom seen and spend most of their time sleeping and mating, living off the prey their drakes bring back. |
||
| + | High dragons are extremely territorial and will typically attack almost anything that trespasses near its lair. Even creatures as large and powerful as giants (and even other high dragons) must be cautious when a high dragon's lair is nearby. |
||
| + | Once every hundred years or so, the high dragon prepares for clutching by emerging from her lair and taking wing. She will fly far and wide, eating hundreds of animals, most often livestock, over the course of a few weeks and leaving smoldering devastation in her wake. During this time entire villages and forests can be reduced to ash, leaving hundreds dead or displaced. She then returns to her lair to lay her eggs and will not appear in the skies again for another century.<ref>[[Codex entry: Dragon]]</ref><ref>{{cite wot|164}}</ref> |
||
| − | Impregnated females are known as high dragons. Living more than 1000 years, these terrifying beasts are known to have at least a dozen drakes guarding their lair. |
||
| + | == Involvement == |
||
| − | At the end of the [[Ages|Blessed Age]], many in [[Thedas]] believed that all the dragons had vanished until one went on a Rampage. A Rampage is when one or more high dragons, who are all female, emerge from their underground lair and destroy everything in their path. They gorge, then lay a clutch. <ref>The developers have suggested the level of devastation is comparable to a category 5 hurricane.</ref> |
||
| + | There are two (optional) high dragon encounters in ''Origins'' and two in ''Awakening''. Please see the relevant quests for details. |
||
| + | {{:The Urn of Sacred Ashes|style=iconmini}}{{Clrl}} |
||
| + | {{:Flemeth's Real Grimoire|style=iconmini}}{{Clrl}} |
||
| + | {{:The Lost Dragon Bones|style=iconmini}}{{Clrl}} |
||
| + | {{:Depths of Depravity|style=iconmini}}{{Clrl}} |
||
| ⚫ | |||
| − | It was this portent (the Rampage) that led to the current period being named the Dragon Age by the [[Divine]] of the [[Chantry]]. |
||
| ⚫ | |||
| + | {{See|[[High dragon (strategy)]] for details on defeating this high dragon}} |
||
| + | {{SpoilerDAO| |
||
| ⚫ | [[The Warden]] is given the option to battle a high dragon during or any time after [[The Urn of Sacred Ashes]] quest. After (optionally) battling [[Kolgrim]] and emerging onto the [[Mountain Top]], a short cutscene of a dragon flying above the Warden is seen. The Warden can engage the dragon by using [[Kolgrim's Horn]] (PC), by hitting the gong seen shortly after emerging on the Mountain Top area (X360 and PS3), or by attacking her on her perch (for example, with spells such as Winter's Grasp). If the Warden decides to help Kolgrim and follows through, the party won't be able to fight the dragon before killing Kolgrim and his followers. This can be done by speaking to him and selecting the option stating that he is too dangerous to be left alive. When he is slain, the gong can be interacted with again (or the party gains the horn).}} |
||
| + | Notably, this could be the dragon which the Dragon Age was named after since the dragon which rampaged in 8:99 Blessed was from the Frostback Mountains. |
||
| − | ==Tactics== |
||
| + | ===== Abilities ===== |
||
| − | {{spoiler}} |
||
| + | {{:Breath|style=iconmini}}{{Clrl}} |
||
| + | {{:Buffet|style=iconmini}}{{Clrl}} |
||
| + | {{:Fire Spit|style=iconmini}}{{Clrl}} |
||
| + | {{:Grab|style=iconmini}}{{Clrl}} |
||
| + | {{:Massive Attack|style=iconmini}}{{Clrl}} |
||
| + | {{:Roar|style=iconmini}}{{Clrl}} |
||
| + | {{:Slap|style=iconmini}}{{Clrl}} |
||
| + | {{:Sweep|style=iconmini}}{{Clrl}} |
||
| + | ===== Loot ===== |
||
| ⚫ | [[The Warden]] is given the option to battle a |
||
| + | {{:Dragon Scale|style=iconmini}}{{clrl}} |
||
| + | {{:Antivan Longbow|style=iconmini}}{{clrl}} |
||
| + | {{:Deadhead Charge|style=iconmini}}{{clrl}} |
||
| + | {{:Crow Dagger|style=iconmini}}{{clrl}} |
||
| + | {{:Grandmaster Flame Rune|style=iconmini}}{{clrl}} |
||
| + | {{:Heavy Infantry Helmet|style=iconmini}}{{clrl}} |
||
| + | {{:Heavy Plate Armor|style=iconmini}} x2{{clrl}} |
||
| + | {{:Heavy Plate Boots|style=iconmini}}{{clrl}} |
||
| + | {{:Heavy Plate Gloves|style=iconmini}}{{clrl}} |
||
| + | {{:Maetashear War Axe|style=iconmini}}{{clrl}} |
||
| + | {{:Metal Kite Shield|style=iconmini}}{{clrl}} |
||
| + | {{:Pure Bitch Braid|style=iconmini}}{{clrl}} |
||
| + | {{:Qunari Siege Gauntlets|style=iconmini}}{{clrl}} |
||
| + | {{:Storm Talons|style=iconmini}}{{clrl}} |
||
| + | {{:The Long Sight|style=iconmini}}{{clrl}} |
||
| + | ==== Secret ==== |
||
| − | The battle is an extremely difficult one, and as such there are some tactics that will make the battle easier: |
||
| + | {{SpoilerDAO| |
||
| + | {{See|[[Flemeth the Shapeshifter]] for details on defeating Flemeth}} |
||
| + | In addition to the Mountain Top encounter, the Warden can fight another high dragon if they choose to kill [[Flemeth]] in the quest for her grimoire. She will shapeshift into a high dragon, which must be killed. The attack can be avoided using certain dialog options. If you do so, you will be able to fight Flemeth at a later date. |
||
| − | *Having a [[Weapon and Shield Talents|Weapon and Shield]] specialist as the tank is very helpful because having the Shield Wall and Shield Expertise talents will make the character immune to the dragon's knockdown attack. |
||
| ⚫ | |||
| − | *Having [[Wynne]] in the party is crucial for this battle, as surviving without her healing abilities is near impossible. It would also help (granted the player or someone is the party has basic Herbalism) to buy the maximum amount of flasks (from Bodhan at the camp) and lyrium dust (from the quartermaster at the [[Kinloch Hold]] (the Circle Tower). This will allow to create 99 lesser lyrium potions, and, using tactics, the player can get her to use one every time her mana drops under 75%. She will essentially have infinite mana, and thus limitless healing abilities. |
||
| − | *It certainly helps to engage the dragon at range, due to a melee attack that causes immediate death. The player should either use their rogue character (skilled archer such as [[Leliana]]) or damage oriented mage. |
||
| − | *[[The Warden]] can prevent the death of a melee character from the dragon's grab attack using well timed heals from a healer. Having both Heal and Group Heal works well for this. Melee characters other than a tank can be kept to the left and right sides of the dragon to prevent being knocked down from the tail/legs of the dragon, also use Force Field to break the dragon's grab, temporarily neutralize him, which gives few seconds to recover. |
||
| − | *[[Morrigan]]'s Cone of the Cold spell is immeasurably valuable in this scenario, as it will immediately freeze the dragon and break the grab attack. Use one of the tactics slots to assign this move, and another to assign a similar potion use to Wynne's. |
||
| − | *Making 99 lesser health potions and having all of the melee [[companions]] use them when their health is less than 75% helps keep them alive longer. |
||
| − | *Due to having high a constitution, [[Shale]] is an excellent choice for the party in this scenario. Equipping a fire crystal will increase resistance to the dragon's fire breathing attacks. Shale is also immune to knockback and the dragon's 1-hit kill move; couple this with the Stoneheart ability to make an almost invincible tank. |
||
| − | *If [[The Warden]] defeated any Drakes prior to fighting the High Dragon, then bring them to Wade's Emporium in Ferelden and the smith will forge Wade's (Superior if [[The Warden]] lets him try twice) Drakeskin Leather Armor. [[Wade's Drakeskin Armor]] is excellent for this battle, as each suit gives 70% flame resistance. |
||
| − | *Ranger summoned pets seem to be immune to the dragon's 1-hit-kill melee attack. This makes them a good choice to hold aggro to complement a ranged strategy. |
||
| − | *A fully specialized Arcane Warrior also works very well as a tank if [[The Warden]] uses a combination of Combat Magic, Rock Armor, and Shimmering Shield. This will render the Arcane Warrior highly resilient to the dragon's physical attacks and almost impervious to its fire attacks. Using spells such as Walking Bomb and Crushing Prison also help to ensure a steady stream of damage. However, note that an Arcane Warrior is vulnerable to knockdown effects, unlike the [[Weapon and Shield Talents|Weapon and Shield]] warrior, so the damage output is highly dependent on how well the Arcane Warrior can resist knockdown effects |
||
| − | *A two-handed weapons specialist equipped with the [[Yusaris]] is also recommended as it grants additional damage against dragons and resistance to fire. |
||
| + | === ''Dragon Age: Awakening'' === |
||
| − | Another set of tactics involves the use of ranged attacks and the forcefield power. Using a main tank to get aggro initially, have the rest of the party attack with ranged weapons from behind but out of range of the tail slap. Use force field on the main tank and keep him healed when the force field drops before re-applying. This should keep the dragon occupied while the rest of the party reduces its HP. The tank should also use powers like Taunt or Bellow for the few seconds that the force field is down to maximize aggro. |
||
| + | {{SpoilerDAOA| |
||
| + | A third high dragon is encountered near the entrance to [[Drake's Fall]] in the [[Dragonbone Wastes]]. It has a chance of dropping minor random loot. |
||
| + | The [[Queen of the Blackmarsh]] is a spectral high dragon that can be encountered at [[Blackmarsh]] after completing the main quest of that area.}} |
||
| − | The high dragon's main attacks are frontal. A good tactic against this is to attack from the sides and never be directly in front of the dragon. Do not get close to its legs or tails and use potions often. When fighting the high dragon, keep to the sides and use the most powerful attacks. This may draw out the battle longer, but it's a good tactic to use if the main tank dies. |
||
| + | [[File:High dragon (The Silent Grove).png|right|200px]] |
||
| − | Another tactic to use is traps. Place several around and then summon the dragon. After it lands, an almost instant kill is possible. |
||
| + | === ''Dragon Age II'' === |
||
| + | {{SpoilerDA2|*Flemeth uses her high dragon form to save [[Hawke]], their family and [[Aveline Vallen]] when they were fleeing from [[Lothering]] (Act 1). |
||
| + | *A high dragon is fought in the [[Bone Pit]] during the quest [[Mine Massacre]] (Act 3). {{See|[[Mine Massacre (strategy)]] for details on defeating this high dragon.}} |
||
| + | *In the [[Legacy]] DLC, the final form of the secret boss [[Malvernis]] is a spectral High Dragon. |
||
| + | }} |
||
| − | Also very useful for this battle are Misdirection and Death Hex, which cause the dragon to miss all attacks while you land critical hits with every blow. These help to mop up any single creature very quickly. Beware though that often the boss tends to shift focus and attack the caster of these spells. |
||
| + | === ''Dragon Age: Inquisition'' === |
||
| − | ==Result== |
||
| + | |||
| − | One of the most valuable items that can be looted from the dragon is her scales. Speak to Wade, from Wade's Emporium, in [[Denerim]]. |
||
| + | There are ten fixed place high dragons in ''[[Dragon Age: Inquisition]]'' plus an eleventh in [[Jaws of Hakkon]]. For all eleven of these dragons, they have greater resistance to their breath element and this also determines their vulnerability: Fire breathers are vulnerable to cold, cold breathers to fire, and electricity breathers to spirit. |
||
| + | |||
| + | {| class="sortable daotable" width = "100%" |
||
| + | |- style="background: #333333; text-align: center; vertical-align:bottom; " |
||
| + | !Name |
||
| + | !Location |
||
| + | !Breath Element |
||
| + | !Level |
||
| + | |- |
||
| + | |[[Fereldan Frostback]] |
||
| + | |[[Hinterlands]] |
||
| + | |Fire |
||
| + | |12 |
||
| + | |- |
||
| + | |[[Northern Hunter]] |
||
| + | |[[Crestwood]] |
||
| + | |Electricity |
||
| + | |13 |
||
| + | |- |
||
| ⚫ | |||
| + | |[[Western Approach]] |
||
| + | |Fire |
||
| + | |14 |
||
| + | |- |
||
| + | |[[Gamordan Stormrider]] |
||
| + | |[[Exalted Plains]] |
||
| + | |Electricity |
||
| + | |15 |
||
| + | |- |
||
| + | |[[Greater Mistral]] |
||
| + | |[[Emerald Graves]] |
||
| + | |Cold |
||
| + | |17 |
||
| + | |- |
||
| + | |[[Hivernal]] |
||
| + | |[[Emprise du Lion]] |
||
| + | |Cold |
||
| + | |19 |
||
| + | |- |
||
| + | |[[Vinsomer]] |
||
| + | |[[Storm Coast]] |
||
| + | |Electricity |
||
| + | |19 |
||
| + | |- |
||
| + | |[[Sandy Howler]] |
||
| + | |[[Hissing Wastes]] |
||
| + | |Fire |
||
| + | |20 |
||
| + | |- |
||
| + | |[[Kaltenzahn]] |
||
| + | |[[Emprise du Lion]] |
||
| + | |Cold |
||
| + | |21 |
||
| + | |- |
||
| + | |[[Highland Ravager]] |
||
| + | |[[Emprise du Lion]] |
||
| + | |Fire |
||
| + | |23 |
||
| + | |- |
||
| + | |[[Hakkon Wintersbreath (creature)|Hakkon Wintersbreath]] |
||
| + | |[[Frostback Basin]] |
||
| + | |Cold |
||
| + | |25 |
||
| + | |- |
||
| + | |} |
||
| + | |||
| + | See also [[Breeding Grounds]] and [[Dragon Hunter]] for related quests. |
||
| + | |||
| + | === Other ''Dragon Age: Inquisition'' Appearances === |
||
| + | {{SpoilerDAI| |
||
| + | * [[Corypheus]]'s [[Red lyrium dragon]] is revealed to be a high dragon that has been corrupted by Red Lyrium and augmented by Corypheus's magic. It apparently works as a tribute to an [[Archdemon]] or [[Old God]]. Additionally at the [[War table]] can be revealed that all Dragons possess a high resistance to the [[Darkspawn]] Taint though are not immune.<ref>[[Learn More about Dragons]]</ref>.The Inquisitor kills the dragon at the end of the main storyline. |
||
| + | * If the [[Inquisitor]] drinks from the [[Well of Sorrows]] a high dragon named the [[Guardian of Mythal]] must be fought to complete [[The Final Piece]]. The dragon then battles Corypheus's dragon, but is killed during the fight. |
||
| + | * If [[Morrigan]] drinks from the [[Well of Sorrows]] she, just like [[Flemeth]], gains the ability to shapeshift into a high dragon. She will battle with the [[Red lyrium dragon]]. In the middle of the battle she is knocked out for the remainder of the fight. |
||
| + | * During [[Jaws of Hakkon]], the [[Avvar]] god Hakkon is revealed to have been bound to the body of a high ice dragon and frozen in time by the efforts of Inquisitor [[Ameridan]]. The [[Inquisitor]] must slay [[Hakkon Wintersbreath (creature)|Hakkon Wintersbreath]] (level 25, breath element cold) when Ameridan's magic fails.}} |
||
| + | {{SpoilerDAIT| |
||
| + | *The [[Qunari]] tried to use the poison extracted from a high dragon called [[Ataashi]] to destroy the Inquisition and all of the southern noble houses of Thedas. In order to stop them, the Inquisitor either kills the dragon or sets it free.}} |
||
| + | |||
| + | === Other Dragon Age Appearances === |
||
| + | {{SpoilerDOTS|style=short| |
||
| + | *A High Dragon is used to allow [[Avexis]] to control others of its kind by the [[Blood mage]] cult. |
||
| + | |||
| + | *Several High Dragon are used by [[Frenic]] and his followers in the attack on the Ten Year Gathering at the [[Grand Cathedral]]. |
||
| + | }} |
||
| + | |||
| + | {{SpoilerTSG| |
||
| + | *Another high dragon guards the [[Silent Grove]] in the [[Tellari Swamps]] and its mistress; [[Yavana]]. |
||
| + | }} |
||
| + | |||
| + | {{SpoilerUWS| |
||
| + | *[[Sten]] recounts how a mysterious [[Witch of the Wilds]] leads a simple [[Mabari|dog]] handler to a cave where an ancient high dragon lays dying, after which [[Calenhad Theirin|the man]] slits the beast's throat and [[Reaver|drinks its blood in order to gain its power]]. |
||
| + | }} |
||
| + | |||
| + | == Trivia == |
||
| + | * The [[Archdemon]]s take the form of corrupted high dragons.<ref>{{Cite wot|166}}</ref> |
||
| + | * The Cult of Andraste at Haven believed the high dragon located at the Mountain Top area is Andraste. |
||
| + | * To become a true [[Reaver]] a ritual must be done using dragon blood, although, [[wyvern]] blood may be used to unlock the Reaver powers, as possibly done with the [[The Warden|Warden]]. |
||
| + | {{SpoilerDA2| |
||
| + | [[File:Flemeth dragon.jpg|Flemeth's dragon form in ''Dragon Age II''|right|200px]] |
||
| + | * In ''[[Dragon Age II]]'', Flemeth's high dragon form is unique compared to other high dragons, being of a larger size with a dark red/purple tint, and having many spikes on her head. |
||
| + | }} |
||
| + | == Gallery == |
||
| − | ==Wade Drake/Dragon Armor(s)== |
||
| + | <gallery> |
||
| − | *[[Wade]] can make the [[Drake]] and [[Dragon]] armor(s) from [[Drake Scale]]s and [[Dragon Scale]]. For details about this process and the talk page about it, see [[Wade]]. |
||
| + | DAI Dragon Attacking.jpg|High dragon ambushing Varric & Cassandra |
||
| + | Dragons 2.jpg|High dragon in ''[[Dragon Age: Origins]]'' |
||
| + | HighDragonDAII.png|High dragon in ''[[Dragon Age II]]'' |
||
| + | DAIHighDragon.jpg|High dragon in ''[[Dragon Age: Inquisition]]'' |
||
| + | highdragondots.png|High dragon in ''[[Dragon Age: Dawn of the Seeker]]'' |
||
| + | HighDragonHoDA.png|Tier progression of a High Dragon in ''[[Heroes of Dragon Age]]'' |
||
| + | </gallery> |
||
| − | == |
+ | == References == |
| ⚫ | |||
| − | *[[Dragon Scale Armor]] |
||
| − | *[[Wade]] |
||
| ⚫ | |||
| + | [[de:Hoher Drache]] |
||
| − | ==References== |
||
| ⚫ | |||
[[Category:Creatures]] |
[[Category:Creatures]] |
||
| − | [[Category: |
+ | [[Category:Dragon Age: The Stolen Throne creatures]] |
| + | [[Category:Dragon Age: The Calling creatures]] |
||
| ⚫ | |||
| + | [[Category:Dragon Age: Origins - Awakening creatures]] |
||
| + | [[Category:Dragon Age II creatures]] |
||
| + | [[Category:Heroes of Dragon Age creatures]] |
||
[[Category:Dragons]] |
[[Category:Dragons]] |
||
| + | [[Category:Dragon Age: Inquisition creatures]] |
||
Revision as of 00:53, 16 January 2020
High dragons are fully mature adult female dragons, one of the rarest of all dragonkin. At the end of the Blessed Age, many in Thedas believed that all the dragons had vanished until one went on a rampage in the Frostbacks. Divine Faustine II declared the next age to be the Dragon Age.[1] The sight of the dragon's rise was thought to be a good omen for Loghain Mac Tir and the rebels, who went on to defeat the Orlesian army at River Dane.[2]
Behavior
High dragons hollow out massive lairs for themselves, for they need the space to house their harem of drakes as well as their eggs and the dragonlings. Living for more than a thousand years, they are seldom seen and spend most of their time sleeping and mating, living off the prey their drakes bring back.
High dragons are extremely territorial and will typically attack almost anything that trespasses near its lair. Even creatures as large and powerful as giants (and even other high dragons) must be cautious when a high dragon's lair is nearby.
Once every hundred years or so, the high dragon prepares for clutching by emerging from her lair and taking wing. She will fly far and wide, eating hundreds of animals, most often livestock, over the course of a few weeks and leaving smoldering devastation in her wake. During this time entire villages and forests can be reduced to ash, leaving hundreds dead or displaced. She then returns to her lair to lay her eggs and will not appear in the skies again for another century.[3][4]
Involvement
There are two (optional) high dragon encounters in Origins and two in Awakening. Please see the relevant quests for details.
Dragon Age: Origins
Mountain Top
- See High dragon (strategy) for details on defeating this high dragon.
Notably, this could be the dragon which the Dragon Age was named after since the dragon which rampaged in 8:99 Blessed was from the Frostback Mountains.
Abilities
Breath may refer to:
- Dragon Breath, a talent used by Archdemon, Flemeth the Shapeshifter and High dragon.
- Flame Breath (dragon), a talent used by Dragon.
- Flame Breath (dragonling), a talent used by Dragonling.
| This disambiguation page lists articles associated with the same title. If an internal link led you here, you may wish to change the link to point directly to the intended article. |
Grab may refer to:
- Grab (broodmother), a talent used by Broodmothers.
- Grab (high dragon), a talent used by High dragons.
- Grab (ogre), a talent used by ogres.
- Grab (strategy), for strategy against grab.
| This disambiguation page lists articles associated with the same title. If an internal link led you here, you may wish to change the link to point directly to the intended article. |
Roar may refer to:
- Roar (dragon), a talent used by Dragon.
- Roar (high dragon), a talent used by High dragons and Archdemon.
| This disambiguation page lists articles associated with the same title. If an internal link led you here, you may wish to change the link to point directly to the intended article. |
Slap may refer to:
- Slap (dragon), a talent used by Dragon.
- Slap (high dragon), a talent used by High dragon.
| This disambiguation page lists articles associated with the same title. If an internal link led you here, you may wish to change the link to point directly to the intended article. |
Sweep may refer to:
- Sweep (broodmother), a talent used by Broodmother.
- Sweep (high dragon), a talent used by High dragons and Archdemon.
| This disambiguation page lists articles associated with the same title. If an internal link led you here, you may wish to change the link to point directly to the intended article. |
Loot
Secret
- See Flemeth the Shapeshifter for details on defeating Flemeth.
Dragon Age: Awakening
A third high dragon is encountered near the entrance to Drake's Fall in the Dragonbone Wastes. It has a chance of dropping minor random loot.
The Queen of the Blackmarsh is a spectral high dragon that can be encountered at Blackmarsh after completing the main quest of that area.
Dragon Age II
- Flemeth uses her high dragon form to save Hawke, their family and Aveline Vallen when they were fleeing from Lothering (Act 1).
- A high dragon is fought in the Bone Pit during the quest Mine Massacre (Act 3).
- See Mine Massacre (strategy) for details on defeating this high dragon..
Dragon Age: Inquisition
There are ten fixed place high dragons in Dragon Age: Inquisition plus an eleventh in Jaws of Hakkon. For all eleven of these dragons, they have greater resistance to their breath element and this also determines their vulnerability: Fire breathers are vulnerable to cold, cold breathers to fire, and electricity breathers to spirit.
| Name | Location | Breath Element | Level |
|---|---|---|---|
| Fereldan Frostback | Hinterlands | Fire | 12 |
| Northern Hunter | Crestwood | Electricity | 13 |
| Abyssal High Dragon | Western Approach | Fire | 14 |
| Gamordan Stormrider | Exalted Plains | Electricity | 15 |
| Greater Mistral | Emerald Graves | Cold | 17 |
| Hivernal | Emprise du Lion | Cold | 19 |
| Vinsomer | Storm Coast | Electricity | 19 |
| Sandy Howler | Hissing Wastes | Fire | 20 |
| Kaltenzahn | Emprise du Lion | Cold | 21 |
| Highland Ravager | Emprise du Lion | Fire | 23 |
| Hakkon Wintersbreath | Frostback Basin | Cold | 25 |
See also Breeding Grounds and Dragon Hunter for related quests.
Other Dragon Age: Inquisition Appearances
- Corypheus's Red lyrium dragon is revealed to be a high dragon that has been corrupted by Red Lyrium and augmented by Corypheus's magic. It apparently works as a tribute to an Archdemon or Old God. Additionally at the War table can be revealed that all Dragons possess a high resistance to the Darkspawn Taint though are not immune.[5].The Inquisitor kills the dragon at the end of the main storyline.
- If the Inquisitor drinks from the Well of Sorrows a high dragon named the Guardian of Mythal must be fought to complete The Final Piece. The dragon then battles Corypheus's dragon, but is killed during the fight.
- If Morrigan drinks from the Well of Sorrows she, just like Flemeth, gains the ability to shapeshift into a high dragon. She will battle with the Red lyrium dragon. In the middle of the battle she is knocked out for the remainder of the fight.
- During Jaws of Hakkon, the Avvar god Hakkon is revealed to have been bound to the body of a high ice dragon and frozen in time by the efforts of Inquisitor Ameridan. The Inquisitor must slay Hakkon Wintersbreath (level 25, breath element cold) when Ameridan's magic fails.
Other Dragon Age Appearances
- A High Dragon is used to allow Avexis to control others of its kind by the Blood mage cult.
- Several High Dragon are used by Frenic and his followers in the attack on the Ten Year Gathering at the Grand Cathedral.
- Another high dragon guards the Silent Grove in the Tellari Swamps and its mistress; Yavana.
- Sten recounts how a mysterious Witch of the Wilds leads a simple dog handler to a cave where an ancient high dragon lays dying, after which the man slits the beast's throat and drinks its blood in order to gain its power.
Trivia
- The Archdemons take the form of corrupted high dragons.[6]
- The Cult of Andraste at Haven believed the high dragon located at the Mountain Top area is Andraste.
- To become a true Reaver a ritual must be done using dragon blood, although, wyvern blood may be used to unlock the Reaver powers, as possibly done with the Warden.

- In Dragon Age II, Flemeth's high dragon form is unique compared to other high dragons, being of a larger size with a dark red/purple tint, and having many spikes on her head.
Gallery
")
")
")
")
")
")