(→Notes) |
m (→The Blooming Rose: Confirmed that Isabela always gets Friendship (+5) when "No Mercy" option chosen whether Varric is in the party or not, no matter how you break Idunna's control.) Tag: Visual edit |
||
| (18 intermediate revisions by 13 users not shown) | |||
| Line 20: | Line 20: | ||
A rumor listed in Hawke's journal states that recently a woman has been searching for a templar outside of the [[Kirkwall chantry|chantry]] in [[Hightown]]. The quest will be unlocked after completing [[Tranquility]]. |
A rumor listed in Hawke's journal states that recently a woman has been searching for a templar outside of the [[Kirkwall chantry|chantry]] in [[Hightown]]. The quest will be unlocked after completing [[Tranquility]]. |
||
| − | Travel to the courtyard outside [[The Chantry]] in Hightown during the day to speak with Macha. She will tell Hawke that her brother, Keran, recently joined the templars and more recently, mysteriously disappeared. She fears that [[Meredith Stannard|Meredith]], Knight-Commander of the Templar Order in [[Kirkwall]], has something to do with his disappearance, and asks Hawke to investigate |
+ | Travel to the courtyard outside [[The Chantry]] in Hightown during the day to speak with Macha. She will tell Hawke that her brother, Keran, recently joined the templars and more recently, mysteriously disappeared. She fears that [[Meredith Stannard|Meredith]], Knight-Commander of the Templar Order in [[Kirkwall]], has something to do with his disappearance, and asks Hawke to investigate the matter. |
== Walkthrough == |
== Walkthrough == |
||
| Line 28: | Line 28: | ||
A templar recruit in the [[Gallows Courtyard]], [[Hugh]], will give you more information. Keran was one of his friends, and he, along with another recruit named [[Wilmod]] and several others, have recently vanished, one-by-one. Although his companions, [[Ruvena]] and [[Paxley]], are reluctant to aid Hawke and tell them about templar matters, Hugh expresses his concern that Meredith has been forcing templars to undergo some strange initiation ritual, in which templars without enough dedication to the cause are killed for failure. |
A templar recruit in the [[Gallows Courtyard]], [[Hugh]], will give you more information. Keran was one of his friends, and he, along with another recruit named [[Wilmod]] and several others, have recently vanished, one-by-one. Although his companions, [[Ruvena]] and [[Paxley]], are reluctant to aid Hawke and tell them about templar matters, Hugh expresses his concern that Meredith has been forcing templars to undergo some strange initiation ritual, in which templars without enough dedication to the cause are killed for failure. |
||
| − | + | {{Note|If [[Anders]], [[Carver]], or [[Fenris]] are in the party they will comment when you ask about the initiation ritual.}} |
|
Ruvena will deride this as being non-true, stating that Wilmod has returned and that he has left the city to "clear his head." Hawke must then travel to [[Wilmod's Camp]], outside of Kirkwall. |
Ruvena will deride this as being non-true, stating that Wilmod has returned and that he has left the city to "clear his head." Hawke must then travel to [[Wilmod's Camp]], outside of Kirkwall. |
||
| Line 37: | Line 37: | ||
Upon arriving, Hawke encounters Knight-Captain [[Cullen]] intimidating the frightened recruit. Despite Wilmod's insistence that he doesn't know anything, Cullen strikes him and draws his sword on him. When Hawke intervenes, Cullen tells them to keep out of templar business; however, Wilmod suddenly rises, declares angrily that this will be the last time that Cullen dares threaten him, and transforms into a [[shade]] accompanied by [[abomination]]s. |
Upon arriving, Hawke encounters Knight-Captain [[Cullen]] intimidating the frightened recruit. Despite Wilmod's insistence that he doesn't know anything, Cullen strikes him and draws his sword on him. When Hawke intervenes, Cullen tells them to keep out of templar business; however, Wilmod suddenly rises, declares angrily that this will be the last time that Cullen dares threaten him, and transforms into a [[shade]] accompanied by [[abomination]]s. |
||
| + | |||
| + | On Nightmare difficulty, the enemies can easily cause knockback on a party lacking in resilience (i.e. not enough warriors or high enough health or Fortitude), but the enemies can only attack in melee, so bringing a fully-ranged party and retreating as a group provides a great tactical advantage. A party of 1 melee and three mages can make quick work of each abomination as a group while Cullen handles the tanking. As a shade, Wilmod is immune to spirit damage, but the abominations are not, and the rage demon that comes later in the fight can be easily dispatched with cold spells. |
||
After Hawke helps Cullen fight the demon and its summons, the Knight-Captain reveals that he was attempting to get information from Wilmod, as the recruit had been demonstrating uncharacteristic behavior. Cullen claims that he would not have hurt Wilmod and was just trying to make him understand that he was serious. Cullen does not believe that Meredith had anything to do with it, and although it is true that templars must undergo an initiation ritual, it is nothing more than a silent vigil in which the greatest danger the recruits face is falling asleep. Cullen will tell Hawke that Wilmod and Keran were last seen at [[the Blooming Rose]], but bashfully admits that he was uncomfortable questioning the ladies of the establishment. |
After Hawke helps Cullen fight the demon and its summons, the Knight-Captain reveals that he was attempting to get information from Wilmod, as the recruit had been demonstrating uncharacteristic behavior. Cullen claims that he would not have hurt Wilmod and was just trying to make him understand that he was serious. Cullen does not believe that Meredith had anything to do with it, and although it is true that templars must undergo an initiation ritual, it is nothing more than a silent vigil in which the greatest danger the recruits face is falling asleep. Cullen will tell Hawke that Wilmod and Keran were last seen at [[the Blooming Rose]], but bashfully admits that he was uncomfortable questioning the ladies of the establishment. |
||
| + | |||
| + | Remember to pick up the [[Design: Rune of Impact]] from the nearby crate before exiting the area, as Wilmod's Camp is removed from the map upon leaving and cannot be returned to, rendering the schematic lost. |
||
=== [[The Blooming Rose]] === |
=== [[The Blooming Rose]] === |
||
| − | At the Blooming Rose, [[Viveka]], |
+ | At the Blooming Rose, [[Viveka]], after some convincing, will review the books and reveal that Wilmod and Keran have been in the brothel. She states that Wilmod last saw [[Idunna]], "The Exotic Wonder From The East," who is upstairs. |
| − | When |
+ | When questioning Idunna about the templars, she will prove evasive, stating that "talking is boring" and invite Hawke to have some "fun" instead. One of Hawke's companions, usually a rogue or warrior, falls under her charm, encouraging Hawke to either forget about their questions or go easy on her. Idunna asks for the name of the one who sold her out. Regardless of how Hawke attempts to reply, Idunna casts a [[blood magic]] spell compelling Hawke to respond how she wants, revealing Viveka's help. Idunna vows to make her pay, then compels Hawke to draw a knife across their own throat. |
| − | If Hawke is a [[Mage (Dragon Age II)|mage]] or a warrior with the Templar specialization, he/she can break the compulsion to Idunna's shock and dismay. If not, any mage in the party can be called upon to break the compulsion |
+ | If Hawke is a [[Mage (Dragon Age II)|mage]] or a warrior with the [[Templar (Dragon Age II)|Templar]] specialization, he/she can break the compulsion to Idunna's shock and dismay. If not, any mage in the party can be called upon to break the compulsion (even one who fell under her charm earlier, if they are the only ally present). If Hawke either does not have a mage in the party or chooses to break the compulsion personally, Idunna will be killed immediately with no option to keep her alive or question her. If Idunna is killed, the necessary information can be found in her room on a desk. |
Break the compulsion yourself, then pick No mercy for you (kill her): |
Break the compulsion yourself, then pick No mercy for you (kill her): |
||
| Line 54: | Line 58: | ||
Ask for help with mind control (not available to a mage Hawke): |
Ask for help with mind control (not available to a mage Hawke): |
||
:{{Approval2|Anders|+5}} (only if Idunna is still killed afterward) |
:{{Approval2|Anders|+5}} (only if Idunna is still killed afterward) |
||
| − | :{{Approval2|Bethany|+15}} ( |
+ | :{{Approval2|Bethany|+15}} (Idunna's fate does not matter) |
:{{Approval2|Isabela|+5}} (only if Idunna is still killed afterward) |
:{{Approval2|Isabela|+5}} (only if Idunna is still killed afterward) |
||
| − | If Idunna is not |
+ | If Idunna is not immediately killed, she reveals that she is a blood mage who enchanted Wilmod and Keran, possibly other templars, and then sent them [[Tarohne]], who implants demons into them to sow chaos and paranoia in the ranks of the Templar Order. She claims Tarohne talked her into the whole thing, stating they could "recreate the ancient Imperium, that mages could rule again, not serve." Hawke can either kill her or turn her in to the templars: |
Hand her over to the templars: |
Hand her over to the templars: |
||
| Line 63: | Line 67: | ||
:{{Approval2|Anders|-5}} |
:{{Approval2|Anders|-5}} |
||
| + | *Note: The companion put under her sway is the one that comments at the end of dialogue, either about heading to the sanctuary (if Idunna was questioned) or wondering what happened (if killed immediately). Fenris and the mage companions recognize it as blood magic immediately, whereas Hawke needs to point it out to Isabela, Varric, Aveline, or Carver. |
||
| − | *Note: If Varric is in the party, Hawke can ask for his input and he will give you some interesting comments. |
||
| − | *Note: |
+ | *Note: Priority for breaking the compulsion goes to Bethany, then Anders, then Merrill. |
| − | |||
| − | *Note: If Bethany and Anders are in the party, Bethany will break the compulsion. |
||
| − | |||
| − | *Note: Isabela only gains {{Approval2|Isabela|+5}} if Varric is not in the party and the "No Mercy" option is chosen when a Mage companion breaks the compulsion. Approval is gained with Varric in the party if Hawke breaks the compulsion. Handing Idunna over to the Templars will automatically override this and give {{Approval2|Isabela|-5}} instead. |
||
=== [[Sanctuary|Blood Mage Hideout]] === |
=== [[Sanctuary|Blood Mage Hideout]] === |
||
| Line 76: | Line 76: | ||
[[File:Tarohne.jpg|thumb|250px|Tarohne]] |
[[File:Tarohne.jpg|thumb|250px|Tarohne]] |
||
| − | [[Idunna]] directs Hawke to a blood mage hideout in the [[Sanctuary]] in [[Darktown]]. Proceed there, killing [[shade]]s, [[abomination]]s, [[rage demon]]s and the undead. |
+ | [[Idunna]] directs Hawke to a blood mage hideout in the [[Sanctuary]] in [[Darktown]]. Proceed there, killing [[shade]]s, [[abomination]]s, [[rage demon]]s and the undead. The first encounter sends several enemies at you into tight confines, making it difficult to use AoE spells without harming your party, and on Nightmare difficulty the abominations are capable of inflicting knockback and interruptions with their most basic attacks. However, the shades are highly vulnerable to electricity and nature magic, making Merrill's [[Wrath of the Elvhen]] along with Chain Lightning valuable spells to deploy, complemented by an Elemental mage unleashing cold spells to slow the enemy's advance. Staying at the top of the stairs and taking out the shade that spawns there gives you a place to bunker down and snipe the enemies as they approach two at a time. With quick, successive elimination of the enemies, the rage demon will have little to no support and fall with ease. Grab the [[Design: Rune of Frost Warding]] from a nearby crate. |
| + | |||
| + | Grab the [[Deathroot (Dragon Age II)|deathroot]] and [[Codex entry: The Veil]] further down the passage. Corpses, which resist nature magic, will rise to fight, along with two more shades in an H-shaped passageway. Move everyone forward and dispatch the shades, then focus fire and electricity on the now-clustered corpses. Downstairs, you can trigger another encounter of corpses, but they can be dispatched by returning back upstairs and laying fire spells at the foot of the stairs when they cluster there (Firestorm works perfectly). Skeleton Archers should be the top priority, followed by the melee enemies. |
||
| + | |||
| + | Your main goal is [[Tarohne]], a fanatical [[apostate]] mage and the mastermind behind the plot, who has a great hatred for templars. Keran is being held captive, bound in a floating magical cage, as Tarohne found him unsuitable to be possessed: she is instead drawing energy from him. She will attack, accompanied by three Critter-ranked apostate mages, a few abominations, and an Elite-ranked [[desire demon]]. She acts like most Elite-ranked mages and simply hides in a barrier, so she won't be nearly as much threat as her cohorts. A couple of AoE spells should dispatch her mage subordinates with ease, allowing you to focus on the rest of her forces with similar tactics used in previous encounters. Save your most damaging hits for the desire demon, but the melee-range abominations should come first, as the demon's attacks are not as threatening as their potential for interruption. This leaves Tarohne to be dispatched like any mage you've encountered so far. After defeating her, speak to Keran, who will swear that he is not possessed. Tarohne drops either the [[Helmet of the Fallen]], the [[Last Descent Helmet]] or the [[Hood of the Spiral Eye]] depending on Hawke's class. |
||
If you brought Carver along, the following dialogue options will appear: |
If you brought Carver along, the following dialogue options will appear: |
||
| Line 112: | Line 116: | ||
*"Hey, I'm a mage" or "Not all mages are like that" |
*"Hey, I'm a mage" or "Not all mages are like that" |
||
:{{Approval2|Merrill|+10}} |
:{{Approval2|Merrill|+10}} |
||
| − | *"You're right" |
+ | *"You're right" - Go to Choice 3 |
:{{Approval2|Anders|-15}} |
:{{Approval2|Anders|-15}} |
||
*"Whatever. It's done now" |
*"Whatever. It's done now" |
||
| Line 164: | Line 168: | ||
== Notes == |
== Notes == |
||
| ⚫ | |||
| ⚫ | |||
| + | == Bugs == |
||
| − | * If you are seeking the [[Supplier]] achievement, be sure to grab the [[Embrium]] (if the player did not already pick it up during Blackpowder Promise) located at the meeting of the four paths in [[Wilmod's Camp]] area and the [[Deathroot (Dragon Age II)|Deathroot]] found in the Darktown Sanctuary. |
||
| + | * There is a mapping bug where if this quest is done prior to [[Blackpowder Promise]], fast travelling to "[[Wilmod's Camp]]" may take Hawke to [[Dead Man's Pass]] instead. The encounter with [[Javaris Tintop]] proceeds normally, but [[Cullen Rutherford|Cullen]] and [[Wilmod]] are nowhere to be found. Simply finish the map and on exiting the area, select Wilmod's Camp again and this quest will proceed normally. |
||
| − | <blockquote>{{platforms|pc}} <small>(1.04)</small> - If doing Enemies Among Us before [[Blackpowder Promise]] the embrium does not appear at the intersection.</blockquote> |
||
| ⚫ | |||
| − | * In order to receive [[Codex entry: Blood Magic: The Forbidden School]], you must choose to kill Idunna without making her "tell you everything she knows". You can, however, choose the investigation options. |
||
| ⚫ | |||
[[Category:Dragon Age II main quests]] |
[[Category:Dragon Age II main quests]] |
||
Revision as of 04:28, 13 September 2019
Enemies Among Us is an Act 1 main quest in Dragon Age II. Hawke assists a woman in need, Macha, as she searches for her missing brother, a templar recruit by the name of Keran who has mysteriously gone missing.
Acquisition
A rumor listed in Hawke's journal states that recently a woman has been searching for a templar outside of the chantry in Hightown. The quest will be unlocked after completing Tranquility.
Travel to the courtyard outside The Chantry in Hightown during the day to speak with Macha. She will tell Hawke that her brother, Keran, recently joined the templars and more recently, mysteriously disappeared. She fears that Meredith, Knight-Commander of the Templar Order in Kirkwall, has something to do with his disappearance, and asks Hawke to investigate the matter.
Walkthrough
Gallows Courtyard
A templar recruit in the Gallows Courtyard, Hugh, will give you more information. Keran was one of his friends, and he, along with another recruit named Wilmod and several others, have recently vanished, one-by-one. Although his companions, Ruvena and Paxley, are reluctant to aid Hawke and tell them about templar matters, Hugh expresses his concern that Meredith has been forcing templars to undergo some strange initiation ritual, in which templars without enough dedication to the cause are killed for failure.
Ruvena will deride this as being non-true, stating that Wilmod has returned and that he has left the city to "clear his head." Hawke must then travel to Wilmod's Camp, outside of Kirkwall.
Wilmod's Camp
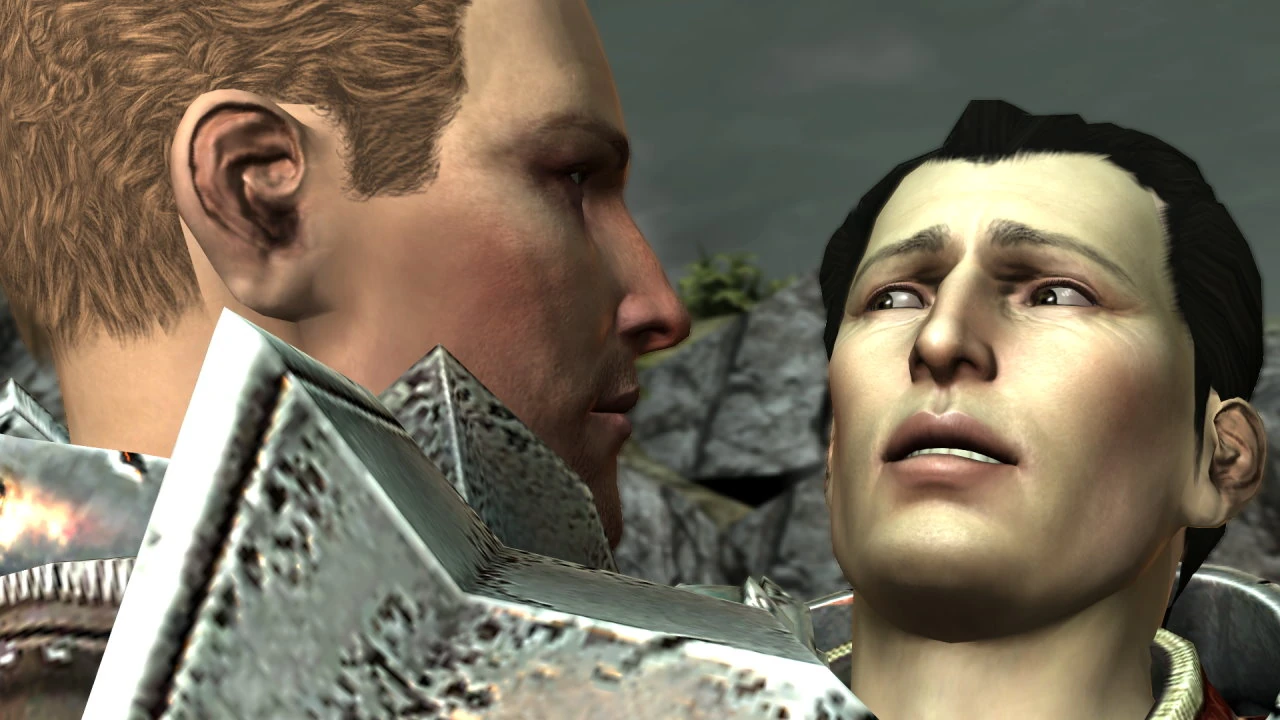
Cullen threatens Wilmod
Upon arriving, Hawke encounters Knight-Captain Cullen intimidating the frightened recruit. Despite Wilmod's insistence that he doesn't know anything, Cullen strikes him and draws his sword on him. When Hawke intervenes, Cullen tells them to keep out of templar business; however, Wilmod suddenly rises, declares angrily that this will be the last time that Cullen dares threaten him, and transforms into a shade accompanied by abominations.
On Nightmare difficulty, the enemies can easily cause knockback on a party lacking in resilience (i.e. not enough warriors or high enough health or Fortitude), but the enemies can only attack in melee, so bringing a fully-ranged party and retreating as a group provides a great tactical advantage. A party of 1 melee and three mages can make quick work of each abomination as a group while Cullen handles the tanking. As a shade, Wilmod is immune to spirit damage, but the abominations are not, and the rage demon that comes later in the fight can be easily dispatched with cold spells.
After Hawke helps Cullen fight the demon and its summons, the Knight-Captain reveals that he was attempting to get information from Wilmod, as the recruit had been demonstrating uncharacteristic behavior. Cullen claims that he would not have hurt Wilmod and was just trying to make him understand that he was serious. Cullen does not believe that Meredith had anything to do with it, and although it is true that templars must undergo an initiation ritual, it is nothing more than a silent vigil in which the greatest danger the recruits face is falling asleep. Cullen will tell Hawke that Wilmod and Keran were last seen at the Blooming Rose, but bashfully admits that he was uncomfortable questioning the ladies of the establishment.
Remember to pick up the Design: Rune of Impact from the nearby crate before exiting the area, as Wilmod's Camp is removed from the map upon leaving and cannot be returned to, rendering the schematic lost.
The Blooming Rose
At the Blooming Rose, Viveka, after some convincing, will review the books and reveal that Wilmod and Keran have been in the brothel. She states that Wilmod last saw Idunna, "The Exotic Wonder From The East," who is upstairs.
When questioning Idunna about the templars, she will prove evasive, stating that "talking is boring" and invite Hawke to have some "fun" instead. One of Hawke's companions, usually a rogue or warrior, falls under her charm, encouraging Hawke to either forget about their questions or go easy on her. Idunna asks for the name of the one who sold her out. Regardless of how Hawke attempts to reply, Idunna casts a blood magic spell compelling Hawke to respond how she wants, revealing Viveka's help. Idunna vows to make her pay, then compels Hawke to draw a knife across their own throat.
If Hawke is a mage or a warrior with the Templar specialization, he/she can break the compulsion to Idunna's shock and dismay. If not, any mage in the party can be called upon to break the compulsion (even one who fell under her charm earlier, if they are the only ally present). If Hawke either does not have a mage in the party or chooses to break the compulsion personally, Idunna will be killed immediately with no option to keep her alive or question her. If Idunna is killed, the necessary information can be found in her room on a desk.
Break the compulsion yourself, then pick No mercy for you (kill her):
 Isabela: friendship (+5)
- Carver: friendship (+5)
Ask for help with mind control (not available to a mage Hawke):
 Anders: friendship (+5) (only if Idunna is still killed afterward)
- Bethany: friendship (+15) (Idunna's fate does not matter)
- Isabela: friendship (+5) (only if Idunna is still killed afterward)
If Idunna is not immediately killed, she reveals that she is a blood mage who enchanted Wilmod and Keran, possibly other templars, and then sent them Tarohne, who implants demons into them to sow chaos and paranoia in the ranks of the Templar Order. She claims Tarohne talked her into the whole thing, stating they could "recreate the ancient Imperium, that mages could rule again, not serve." Hawke can either kill her or turn her in to the templars:
Hand her over to the templars:
- Isabela: rivalry (+5)
- Anders: rivalry (+5)
- Note: The companion put under her sway is the one that comments at the end of dialogue, either about heading to the sanctuary (if Idunna was questioned) or wondering what happened (if killed immediately). Fenris and the mage companions recognize it as blood magic immediately, whereas Hawke needs to point it out to Isabela, Varric, Aveline, or Carver.
- Note: Priority for breaking the compulsion goes to Bethany, then Anders, then Merrill.
Blood Mage Hideout


Keran, floating in the magical cage


Tarohne
Idunna directs Hawke to a blood mage hideout in the Sanctuary in Darktown. Proceed there, killing shades, abominations, rage demons and the undead. The first encounter sends several enemies at you into tight confines, making it difficult to use AoE spells without harming your party, and on Nightmare difficulty the abominations are capable of inflicting knockback and interruptions with their most basic attacks. However, the shades are highly vulnerable to electricity and nature magic, making Merrill's Wrath of the Elvhen along with Chain Lightning valuable spells to deploy, complemented by an Elemental mage unleashing cold spells to slow the enemy's advance. Staying at the top of the stairs and taking out the shade that spawns there gives you a place to bunker down and snipe the enemies as they approach two at a time. With quick, successive elimination of the enemies, the rage demon will have little to no support and fall with ease. Grab the Design: Rune of Frost Warding from a nearby crate.
Grab the deathroot and Codex entry: The Veil further down the passage. Corpses, which resist nature magic, will rise to fight, along with two more shades in an H-shaped passageway. Move everyone forward and dispatch the shades, then focus fire and electricity on the now-clustered corpses. Downstairs, you can trigger another encounter of corpses, but they can be dispatched by returning back upstairs and laying fire spells at the foot of the stairs when they cluster there (Firestorm works perfectly). Skeleton Archers should be the top priority, followed by the melee enemies.
Your main goal is Tarohne, a fanatical apostate mage and the mastermind behind the plot, who has a great hatred for templars. Keran is being held captive, bound in a floating magical cage, as Tarohne found him unsuitable to be possessed: she is instead drawing energy from him. She will attack, accompanied by three Critter-ranked apostate mages, a few abominations, and an Elite-ranked desire demon. She acts like most Elite-ranked mages and simply hides in a barrier, so she won't be nearly as much threat as her cohorts. A couple of AoE spells should dispatch her mage subordinates with ease, allowing you to focus on the rest of her forces with similar tactics used in previous encounters. Save your most damaging hits for the desire demon, but the melee-range abominations should come first, as the demon's attacks are not as threatening as their potential for interruption. This leaves Tarohne to be dispatched like any mage you've encountered so far. After defeating her, speak to Keran, who will swear that he is not possessed. Tarohne drops either the Helmet of the Fallen, the Last Descent Helmet or the Hood of the Spiral Eye depending on Hawke's class.
If you brought Carver along, the following dialogue options will appear:
"Magic is not the problem"
- Merrill: rivalry (+10)
"Templars are just as bad"
- Merrill: friendship (+10)
- Varric: friendship (+5)
If Merrill or Anders is in the party, you can ask them to examine the templar for traces of possession: Anders will use a shock spell which will spook Keran, but not harm him. Anders will then say that if there was a demon, it would have defended itself. Merrill will check Keran's blood and confirm that there's no scent of demons. Either way, both will confirm that he is not possessed. Merrill takes precedence over Anders to check Keran if you brought both of them along, but there will be no approval points gained from her. Bethany, although a mage, will not be able to tell her sibling if Keran is possessed due to her not focusing on demons during her magic training.
If Anders is asked to check Keran:
- Anders: friendship (+5) (only available if Merrill is not in party)
Keran will beg Hawke not to tell Cullen about this, and runs away. If Anders is in the party, he will ask Hawke to not broach the "blood magic" aspect when they speak to the Knight-Captain.
"I have to tell the templars"
- Aveline: friendship (+5)
- Carver: friendship (+5)
- Anders: rivalry (+5)
- Isabela: rivalry (+5)
"I do believe you."
- Aveline: rivalry (+5) (no change if Keran was checked by Anders or Merrill)
- Carver: rivalry (+5) (no change if Keran was checked by Anders or Merrill)
Gallows Courtyard
Return to the Gallows. When reporting to Cullen and telling him about the use of blood magic, he expresses anger at the rebel mages' use of the forbidden school. Hawke can either persuade Cullen to keep Keran in the Order, or recommend that he be discharged from his duties. Recommending that the recruit be kept in the Order will result in Cullen rewarding Hawke, and both Keran and his sister will express their profuse thanks. If you have examined Keran with the help of a mage companion, you can also assure Cullen that tests have been conducted on Keran and that he is not possessed.
Choice 1
- "Hey, I'm a mage" or "Not all mages are like that"
- Merrill: friendship (+10)
- "You're right" - Go to Choice 3
- Anders: rivalry (+15)
- "Whatever. It's done now"
- No Approval Changes - Go to Choice 3
- "It's the templars' fault"
- Anders: friendship (+10)
Choice 2
- "There has to be a better way"
- Varric: friendship (+5)
- "You're wrong"
- Merrill: friendship (+10)
- "You're right"
- Anders: rivalry (+15)
- Bethany: rivalry (+5)
Choice 3
- "Keran should keep his status" (leads to quest How to Frame a Templar in Act 2)
- Aveline: friendship (+5)
- Fenris: rivalry (+5)
- "You can't take any chances" (leads to quest A Debt in the Family in Act 2)
- Anders: rivalry (+5)
- Aveline: rivalry (+5)
- Bethany: rivalry (+10)
- Fenris: friendship (+5)
- "Keran's fine" (available only if Keran was checked; leads to quest How to Frame a Templar in Act 2)
- Fenris: rivalry (+5)
Companion reactions
Cullen and the Order: This dialogue is available when talking to Cullen after the quest (you have to leave and re-enter the Gallows)
"I support the templars"
- Aveline: friendship (+5)
- Carver: friendship (+5)
- Fenris: friendship (+5)
- Merrill: rivalry (+10)
- Anders: rivalry (+10) (PC 1.04 no approval change)
![]() (1.03) A bug prevents quite a few companions from awarding friendship/rivalry depending on your dialogue choice. The changes listed above are the only approval gains available. Patch 1.04 should fix it.
(1.03) A bug prevents quite a few companions from awarding friendship/rivalry depending on your dialogue choice. The changes listed above are the only approval gains available. Patch 1.04 should fix it.
"The Order needs to change"
- Anders: friendship (+5)
- Aveline: friendship (+5)
- Carver: rivalry (+5)
Rewards
- 400 XP
- 4
Notes
- There is a Simple-ranked trap at the bottom of the first set of stairs upon entering the Sanctuary, and another before the final confrontation.
- In Wilmod's camp check the crate near the fight area for Design: Rune of Impact.
Bugs
- There is a mapping bug where if this quest is done prior to Blackpowder Promise, fast travelling to "Wilmod's Camp" may take Hawke to Dead Man's Pass instead. The encounter with Javaris Tintop proceeds normally, but Cullen and Wilmod are nowhere to be found. Simply finish the map and on exiting the area, select Wilmod's Camp again and this quest will proceed normally.