RShepard227 (talk | contribs) No edit summary |
Gphoenix51 (talk | contribs) (Spelling, proofreading and syntax fixes) Tag: Visual edit |
||
| Line 23: | Line 23: | ||
Enter the [[Hawke Estate]] at [[Hightown]]. If Isabela is present but you choose to help [[Aveline Vallen|Aveline]] first, you immediately activate this quest – this will cause [[Isabela]] to leave permanently. If you don't want to lose her, help Isabela first (the [[To Catch a Thief]] quest), after which this quest will continue. |
Enter the [[Hawke Estate]] at [[Hightown]]. If Isabela is present but you choose to help [[Aveline Vallen|Aveline]] first, you immediately activate this quest – this will cause [[Isabela]] to leave permanently. If you don't want to lose her, help Isabela first (the [[To Catch a Thief]] quest), after which this quest will continue. |
||
| − | Depending on previous choices, it's possible that you will encounter Aveline by herself near the start of Act II at your estate. If this happens, you can accept the quest at this point with no adverse |
+ | Depending on previous choices, it's possible that you will encounter Aveline by herself near the start of Act II at your estate. If this happens, you can accept the quest at this point with no adverse effect on Isabela as long as you don't go to the [[Arishok]] with Aveline before completing To Catch a Thief. Also, you will still have the above described encounter where Aveline and Isabela argue over who should help first after you complete [[Following the Qun]]. |
== Walkthrough == |
== Walkthrough == |
||
| Line 69: | Line 69: | ||
The opening battle of Hightown pits you against a Sten with at least one Ashaad. Take the Ashaad out first, then stun and defeat the Sten before killing too many and spawning a Saarebas. Defeat the Saarebas as before, then clean up. |
The opening battle of Hightown pits you against a Sten with at least one Ashaad. Take the Ashaad out first, then stun and defeat the Sten before killing too many and spawning a Saarebas. Defeat the Saarebas as before, then clean up. |
||
| − | After this battle you are |
+ | After this battle you are blindsided by another Saarebas. Knight-Commander [[Meredith Stannard|Meredith]] dispels it magic and runs it through. After a brief discussion, she asks you to meet her at the Viscount's Keep. Unlock the Complex-ranked chest for loot and keep moving. There is a massive battle at the Merchants' Guild square, featuring Qunari battling Carta Thugs, so it is best to save before continuing. They will attack each other at first, but if you build enough threat they will put their differences aside to kill you. Cold damage makes short work of both groups, but two Carta Assassins will show up. It's best to kill only a few Carta dwarves and fall back to the bazaar, trying to make short work of one Assassin before the other can kill a party member. |
On your way to the main square you will see a corpse on the ground, which you can loot for the [[Recipe: Elixir of Heroism]]. Easily missed, the corpse is located in a corner to the right, just before you enter the square. After killing a few enemies a Saarebas will spawn in from here, so hold position here and lure a few enemies at a time so you'll be in position for that. To conserve resources, fall back to the Merchants' Guild and pull the enemies a few at a time. When a Sten shows up, quickly kill the remaining enemies before it can heal them. If everyone has survived to this point, they should be able to stand against the Sten by themselves while you root around the main square for things to loot. After the final enemy falls there will be a series of cutscenes that result in moving on from this area. |
On your way to the main square you will see a corpse on the ground, which you can loot for the [[Recipe: Elixir of Heroism]]. Easily missed, the corpse is located in a corner to the right, just before you enter the square. After killing a few enemies a Saarebas will spawn in from here, so hold position here and lure a few enemies at a time so you'll be in position for that. To conserve resources, fall back to the Merchants' Guild and pull the enemies a few at a time. When a Sten shows up, quickly kill the remaining enemies before it can heal them. If everyone has survived to this point, they should be able to stand against the Sten by themselves while you root around the main square for things to loot. After the final enemy falls there will be a series of cutscenes that result in moving on from this area. |
||
| Line 81: | Line 81: | ||
=== Viscount's Keep === |
=== Viscount's Keep === |
||
{{Note|Inside the keep there are 2 standard traps (20 Cunning, 100 XP each) at the bottoms of the second sets of stairs - both the right and the left side have a trap.}} |
{{Note|Inside the keep there are 2 standard traps (20 Cunning, 100 XP each) at the bottoms of the second sets of stairs - both the right and the left side have a trap.}} |
||
| − | As you enter Viscount's Keep, you are attacked by a large contingent of Qunari led by a [[Saarebas]] and later a Sten. The best way out of this turkey |
+ | As you enter Viscount's Keep, you are attacked by a large contingent of Qunari led by a [[Saarebas]] and later a Sten. The best way out of this turkey shoot is to hide behind the two pillars and try to break the Ashaads' and Saarebas's lines of sight to force them down below. Use a Miasmic Flask or Glyph of Paralysis to suppress the Ashaads and a more powerful stun for the Saarebas. Close ranks, bringing a rogue to disarm the traps, then kill the Saarebas. Kill the Ashaads next, then fall back downstairs and let the Karashok come to you. More Karashok should arrive for the slaughter followed by the final Sten. Defeat them like you did outside, by keeping the Sten's aura suppressed or far away from them (killing them before the Sten even gets close will also work). |
| − | After the fight, loot the remains and containers. Obtain the [[The Seal of Kirkwall]] and [[Twice-Blessed Ring]]. Go to |
+ | After the fight, loot the remains and containers. Obtain the [[The Seal of Kirkwall]] and [[Twice-Blessed Ring]]. Go to the Viscount's Throne Room in the back and a cutscene will start. |
| − | If you didn't get the Arishok's respect (A Worthy Rival achievement) he will order several Qunari to attack you before he will talk with you. [360 and PC: This does not always appear to be the case; getting attacked seems to be a possibility anyway. Even after receiving the achievement there may be very few words before Arishok orders an attack. However, this battle is rather short and not difficult on the lower settings. After this, the conversation begins.] |
+ | If you didn't get the Arishok's respect ([[A Worthy Rival]] achievement) he will order several Qunari to attack you before he will talk with you. [360 and PC: This does not always appear to be the case; getting attacked seems to be a possibility anyway. Even after receiving the achievement there may be very few words before Arishok orders an attack. However, this battle is rather short and not difficult on the lower settings. After this, the conversation begins.] |
[[File:Demands of the qun.jpg|thumb|250px|Arishok with Tome of Koslun]] |
[[File:Demands of the qun.jpg|thumb|250px|Arishok with Tome of Koslun]] |
||
| Line 94: | Line 94: | ||
* If you refuse to turn Isabela over then {{Approval2|Isabela|+15}}. If Aveline is in the party then {{Approval2|Aveline|-5}} (even if you change your mind and turn Isabela over). |
* If you refuse to turn Isabela over then {{Approval2|Isabela|+15}}. If Aveline is in the party then {{Approval2|Aveline|-5}} (even if you change your mind and turn Isabela over). |
||
* If you say that you will punish her, you receive {{Approval2|Isabela|-10}}. (Merrill and Aveline will also react with {{Approval2|+10}} for protecting Isabela and {{Approval2|-10}} for handing her over.) |
* If you say that you will punish her, you receive {{Approval2|Isabela|-10}}. (Merrill and Aveline will also react with {{Approval2|+10}} for protecting Isabela and {{Approval2|-10}} for handing her over.) |
||
| − | * If you appease the Arishok by giving him Isabela, you will lose her forever, and he and the rest of the Qunari will leave Kirkwall peacefully. Isabela will be furious with Hawke and vow |
+ | * If you appease the Arishok by giving him Isabela, you will lose her forever, and he and the rest of the Qunari will leave Kirkwall peacefully. Isabela will be furious with Hawke and vow revenge. If Aveline is in the party then {{Approval2|Aveline|-10}}. Otherwise you will have to fight. |
The Arishok will offer Hawke a duel: |
The Arishok will offer Hawke a duel: |
||
| Line 140: | Line 140: | ||
* Approaching the Qunari compound at night will turn the city guards stationed outside the compound into hostile NPCs. After the fight a single guard NPC remains at his post. Returning to the Docks during the day makes all the guards appear at their posts again. (As of Patch 1.02 this is no longer the case.) |
* Approaching the Qunari compound at night will turn the city guards stationed outside the compound into hostile NPCs. After the fight a single guard NPC remains at his post. Returning to the Docks during the day makes all the guards appear at their posts again. (As of Patch 1.02 this is no longer the case.) |
||
* After killing the last group of Qunari, your game may send you back to an earlier dialog. |
* After killing the last group of Qunari, your game may send you back to an earlier dialog. |
||
| − | * If you choose to slaughter the Qunari in the Viscount's throne room, the closing |
+ | * If you choose to slaughter the Qunari in the Viscount's throne room, the closing cutscene may still feature Qunari standing around the throne room area. |
*If you choose to duel the Arishok one on one, he may reach 0 health but become unkillable. |
*If you choose to duel the Arishok one on one, he may reach 0 health but become unkillable. |
||
* If the Arishok backs you against the wall with the entrance door, he may knock you through the door/wall. It is impossible to get back into the room and finish the fight. |
* If the Arishok backs you against the wall with the entrance door, he may knock you through the door/wall. It is impossible to get back into the room and finish the fight. |
||
Revision as of 06:35, 1 April 2018
- For Iron Bull's companion quest in Dragon Age: Inquisition, see Demands of the Qun (Inquisition).
Demands of the Qun is an Act 2 main quest in Dragon Age II.
Late in Act 2, return to the Hawke Estate to find Aveline requesting your help. Assuming you have recruited Isabela, she will also be present, and will argue with Aveline – Isabela has found the relic that she lost, and retrieving it would mean that her pursuer, Castillon, would spare her life. You will need to choose who to help first.
Acquisition
Enter the Hawke Estate at Hightown. If Isabela is present but you choose to help Aveline first, you immediately activate this quest – this will cause Isabela to leave permanently. If you don't want to lose her, help Isabela first (the To Catch a Thief quest), after which this quest will continue.
Depending on previous choices, it's possible that you will encounter Aveline by herself near the start of Act II at your estate. If this happens, you can accept the quest at this point with no adverse effect on Isabela as long as you don't go to the Arishok with Aveline before completing To Catch a Thief. Also, you will still have the above described encounter where Aveline and Isabela argue over who should help first after you complete Following the Qun.
Walkthrough
Qunari Compound
Go with Aveline to the Qunari Compound by the Docks. She expects trouble, so finish any pressing business first. (Completing the quest ends the Act.) Make sure that you have a significant number of health potions and injury kits as you will not be able to buy any during the quest.
When you start the conversation with the Arishok, the Arishok will ask Hawke about the status of their stolen relic. Choosing to tell him "Isabela has it" regarding the relic earns an amount of respect from him.
During the conversation, the two fugitive elves who were granted religious sanctuary will reveal their crime. A city guard forced himself on their sister. When they reported him, the authorities would do nothing about it. So they took matters into their own hands and murdered the corrupt guard themselves.
- If you disagree with Aveline’s comment (“That doesn’t excuse murder”) by saying "Yes it does", you will get
 Aveline: rivalry (+10) for doing so.
 - If you agree with Aveline’s comment by saying "Aveline is right”, you will get
 Aveline: friendship (+10) for doing so.
The Arishok will ask Hawke's opinion on the matter of whether he should hand over the two elven fugitives for their trial.
- If Hawke has an aggressive personality and you choose the aggressive option then this will earn you another degree of respect from him.
- It's possible choosing not to hand them over will earn another degree of respect from him.
(All the respect goes towards earning the "A Worthy Rival" achievement. If you've been honest and upfront in your actions and words during your dealings with the Arishok (particularly reporting his missing delegation, not hiding the zealot's torture, and telling him the truth about how they were tortured over the course of Offered and Lost), regardless of whether or not you asked for money in the first Javaris business in Blackpowder Promise, you can earn the achievement by the end of this conversation; it will unlock after the following cutscenes, on the screen where you are prompted to choose your party. It's possible to have already earned enough respect for the achievement, but this conversation will be your last chance to earn his full respect storywise.)
Regardless, he is determined to defend the two elven "viddathari," as is his duty under the Qun. As he cannot simply leave Kirkwall without the relic, neither can he stay and remain blind to the city's "dysfunction." The conversation will end with his decision to attack the city and convert it to the Qun.
Lowtown
After the attack on your small party in the Qunari Compound and a short cutscene, you appear in Lowtown and are given a chance to rearrange your party.
- If you do not accept Aveline, you will get Aveline: rivalry (+10) or
 Aveline: friendship (+5) if your friendship is high enough. Note: She tells you to go to your estate but this is impossible; you must go to the Viscount's Keep.
 - If you accept Aveline in your party, you will get Aveline: friendship (+10). She tells you to go to the Viscount's Keep.
- (Picking or not picking her doesn't have any influence on your friendship with Aveline in patch 1.04)
Note : If you choose your romantic partner, you will have a small scene with them indicating their worry over you.
The Qunari now lay siege to Kirkwall. You can regroup and go to the Viscount's Keep to warn the city guards about the Qunari attack.
First you will face a Saarebas at the top of the steps from the Docks, along with some Karashok. Blitz the Saarebas with stun and burst damage to prevent its electrical attacks from wiping out your party. Frost is your best friend against Qunari; while nature will incur double damage as well, it's a much rarer element and their are elven supporters further in Lowtown that are immune to it on Nightmare difficulty. Qunari will also be immune to fire and electricity, so stay away from these elements on the game's most difficult setting.
Passing through Gamlen's neighborhood you will find a group of Grey Wardens. Let the enemy's attention fall on the Wardens and use ranged attacks to pick off some of the enemies. A Saarebas stations itself outside Gamlen's House, so defeat it like the previous one when you get an opening, then band together with the Grey Wardens to defeat the remaining enemies. If you imported a Dragon Age: Origins save where Alistair was not made King, killed or exiled, he will be leading the Wardens and will give you The Sacred Heart amulet. Otherwise the Wardens will be led by Stroud, who will give you the Warden's Promise ring instead. If you took Bethany or Carver on The Deep Roads Expedition and they survived, they will be among the Wardens as well. They will not rejoin your party.
You can choose to go south first to an optional fight with a large party of Coterie-dressed Looters, led by a Coterie Rogue. Use spirit damage to make short work of them, but they're mostly Critter ranked anyway.
You will fight a Sten, along with other Qunari, right before you enter Hightown. The Elven supporters are immune to nature and weak to electricity, which complements the Qunari nicely. For best results, take the right hand path and pull just a few enemies, including the Sten, then defeat them, drop out of combat, and save. Two waves will spawn in this lower section of the market area, with melee Elven supporters who resist fire. They're Critter-ranked and not very difficult if you kite them, but take out the Ashaad first.
Hightown
The opening battle of Hightown pits you against a Sten with at least one Ashaad. Take the Ashaad out first, then stun and defeat the Sten before killing too many and spawning a Saarebas. Defeat the Saarebas as before, then clean up.
After this battle you are blindsided by another Saarebas. Knight-Commander Meredith dispels it magic and runs it through. After a brief discussion, she asks you to meet her at the Viscount's Keep. Unlock the Complex-ranked chest for loot and keep moving. There is a massive battle at the Merchants' Guild square, featuring Qunari battling Carta Thugs, so it is best to save before continuing. They will attack each other at first, but if you build enough threat they will put their differences aside to kill you. Cold damage makes short work of both groups, but two Carta Assassins will show up. It's best to kill only a few Carta dwarves and fall back to the bazaar, trying to make short work of one Assassin before the other can kill a party member.
On your way to the main square you will see a corpse on the ground, which you can loot for the Recipe: Elixir of Heroism. Easily missed, the corpse is located in a corner to the right, just before you enter the square. After killing a few enemies a Saarebas will spawn in from here, so hold position here and lure a few enemies at a time so you'll be in position for that. To conserve resources, fall back to the Merchants' Guild and pull the enemies a few at a time. When a Sten shows up, quickly kill the remaining enemies before it can heal them. If everyone has survived to this point, they should be able to stand against the Sten by themselves while you root around the main square for things to loot. After the final enemy falls there will be a series of cutscenes that result in moving on from this area.
If you didn't notice him already, First Enchanter Orsino is lying on the ground. Hawke helps him to his feet. If Bethany was the surviving sibling and you didn't take her on the Deep Roads Expedition, Orsino will heal her and she will leave with him. Meredith will arrive shortly after with her reinforcements. If Carver was the surviving sibling and you didn't take him, he will be the one appearing with Meredith as she leads a group of templars to join you.
After saving Orsino, you must choose between Meredith's and Orsino's plans. If Hawke is diplomatic, you can also ask them to stop arguing, after which Orsino suggests that you lead them and make the decisions. If you follow Meredith's plan, you will fight more Qunari; this plan gives you more items and experience. (Again, if you choose to battle the Qunari with Meredith's plan, loot the bodies during battle, as a cutscene will transport you inside the Keep once the last opponent dies.) Whichever choice you make, the hostages are not killed.
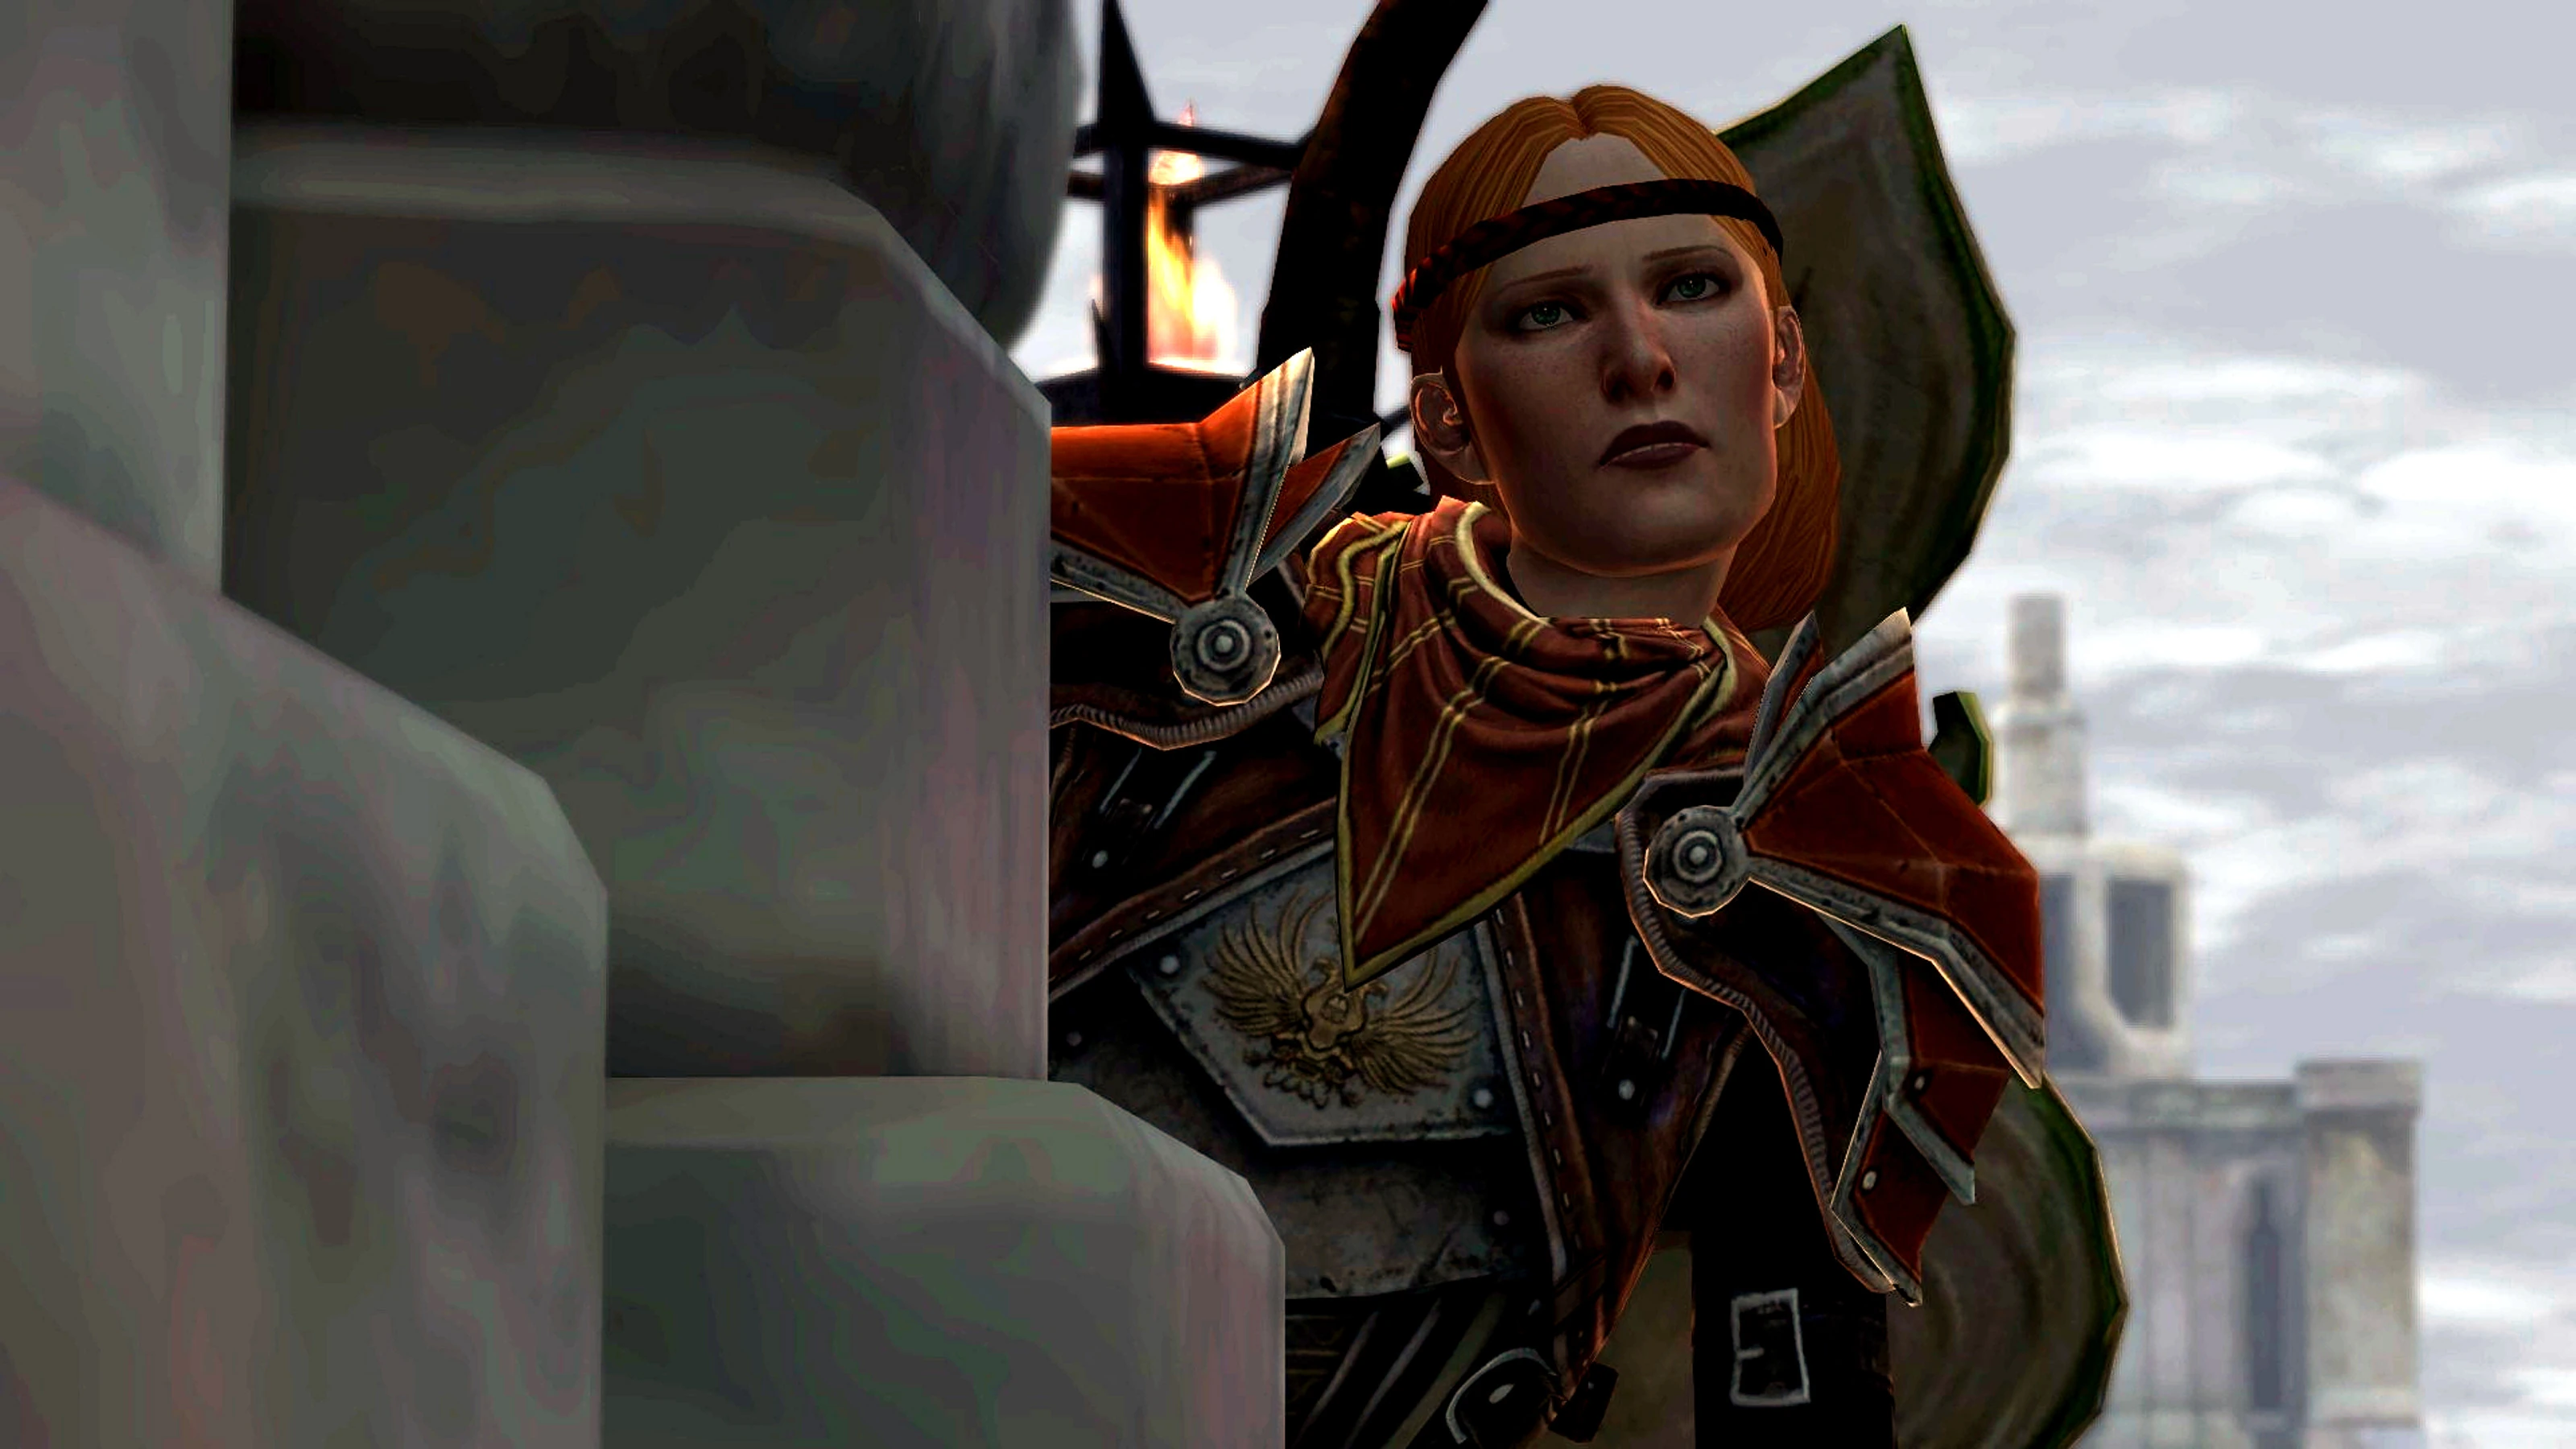

Aveline checking for her guards
Viscount's Keep
As you enter Viscount's Keep, you are attacked by a large contingent of Qunari led by a Saarebas and later a Sten. The best way out of this turkey shoot is to hide behind the two pillars and try to break the Ashaads' and Saarebas's lines of sight to force them down below. Use a Miasmic Flask or Glyph of Paralysis to suppress the Ashaads and a more powerful stun for the Saarebas. Close ranks, bringing a rogue to disarm the traps, then kill the Saarebas. Kill the Ashaads next, then fall back downstairs and let the Karashok come to you. More Karashok should arrive for the slaughter followed by the final Sten. Defeat them like you did outside, by keeping the Sten's aura suppressed or far away from them (killing them before the Sten even gets close will also work).
After the fight, loot the remains and containers. Obtain the The Seal of Kirkwall and Twice-Blessed Ring. Go to the Viscount's Throne Room in the back and a cutscene will start.
If you didn't get the Arishok's respect (A Worthy Rival achievement) he will order several Qunari to attack you before he will talk with you. [360 and PC: This does not always appear to be the case; getting attacked seems to be a possibility anyway. Even after receiving the achievement there may be very few words before Arishok orders an attack. However, this battle is rather short and not difficult on the lower settings. After this, the conversation begins.]
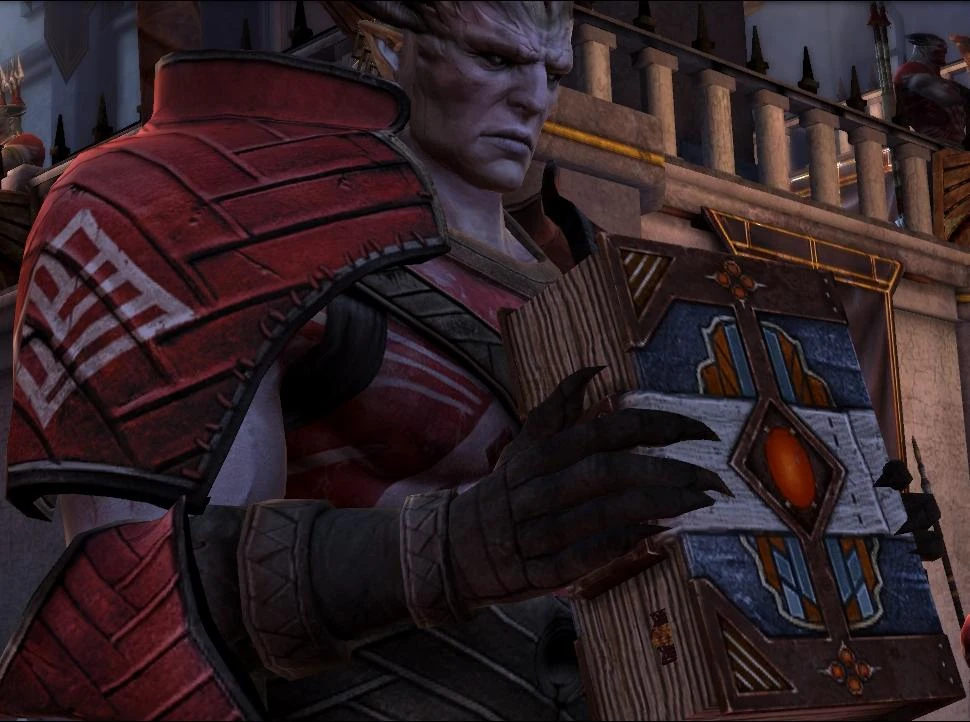
Arishok with Tome of Koslun
If Hawke has romanced Isabela at some point in the past or has fifty points of Friendship or Rivalry with her, she will return with the Relic. You must now choose whether to give Isabela to the Arishok or not.
- If you refuse to turn Isabela over then Isabela: friendship (+15). If Aveline is in the party then Aveline: rivalry (+5) (even if you change your mind and turn Isabela over).
- If you say that you will punish her, you receive Isabela: rivalry (+10). (Merrill and Aveline will also react with (+10) for protecting Isabela and (+10) for handing her over.)
- If you appease the Arishok by giving him Isabela, you will lose her forever, and he and the rest of the Qunari will leave Kirkwall peacefully. Isabela will be furious with Hawke and vow revenge. If Aveline is in the party then Aveline: rivalry (+10). Otherwise you will have to fight.
The Arishok will offer Hawke a duel:
- If you refuse to turn Isabela over when the Arishok demands it
- If Isabela did not return and:
- you have Fenris in your group, who will arrange the duel ( Fenris: friendship (+10) if you agree, Fenris: rivalry (+10) if you refuse)
- or the Arishok considers you to be A Worthy Rival and you choose the aggressive option when he asks how you plan to resolve this.
- you have Fenris in your group, who will arrange the duel (
If you agree, there will be a one-on-one duel to the death between the Arishok and you (![]() Varric: friendship (+10). See Arishok (strategy) for details on fighting him in single combat.
Varric: friendship (+10). See Arishok (strategy) for details on fighting him in single combat.
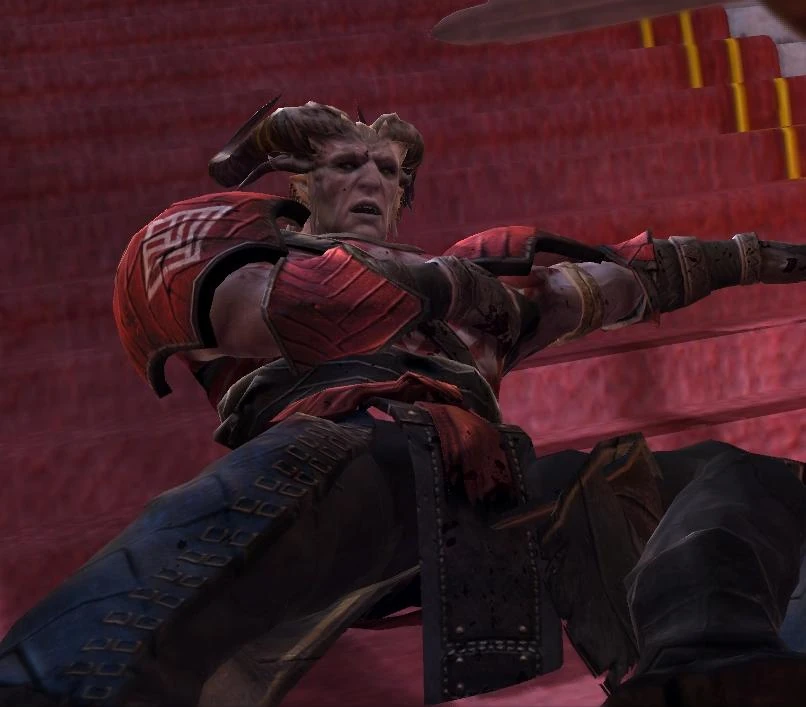
The Death of the Arishok
If you are not offered or are offered and refuse the duel, you and your party will fight the Arishok and his Qunari to the death (the Arishok may be easier to beat this way). The strategy here is to quickly take out the three Qunari from behind first. A rogue should be able to take them out quickly. Then, proceed to the other two on the bottom room. Keep mages and archers close while a warrior holds position at the base of the stairs. (You may want or need to have your characters positioned very close to the "wall" on either side of the stairs to prevent them from being decimated by ranged attacks. This will also draw the ranged Qunari to the bottom of the stairs, where they can be more easily dealt with.) Wait for the rest of the Qunari to come down the stairs and have ranged fighters slow and bombard them. This should take them all out fairly quick (on normal difficulty). After that, take out the two remaining Qunari. You may want to leave the Arishok alive to loot the other bodies, and take him out afterwards.
After the battle, you are rewarded with Sataareth and the Mantle of the Champion gloves. Note: You are not meant to "loot" the Arishok, nor is it possible to do so - when the killing blow is landed, he doesn't actually die, but rather, turns into an "ally" (blue ground ring) and a plot point. The cut scene then triggers, so a lootable body is never present.
After some more cutscenes, three years have passed and Act 3 begins.
Result
- Act 2 of Varric's Tale of the Champion ends, and Act 3 begins.
- The Qunari leave Kirkwall.
- With the Qunari threat ended, the nobility of Kirkwall and Knight-Commander Meredith declare Hawke to be the Champion of Kirkwall. Cassandra queries Varric on these final moments of the battle, finding it "romantic" if Hawke defeated the Arishok in single combat. Seeing that Hawke is very heroic in Varric's tale compared to the version of the story she had heard, she begins to wonder how different the events that followed truly are. She is starting to believe that Varric's account is the truthful one, and wishes to know how the events at the Gallows played out.
Rewards
For the final showdown inside the throne room of Viscount's Keep, there are three choices available. Two of them yield the same experience.
- Giving Isabela to the Arishok results in no fight. (13200xp)
- Dueling Arishok. (13200xp)
- Fighting Arishok and killing all qunari with him. (13886xp)
There are also several items that are given as rewards or that may be picked up during the course of this quest:
- Recipe: Elixir of Heroism
- The Seal of Kirkwall
- Twice-Blessed Ring
- Sataareth
- Gloves of the Champion
- Warden's Promise
- The Sacred Heart - Requires a Dragon Age: Origins save import where Alistair is still in the Grey Wardens, i.e. isn't King and wasn't imprisoned or exiled after the Landsmeet.
- Note: You appear to receive Gloves of the Champion, Sataareth, and the achievement King of the Hill only if Hawke is alive when you defeat the Arishok. If Hawke has fallen and Arishok is defeated with another party member, you will not receive these things. This is likely due to the game assuming you would face him in single combat.
Trivia
- Even though it is seen that a qunari snaps the neck of one of the citizens in the keep he is seen cheering after Hawke is victorious, this is however due to the fact that they use the same model for multiple individuals.
Bugs
- Just after the talk with Aveline, sometime during the first fight (when Qunari appear on the stairs) Some Qunari might clip through the stairs and end up beneath it, causing companions to get stuck in attack mode without it being possible to kill the enemy. These enemies will follow you beneath the ground and cause some companions to be unable to move. Reloading can (but does not always) fix this bug. Luring the Qunari to the bottom of the stairs will prevent this.
- Approaching the Qunari compound at night will turn the city guards stationed outside the compound into hostile NPCs. After the fight a single guard NPC remains at his post. Returning to the Docks during the day makes all the guards appear at their posts again. (As of Patch 1.02 this is no longer the case.)
- After killing the last group of Qunari, your game may send you back to an earlier dialog.
- If you choose to slaughter the Qunari in the Viscount's throne room, the closing cutscene may still feature Qunari standing around the throne room area.
- If you choose to duel the Arishok one on one, he may reach 0 health but become unkillable.
- If the Arishok backs you against the wall with the entrance door, he may knock you through the door/wall. It is impossible to get back into the room and finish the fight.
- If this occurs, as a mage, you may still be able to defeat the Arishok from the back room during the glitch and gain an advantage as his attacks will not be able to harm you. Elemental Fire/Ice attacks can strike the Arishok if positioned correctly near the wall the Arishok is attempting to attack you.
- If you defeat the Arishok as an Archer Rogue, the cutscene will show your character dual wielding to make the killing blows.
- Sometimes Isabela would not return, even if you had 50% or more friendship or rivalry. The only known way to fix this is by using the console to set your relationship to an active romance, and after Act 2 has ended, clear the romance.
- Using the console to fix Isabela can set the Denied or Ended romance flags if you're in a romance with a different companion. Before their Act 3 romances will progress properly, you'll need to use the console and clear those flags.
- During the duel with Arishok, the quest will mark itself as completed in your journal even though Arishok is still alive.