(→Mages) |
Tags: Visual edit apiedit |
||
| (39 intermediate revisions by 19 users not shown) | |||
| Line 2: | Line 2: | ||
|style = {{{style|}}} |
|style = {{{style|}}} |
||
|name = [[Circle Tower]] |
|name = [[Circle Tower]] |
||
| − | |icon = |
+ | |icon = Ico Tower.png |
| − | |image = Area- |
+ | |image = Area-Circle Tower.jpg |
| − | | |
+ | |type = Tower, Island, Fortress |
| − | |type = Tower |
||
|location = [[Ferelden]] |
|location = [[Ferelden]] |
||
| + | |quests = [[Magi Origin]] <br> [[Broken Circle]] <br> [[In Search of Morrigan]] |
||
| − | |inhabitants = [[Humans]], [[Elves]], [[Dagna]] <small>(possibly)</small>, [[Demons]], [[Abominations]] |
||
| + | |sections = [[Storage Caves]] <br> [[Mage Tower - Basement|Basement]] <br> [[Apprentice Quarters]] (lvl 1) <br> [[Senior Mage Quarters]] (lvl 2) <br> [[Great Hall]] (lvl 3) <br> [[Templar Quarters]] (lvl 4) <br> [[Harrowing Chamber]] (lvl 5) |
||
| ⚫ | |||
| + | |inhabitants = [[Human]]s, [[Elf|Elves]], [[Dwarf|Dwarves]] |
||
| ⚫ | |||
| + | |appearances = [[Dragon Age: The Stolen Throne]] <br> [[Dragon Age: The Calling]] <br> [[Dragon Age: Origins]] <br> [[Witch Hunt]] |
||
}}</onlyinclude> |
}}</onlyinclude> |
||
| − | The '''Circle Tower''' |
+ | The '''Circle Tower''', officially named '''Kinloch Hold''', is [[Ferelden]]'s regional headquarters for the [[Circle of Magi]]. It is located on [[Lake Calenhad]], and accessed only by its [[Lake Calenhad Docks|docks]]. As per Chantry and local law, human and city elf citizens of Ferelden with magical potential are brought here to be imprisoned for most of their lives and [[Education|instructed]] in the legally-approved Schools of Magic, and (ideally) trained to resist [[demon]]s (who seek especially to [[Abomination|possess living mages]]). |
| + | Apprentices and the majority of the Circle's impressive library are housed on the [[Apprentice Quarters|first floor]], while full mages live on the [[Senior Mage Quarters|second floor]], which also contains the stockrooms, enchanters' laboratories, the Chantry, and more libraries. The [[Great Hall|third floor]] consists mostly of meeting rooms and assembly spaces, as well as a few personal quarters, presumably for the senior enchanters. The [[Templar Order|templars]] live and train on the [[Templar Quarters|fourth floor]], while the pinnacle of the tower, accessible only from the Templar Quarters, contains the [[Harrowing Chamber]]. Each floor is dozens of feet high. The tower also features a secure [[Mage Tower - Basement|basement]], which houses the repository, a vault for dangerous artifacts, and, prior to 9:30 [[Dragon Age (time period)|Dragon]], the [[Phylactery|phylacteries]] of apprentices. Beneath the tower there is also an extensive network of caves which [[Storage Caves|part]] of it is used by the tower as storage space. |
||
| ⚫ | |||
| + | |||
| ⚫ | |||
== Background == |
== Background == |
||
| − | + | {{Blockquote|Since it is best known as the Tower of the Circle of Magi these days, many people forget that the great tower sitting in the middle of Lake Calenhad existed long before the Circle.| [[First Enchanter]] Lothaire}} |
|
| − | ''— First Enchanter Lothaire'' |
||
| + | [[File:Kinloch Hold painting.png|thumb|300px|Painting depicting Kinloch Hold]] |
||
| ⚫ | More commonly referred to as the Tower of the Circle of Magi or the Circle Tower, Kinloch Hold existed long before the Circle was founded. Built by the [[Avvar]]s |
||
| + | |||
| ⚫ | More commonly referred to as the Tower of the Circle of Magi or the Circle Tower, Kinloch Hold existed long before the Circle was founded. Built by the [[Avvar]]s along with some help from [[Dwarf|dwarves]], it was long considered impregnable -- until the [[Tevinter Imperium]] drove the Avvars from it in a brutal campaign. |
||
| + | |||
| + | The tower was thought to be cursed, and was widely shunned even before the Circle of Magi moved there in 3:87 [[Towers Age|Towers]] after its tower in [[Denerim]] was razed.<ref>[http://social.bioware.com/wiki/dragonage/index.php/Kinloch_Hold Kinloch Hold]. BioWare wiki.</ref> |
||
== Involvement == |
== Involvement == |
||
| ⚫ | |||
| ⚫ | |||
| − | A [[mage]] [[The Warden|Warden]] will begin the story on the top floor of the tower as their [[Harrowing]] commences. |
||
| + | === ''Dragon Age: The Stolen Throne'' === |
||
| ⚫ | |||
| + | {{SpoilerTST|[[Maric Theirin]] visits Kinloch Hold in the end of the [[Blessed Age]] in order to meet with [[Grand Cleric]] [[Bronach]] who he knew was there. Bronach mentions that if she had a proper honor guard, she would have captured Maric and asks him to surrender, but the young rebel prince refuses. Even if the meeting did not help either side of the [[Fereldan Rebellion|rebellion]], Bronach -- one of the most important figures of the kingdom -- formed an opinion about Maric Theirin.}} |
||
| ⚫ | |||
| + | |||
| − | When The Warden comes to the Tower seeking aid against the [[Fifth Blight]], it is discovered that the Circle has been overrun by [[demons]] and [[abomination]]s. |
||
| + | === ''Dragon Age: The Calling'' === |
||
| + | {{SpoilerTC|King [[Maric Theirin]] along with a group of [[Grey Wardens]] visited Kinloch Hold in 9:10 [[Dragon Age (time period)|Dragon]]. There, in a small ceremony in front of the Circle, they were given black brooches which would allow them to not be sensed by the [[darkspawn]], and Maric was given some rare potions which would allow him to resist the darkspawn corruption. [[Duncan]] also slipped into the upper levels of the tower and stole an ebony-black dagger from the chest in [[First Enchanter]] [[Remille]]'s room. |
||
| + | |||
| + | While the Grey Wardens and Maric were underground, Remille along with the help of other [[Orlais|Orlesian]] Circle mages and templars, managed to take over the tower and imprison everyone else in the dungeons. However, Teyrn [[Loghain Mac Tir|Loghain]] who was already suspicious of the Orlesians, quickly took notice of this development. In the meantime, Remille captured Maric, Duncan and [[Fiona]] who fled [[Kul-Baras]] and brought them back to the Circle Tower where [[the Architect]], [[Bregan]], [[Genevieve]] and [[Utha]] were waiting for them. Eventually this meeting turned into a brawl which ended with Maric, Fiona and Duncan surviving and Utha and the Architect fleeing. In the meantime Fereldan troops led by Teyrn Loghain assaulted the Tower and freed it from those who took it over. |
||
| + | }} |
||
| + | |||
| ⚫ | |||
| + | |||
| ⚫ | |||
| ⚫ | |||
| + | A Circle [[Mage (Origins)|mage]] will go through their [[Harrowing]] at the Circle Tower and later encounter [[Duncan]], Ferelden's [[Warden-Commander]] here. |
||
| + | |||
| + | |||
| ⚫ | |||
| ⚫ | |||
| + | When [[the Warden]] comes to the Tower seeking aid against the [[Fifth Blight]], it is discovered that the Circle has been overrun by [[demon]]s and [[abomination]]s. Due to the Templars having been taken unawares and scattered, it is up to the Warden and their allies to either save the mages or purge the tower. In the former case, the mages will join the Grey Wardens against the Blight; in the latter, the Templars will instead.}} |
||
| + | |||
| ⚫ | |||
| + | {{SpoilerWH| |
||
| + | [[The Warden-Commander]] visits the Tower along with [[Ariane]] and the [[Dog]] while [[In Search of Morrigan]]. There, Knight-Captain [[Hadley]] will greet them. [[Sandal]] with his [[Bodahn Feddic|father]]'s stock is also present in the Apprentice Quarters.}} |
||
| + | |||
| + | |||
| ⚫ | |||
| + | {{:Storage Caves|style=iconmini}}{{clrl}} |
||
| + | {{:Mage Tower - Basement|style=iconmini}}{{clrl}} |
||
| + | {{:Apprentice Quarters|style=iconmini}} Interior{{clrl}} |
||
| + | {{:Senior Mage Quarters|style=iconmini}}{{clrl}} |
||
| + | {{:Great Hall|style=iconmini}}{{clrl}} |
||
| + | {{:Templar Quarters|style=iconmini}}{{clrl}} |
||
| + | {{:Harrowing Chamber|style=iconmini}}{{clrl}} |
||
== List of Circle Tower mages == |
== List of Circle Tower mages == |
||
| + | [[File:Kinloch Hold - Keep.png|thumb|270px|''[[Dragon Age Keep]]'' concept art of Kinloch Hold]] |
||
=== First Enchanters === |
=== First Enchanters === |
||
| + | * Arlen<ref>[[Circle Letter]]</ref> |
||
| − | * [[First Enchanter Irving|Irving]] |
||
| ⚫ | |||
| − | * [[First Enchanter Remille|Remille]] |
||
| + | * [[Remille]] |
||
| − | * Sinclair |
||
| + | * Sinclair<ref>[[Codex entry: Extracurricular Studies]]</ref> |
||
| − | * Arlen |
||
| + | * Wencelus |
||
=== Senior Enchanters === |
=== Senior Enchanters === |
||
| − | * [[ |
+ | * [[Leorah]] |
| − | * [[ |
+ | * [[Sweeney]] |
| − | * [[ |
+ | * [[Torrin]] |
* [[Uldred]] |
* [[Uldred]] |
||
* [[Wynne]] |
* [[Wynne]] |
||
=== Enchanters === |
=== Enchanters === |
||
| − | * [[ |
+ | * [[Cera]] |
=== Mages === |
=== Mages === |
||
| Line 54: | Line 88: | ||
* [[Petra]] |
* [[Petra]] |
||
* [[The Warden]] (Magi Origin) |
* [[The Warden]] (Magi Origin) |
||
| ⚫ | |||
=== Apprentices === |
=== Apprentices === |
||
| Line 71: | Line 104: | ||
* [[Evelina]] |
* [[Evelina]] |
||
| − | == |
+ | == Other characters == |
| + | * [[Bran (templar)|Bran]] |
||
| − | * Storage ([[Mage Tower - Basement|basement]]) |
||
| + | * [[Cullen]] |
||
| − | * Lobby, [[Apprentice Quarters]] (Level 1) |
||
| − | * [[ |
+ | * [[Dagna]] (possibly) |
| − | * [[ |
+ | * [[Drass]] |
| + | * [[Knight-Commander]] [[Greagoir]] |
||
| − | * [[Templar Quarters]] (Level 4) |
||
| + | * [[Hadley]] |
||
| − | * [[Harrowing Chamber]] (Level 5) |
||
| + | * [[Quartermaster (Circle Tower)|Quartermaster]] |
||
| + | * [[Sandal]] |
||
| + | * Head Cook<ref>According to the item description for [[Oven Mitts]].</ref> |
||
| + | [[File:Circle Tower concept art.jpg|thumb|270px|Concept art]] |
||
== Notable items == |
== Notable items == |
||
| − | {{See|[[Quartermaster (Circle Tower)]] for |
+ | {{See|[[Quartermaster (Circle Tower)]] for merchant items. To open all locked chests in the Circle Tower one needs a [[Rogue talents (Origins)#Deft Hands tree|lockpicking score]] of 60}} |
{{:Apprentice's Amulet|style=iconmini}}{{clrl}} |
{{:Apprentice's Amulet|style=iconmini}}{{clrl}} |
||
| Line 88: | Line 125: | ||
{{:Charged Mitts|style=iconmini}}, source: SideQuest Drop Fade Rifter{{clrl}} |
{{:Charged Mitts|style=iconmini}}, source: SideQuest Drop Fade Rifter{{clrl}} |
||
{{:Cinderfel Gauntlets|style=iconmini}}, source: Boss Drop Uldred{{clrl}} |
{{:Cinderfel Gauntlets|style=iconmini}}, source: Boss Drop Uldred{{clrl}} |
||
| + | {{:Fade Striders|style=iconmini}}, source: Chest{{clrl}} |
||
{{:Kaddis of the Lady of the Skies|style=iconmini}}, source: Chest{{clrl}} |
{{:Kaddis of the Lady of the Skies|style=iconmini}}, source: Chest{{clrl}} |
||
{{:Litany of Adralla|style=iconmini}}, source: Niall's Corpse{{clrl}} |
{{:Litany of Adralla|style=iconmini}}, source: Niall's Corpse{{clrl}} |
||
| Line 99: | Line 137: | ||
{{:Yusaris|style=iconmini}}, source: SideQuest Boss Drop [[Shah Wyrd]]{{clrl}} |
{{:Yusaris|style=iconmini}}, source: SideQuest Boss Drop [[Shah Wyrd]]{{clrl}} |
||
{{:Greagoir's Shield|style=iconmini}}, it is marked as stealable but currently equipped making this impossible without the toolset.{{clrl}} |
{{:Greagoir's Shield|style=iconmini}}, it is marked as stealable but currently equipped making this impossible without the toolset.{{clrl}} |
||
| − | {{:Journeyman Lightning Rune|style=iconmini}} |
+ | {{:Journeyman Lightning Rune|style=iconmini}}, source: Locked Chest [[Templar Quarters]] (4th Floor).{{clrl}} |
| − | Notable [[Gifts (Origins)|{{ColorItemGift|gifts}}]] for [[companions]]: |
+ | Notable [[Gifts (Origins)|{{ColorItemGift|gifts}}]] for [[Companions (Origins)|companions]]: |
| − | {{:Remarkable Malachite|style=iconmini}}, for [[Gifts#Gifts for Shale|Shale]], source: [[Quartermaster (Circle Tower)|Quartermaster]] at [[Apprentice Quarters]] (First Floor).{{clrl}} |
+ | {{:Remarkable Malachite|style=iconmini}}, for [[Gifts (Origins)#Gifts for Shale|Shale]], source: [[Quartermaster (Circle Tower)|Quartermaster]] at [[Apprentice Quarters]] (First Floor).{{clrl}} |
| − | {{:Black Grimoire|style=iconmini}}, for [[Gifts#Gifts for Morrigan|Morrigan]], source: Irving's Quarters at [[Senior Mage Quarters]] (Second Floor).{{clrl}} |
+ | {{:Black Grimoire|style=iconmini}}, for [[Gifts (Origins)#Gifts for Morrigan|Morrigan]], source: Irving's Quarters at [[Senior Mage Quarters]] (Second Floor).{{clrl}} |
| − | {{:Chantry Amulet|style=iconmini}}, for [[Gifts#Gifts for Leliana|Leliana]], source: {{TextContainer|Templar Corpse}} at [[Senior Mage Quarters]] (Second Floor).{{clrl}} |
+ | {{:Chantry Amulet|style=iconmini}}, for [[Gifts (Origins)#Gifts for Leliana|Leliana]], source: {{TextContainer|Templar Corpse}} at [[Senior Mage Quarters]] (Second Floor).{{clrl}} |
| − | {{:Silver Chain|style=iconmini}}, for [[Gifts#Gifts for Morrigan|Morrigan]], source: {{TextContainer|Vanity}} at [[Senior Mage Quarters]] (Second Floor).{{clrl}} |
+ | {{:Silver Chain|style=iconmini}}, for [[Gifts (Origins)#Gifts for Morrigan|Morrigan]], source: {{TextContainer|Vanity}} at [[Senior Mage Quarters]] (Second Floor).{{clrl}} |
| − | {{:The Rose of Orlais|style=iconmini}}, for [[Gifts#Gifts for Wynne|Wynne]], source: {{TextContainer|Pile of Books}} at [[Senior Mage Quarters]] (Second Floor).{{clrl}} |
+ | {{:The Rose of Orlais|style=iconmini}}, for [[Gifts (Origins)#Gifts for Wynne|Wynne]], source: {{TextContainer|Pile of Books}} at [[Senior Mage Quarters]] (Second Floor).{{clrl}} |
| − | {{:Water-Stained Portrait|style=iconmini}}, for [[Gifts#Gifts for Sten|Sten]], source: {{TextContainer|Charred Corpse}} at [[Senior Mage Quarters]] (Second Floor).{{clrl}} |
+ | {{:Water-Stained Portrait|style=iconmini}}, for [[Gifts (Origins)#Gifts for Sten|Sten]], source: {{TextContainer|Charred Corpse}} at [[Senior Mage Quarters]] (Second Floor).{{clrl}} |
| − | {{:White Runestone|style=iconmini}}, for [[Gifts#Gifts for Alistair|Alistair]], source: Boss Drop Abomination at [[Great Hall]] (Third Floor).{{clrl}} |
+ | {{:White Runestone|style=iconmini}}, for [[Gifts (Origins)#Gifts for Alistair|Alistair]], source: Boss Drop Abomination at [[Great Hall]] (Third Floor).{{clrl}} |
| − | {{:Small Gold Bar|style=iconmini}}, for [[Gifts#Gifts for Zevran|Zevran]], source: Drop off {{TextContainer|Charmed Templar}} in the [[Great Hall]] (Third Floor) or [[Templar Quarters]] (Fourth Floor).{{clrl}} |
+ | {{:Small Gold Bar|style=iconmini}}, for [[Gifts (Origins)#Gifts for Zevran|Zevran]], source: Drop off {{TextContainer|Charmed Templar}} in the [[Great Hall]] (Third Floor) or [[Templar Quarters]] (Fourth Floor).{{clrl}} |
| − | {{:Beef Bone|style=iconmini}}, for [[Gifts#Gifts for Dog|Dog]], source: {{TextContainer|Chest}} [[Templar Quarters]] (Fourth Floor).{{clrl}} |
+ | {{:Beef Bone|style=iconmini}}, for [[Gifts (Origins)#Gifts for Dog|Dog]], source: {{TextContainer|Chest}} [[Templar Quarters]] (Fourth Floor).{{clrl}} |
| − | {{:Sun Blonde Vint-1|style=iconmini}}, for [[Gifts#Gifts for Oghren|Oghren]], source: {{TextContainer|Vanity}} at [[Templar Quarters]] (Fourth Floor).{{clrl}} |
+ | {{:Sun Blonde Vint-1|style=iconmini}}, for [[Gifts (Origins)#Gifts for Oghren|Oghren]], source: {{TextContainer|Vanity}} at [[Templar Quarters]] (Fourth Floor).{{clrl}} |
== Companion remarks == |
== Companion remarks == |
||
| Line 128: | Line 166: | ||
== Banter == |
== Banter == |
||
Party banter may be triggered at the following spots: |
Party banter may be triggered at the following spots: |
||
| ⚫ | |||
| − | |||
| ⚫ | |||
| − | |||
| ⚫ | |||
| − | * Apparently, the mages of the Tower are quite free in showing their affections for one another - at least according to Anders: "Everyone was kissing everyone." |
||
== Bugs == |
== Bugs == |
||
| ⚫ | * {{Platforms|PS3|Xbox360}}After the player finishes the quest [[Broken Circle]] and asks First Enchanter Irving if Dagna can join magic classes, there might be a minor bug if you return to the Circle Tower without going to [[Orzammar Commons]] to tell her that she was accepted. She may already be there waiting for the Warden; when told she can join she will return to [[Orzammar]] but will act as if she is in the Tower. |
||
| − | {{Bug|DAO|Even if you avoid killing Wynne, you may still slay the mages around her (Petra, Kinnon and Keili) with AOE damage. However, doing so adds Wynne's 'death notice' to her codex entry.}} |
||
| − | |||
| ⚫ | {{ |
||
== Gallery == |
== Gallery == |
||
| − | <gallery captionalign="center" orientation="landscape"> |
+ | <gallery widths=199 captionalign="center" orientation="landscape"> |
| − | + | Tower.jpg|Concept art |
|
| − | Tower.jpg |Concept art |
||
Circle Tower comic 1.jpg|The tower as seen in [[Dragon Age (comic)]] |
Circle Tower comic 1.jpg|The tower as seen in [[Dragon Age (comic)]] |
||
Circle Tower comic 2.jpg|The tower as seen in [[Dragon Age (comic)]] |
Circle Tower comic 2.jpg|The tower as seen in [[Dragon Age (comic)]] |
||
</gallery> |
</gallery> |
||
| + | |||
| + | == References == |
||
| + | <references/> |
||
{{Magic}} |
{{Magic}} |
||
| + | [[Category:Dragon Age: The Stolen Throne locations]] |
||
| + | [[Category:Dragon Age: The Calling locations]] |
||
[[Category:Dragon Age: Origins locations]] |
[[Category:Dragon Age: Origins locations]] |
||
| − | [[Category: |
+ | [[Category:Witch Hunt locations]] |
| + | [[Category:Circle Tower locations| ]] |
||
[[Category:Fortresses]] |
[[Category:Fortresses]] |
||
| + | [[Category:Islands]] |
||
| + | [[Category:Ferelden]] |
||
Revision as of 06:40, 12 October 2015
The Circle Tower, officially named Kinloch Hold, is Ferelden's regional headquarters for the Circle of Magi. It is located on Lake Calenhad, and accessed only by its docks. As per Chantry and local law, human and city elf citizens of Ferelden with magical potential are brought here to be imprisoned for most of their lives and instructed in the legally-approved Schools of Magic, and (ideally) trained to resist demons (who seek especially to possess living mages).
Apprentices and the majority of the Circle's impressive library are housed on the first floor, while full mages live on the second floor, which also contains the stockrooms, enchanters' laboratories, the Chantry, and more libraries. The third floor consists mostly of meeting rooms and assembly spaces, as well as a few personal quarters, presumably for the senior enchanters. The templars live and train on the fourth floor, while the pinnacle of the tower, accessible only from the Templar Quarters, contains the Harrowing Chamber. Each floor is dozens of feet high. The tower also features a secure basement, which houses the repository, a vault for dangerous artifacts, and, prior to 9:30 Dragon, the phylacteries of apprentices. Beneath the tower there is also an extensive network of caves which part of it is used by the tower as storage space.
A small trading hamlet has developed on the shore to facilitate trade and to maintain a ferry to the tower, which was originally reached by a massive bridge (now in ruins). Visitors are few and far between, however, as most come either to learn magic or to watch over those who do.
Background
Since it is best known as the Tower of the Circle of Magi these days, many people forget that the great tower sitting in the middle of Lake Calenhad existed long before the Circle.
— First Enchanter Lothaire
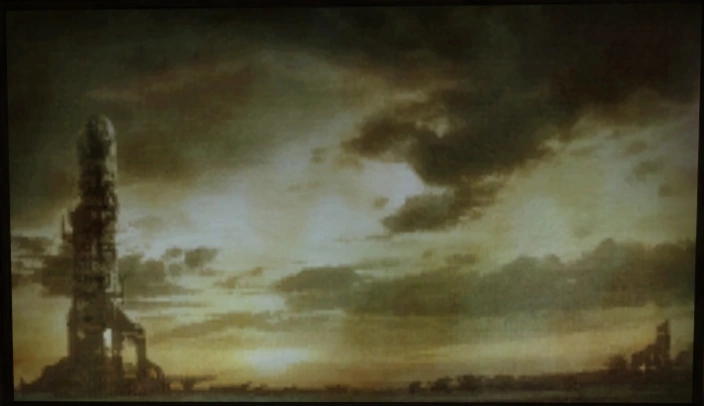

Painting depicting Kinloch Hold
More commonly referred to as the Tower of the Circle of Magi or the Circle Tower, Kinloch Hold existed long before the Circle was founded. Built by the Avvars along with some help from dwarves, it was long considered impregnable -- until the Tevinter Imperium drove the Avvars from it in a brutal campaign.
The tower was thought to be cursed, and was widely shunned even before the Circle of Magi moved there in 3:87 Towers after its tower in Denerim was razed.[1]
Involvement
Dragon Age: The Stolen Throne
Dragon Age: The Calling
King Maric Theirin along with a group of Grey Wardens visited Kinloch Hold in 9:10 Dragon. There, in a small ceremony in front of the Circle, they were given black brooches which would allow them to not be sensed by the darkspawn, and Maric was given some rare potions which would allow him to resist the darkspawn corruption. Duncan also slipped into the upper levels of the tower and stole an ebony-black dagger from the chest in First Enchanter Remille's room.
While the Grey Wardens and Maric were underground, Remille along with the help of other Orlesian Circle mages and templars, managed to take over the tower and imprison everyone else in the dungeons. However, Teyrn Loghain who was already suspicious of the Orlesians, quickly took notice of this development. In the meantime, Remille captured Maric, Duncan and Fiona who fled Kul-Baras and brought them back to the Circle Tower where the Architect, Bregan, Genevieve and Utha were waiting for them. Eventually this meeting turned into a brawl which ended with Maric, Fiona and Duncan surviving and Utha and the Architect fleeing. In the meantime Fereldan troops led by Teyrn Loghain assaulted the Tower and freed it from those who took it over.
Dragon Age: Origins
Magi Origin
- Main article: Magi Origin
A Circle mage will go through their Harrowing at the Circle Tower and later encounter Duncan, Ferelden's Warden-Commander here.
Broken Circle
- Main article: Broken Circle
Witch Hunt
Places
![]() Apprentice Quarters Interior
Apprentice Quarters Interior
List of Circle Tower mages
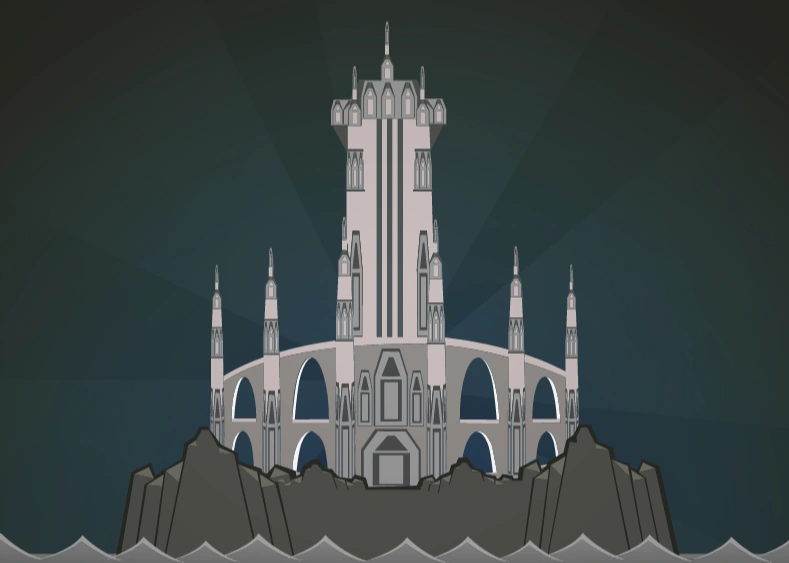
Dragon Age Keep concept art of Kinloch Hold
First Enchanters
Senior Enchanters
Enchanters
Mages
- Finn
- Godwin
- Niall
- Petra
- The Warden (Magi Origin)
Apprentices
Tranquil
Apostates with prior Circle training
Other characters
- Bran
- Cullen
- Dagna (possibly)
- Drass
- Knight-Commander Greagoir
- Hadley
- Quartermaster
- Sandal
- Head Cook[4]

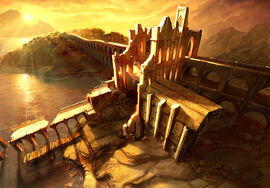
Concept art
Notable items
- See Quartermaster (Circle Tower) for merchant items. To open all locked chests in the Circle Tower one needs a lockpicking score of 60.
![]() Archon Robes, source: Drop Blood Mage
Archon Robes, source: Drop Blood Mage
![]() Beastman's Dagger, source: locked Chest
Beastman's Dagger, source: locked Chest
![]() Buckle of the Winds, source: Pile of Fifth
Buckle of the Winds, source: Pile of Fifth
![]() Charged Mitts, source: SideQuest Drop Fade Rifter
Charged Mitts, source: SideQuest Drop Fade Rifter
![]() Cinderfel Gauntlets, source: Boss Drop Uldred
Cinderfel Gauntlets, source: Boss Drop Uldred
![]() Fade Striders, source: Chest
Fade Striders, source: Chest
![]() Kaddis of the Lady of the Skies, source: Chest
Kaddis of the Lady of the Skies, source: Chest
![]() Litany of Adralla, source: Niall's Corpse
Litany of Adralla, source: Niall's Corpse
![]() Love Letter, source: locked Chest
Love Letter, source: locked Chest
![]() Mabari War Harness, source: Chest
Mabari War Harness, source: Chest
![]() Sailor's Charm, source: Vanity
Sailor's Charm, source: Vanity
![]() Scroll of Banastor x2, source: Pile of Books
Scroll of Banastor x2, source: Pile of Books
![]() Shiver, source: Drop Desire Demon
Shiver, source: Drop Desire Demon
![]() Small Painted Box, Quest Item, source: First Enchanter's Desk
Small Painted Box, Quest Item, source: First Enchanter's Desk
![]() The Libertarian's Cowl, source: Charred Corpse
The Libertarian's Cowl, source: Charred Corpse
![]() Yusaris, source: SideQuest Boss Drop Shah Wyrd
Yusaris, source: SideQuest Boss Drop Shah Wyrd
![]() Greagoir's Shield, it is marked as stealable but currently equipped making this impossible without the toolset.
Greagoir's Shield, it is marked as stealable but currently equipped making this impossible without the toolset.
![]() Journeyman Lightning Rune, source: Locked Chest Templar Quarters (4th Floor).
Journeyman Lightning Rune, source: Locked Chest Templar Quarters (4th Floor).
Notable gifts for companions:
![]() Remarkable Malachite, for Shale, source: Quartermaster at Apprentice Quarters (First Floor).
Remarkable Malachite, for Shale, source: Quartermaster at Apprentice Quarters (First Floor).
![]() Black Grimoire, for Morrigan, source: Irving's Quarters at Senior Mage Quarters (Second Floor).
Black Grimoire, for Morrigan, source: Irving's Quarters at Senior Mage Quarters (Second Floor).
![]() Chantry Amulet, for Leliana, source: Templar Corpse at Senior Mage Quarters (Second Floor).
Chantry Amulet, for Leliana, source: Templar Corpse at Senior Mage Quarters (Second Floor).
![]() Silver Chain, for Morrigan, source: Vanity at Senior Mage Quarters (Second Floor).
Silver Chain, for Morrigan, source: Vanity at Senior Mage Quarters (Second Floor).
![]() The Rose of Orlais, for Wynne, source: Pile of Books at Senior Mage Quarters (Second Floor).
The Rose of Orlais, for Wynne, source: Pile of Books at Senior Mage Quarters (Second Floor).
![]() Water-Stained Portrait, for Sten, source: Charred Corpse at Senior Mage Quarters (Second Floor).
Water-Stained Portrait, for Sten, source: Charred Corpse at Senior Mage Quarters (Second Floor).
![]() White Runestone, for Alistair, source: Boss Drop Abomination at Great Hall (Third Floor).
White Runestone, for Alistair, source: Boss Drop Abomination at Great Hall (Third Floor).
![]() Small Gold Bar, for Zevran, source: Drop off Charmed Templar in the Great Hall (Third Floor) or Templar Quarters (Fourth Floor).
Small Gold Bar, for Zevran, source: Drop off Charmed Templar in the Great Hall (Third Floor) or Templar Quarters (Fourth Floor).
![]() Beef Bone, for Dog, source: Chest Templar Quarters (Fourth Floor).
Beef Bone, for Dog, source: Chest Templar Quarters (Fourth Floor).
![]() Sun Blonde Vint-1, for Oghren, source: Vanity at Templar Quarters (Fourth Floor).
Sun Blonde Vint-1, for Oghren, source: Vanity at Templar Quarters (Fourth Floor).
Companion remarks
A companion may interject a comment upon certain triggers:
- Entering the Senior Mage Quarters
- Entering Irving's study
- Entering the Great Hall
- Collecting the fourth note for Watchguard of the Reaching
- Collecting the last note for Watchguard of the Reaching
- Passing corruption (the bizarre 'growths' overlapping with walls, doors and gore) in the Templars' Quarters
- Approaching Cullen
- Defeating Shah Wyrd
Banter
Party banter may be triggered at the following spots:
- The first corridor in the Apprentice Quarters.
Bugs
 After the player finishes the quest Broken Circle and asks First Enchanter Irving if Dagna can join magic classes, there might be a minor bug if you return to the Circle Tower without going to Orzammar Commons to tell her that she was accepted. She may already be there waiting for the Warden; when told she can join she will return to Orzammar but will act as if she is in the Tower.
Gallery
")
")
")
References
- ↑ Kinloch Hold. BioWare wiki.
- ↑ Circle Letter
- ↑ Codex entry: Extracurricular Studies
- ↑ According to the item description for Oven Mitts.
| ||||||||||||||||||||
