Tag: sourceedit |
mNo edit summary |
||
| (33 intermediate revisions by 20 users not shown) | |||
| Line 32: | Line 32: | ||
== Walkthrough == |
== Walkthrough == |
||
| ⚫ | |||
| ⚫ | {{Blockquote|[[Leliana]] and [[Josephine Montilyet|Josephine]] have been working tirelessly to convince, coerce, and win over some of [[Orlais|Orlais']] most influential houses. Ten noble families will help the [[Inquisition]] pressure the [[Templar Order|templars]] into sealing the [[Breach]], traveling to [[Therinfal Redoubt]] and demanding the [[Lucius Corin|Lord Seeker]] deal with them or face the wrath of Orlais. The Inquisition has promised the Herald of Andraste as its voice in these negotiations. |
||
| ⚫ | |||
| − | |||
| − | |||
| − | |||
| ⚫ | [[Leliana]] and [[Josephine Montilyet|Josephine]] have been working tirelessly to convince, coerce, and win over some of [[Orlais|Orlais']] most influential houses. |
||
Recommended Levels: 4 to 7}} |
Recommended Levels: 4 to 7}} |
||
| Line 43: | Line 40: | ||
Upon arriving at Therinfal Redoubt, a cutscene will begin and [[Esmeral Abernache|Lord Esmeral Abernache]] introduces himself to the Herald: |
Upon arriving at Therinfal Redoubt, a cutscene will begin and [[Esmeral Abernache|Lord Esmeral Abernache]] introduces himself to the Herald: |
||
| − | + | '''Lord Abernache: Care to mark the moment? Ten Orlesian houses walk with you.''' |
|
| − | + | *''(Nobility Knowledge)'' I celebrate this pairing. |
|
| − | + | :{{Approval3|Cassandra Slightly Approves}}<br>{{Approval3|Sera Slightly Disapproves}}<br>{{Approval3|Vivienne Slightly Approves}} |
|
| − | + | *Of course. |
|
| − | + | :{{Approval3|Sera Slightly Disapproves}}[[File:Champions of the Just Image 1.png|thumb|300px|The Templars and the Nobility]] |
|
| − | + | *Perhaps an overblown speech? |
|
| − | + | :{{Approval3|Cassandra Slightly Disapproves}}<br>{{Approval3|Iron Bull Slightly Approves}}<br>{{Approval3|Sera Slightly Approves}}<br>{{Approval3|Varric Slightly Approves}} |
|
| − | + | *Save it for the [[Lucius Corin|Lord Seeker]]. |
|
| − | + | :{{Approval3|Sera Slightly Approves}}<br>{{Approval3|Iron Bull Slightly Approves}}<br>{{Approval3|Vivienne Slightly Disapproves}} |
|
After the scene, [[Codex entry: Therinfal Redoubt]] will unlock. Turn around and head down the hill to pick up some gold. |
After the scene, [[Codex entry: Therinfal Redoubt]] will unlock. Turn around and head down the hill to pick up some gold. |
||
| − | {{ |
+ | {{Note|There are several notes and letters that can be found throughout this quest that are not codex. See [[Champions of the Just#Gallery|Gallery]]. All notes read grant 50-150XP each, the exact amout depending on number of "Knowledge" [[Inquisition perks|perks]] acquired.}} |
=== Meet the templar contact === |
=== Meet the templar contact === |
||
| − | Approach the nobles and templars to listen to their banter. |
+ | Approach the nobles and templars to listen to their banter. A couple of loot stashes and a note can also be found. Speak to [[Delrin Barris|Knight-Templar Delrin Barris]] when ready. There are no approval changes for any available party members during the entire following sequence, so feel free to choose any dialogue options. [[Cassandra Pentaghast|Cassandra]] has a special dialogue choice at one point, however. |
| − | Barris will lead the Herald to some banners. |
+ | Barris will lead the Herald to some banners. The Lord Seeker has requested that they perform a ritual that all templars are required to do. The choice here has some secondary consequences: |
| − | :*'''I'll do the ritual.''' - Performing the ritual allows for approval changes from party members. |
+ | :*'''I'll do the ritual.''' - Performing the ritual allows for approval changes from party members. The courtyard can also be looted. However, Lord Abernache will die in the following cutscene. |
:*'''Take us to the Lord Seeker.''' - No ritual, corresponding approval changes or loot, but Lord Abernache survives. |
:*'''Take us to the Lord Seeker.''' - No ritual, corresponding approval changes or loot, but Lord Abernache survives. |
||
| − | {{Note|When judging your first prisoner in Skyhold,if Lord Abernache was saved, there is a sentence related to ordering the prisoner to work for the lord.}} |
+ | {{Note|When judging your first prisoner in Skyhold, if Lord Abernache was saved, there is a sentence related to ordering the prisoner to work for the lord.}} |
| − | |||
| − | ''NOTE(2) : '''''As with all XP-giving notes and readables, the XP gained is based on how many |
||
| − | "Knowledge" (Inquisition) perks you have acquired - so XP can range from |
||
| − | <nowiki> </nowiki>50 to 150 per note read.''' |
||
| − | If the ritual is not performed, skip down to [[Champions of the Just#Meet the Lord Seeker| |
+ | If the ritual is not performed, skip down to [[Champions of the Just#Meet the Lord Seeker|Meet the Lord Seeker]]. |
| − | === Raise the flags in order of importance |
+ | === Raise the flags in order of importance === |
[[File:Therinfal-Redoubt-Banners.png|thumb|300px|Flags representing Andraste, the people, and the templars]] |
[[File:Therinfal-Redoubt-Banners.png|thumb|300px|Flags representing Andraste, the people, and the templars]] |
||
| − | Use the wheels to raise the flags. |
+ | Use the wheels to raise the flags. As far as party approval goes, only the flag raised to the top matters. Party members will audibly hint at what they approve/disapprove of as the flags are moved. Full changes are as follows: |
| − | + | *[[Andraste]] first |
|
| − | + | :{{Approval3|Cassandra Slightly Approves}}<br>{{Approval3|Solas Slightly Disapproves}} |
|
| − | + | *People first |
|
| − | + | :{{Approval3|Varric Slightly Approves}}<br>{{Approval3|Sera Slightly Approves}}<br>{{Approval3|Vivienne Slightly Disapproves}} |
|
| − | + | *Templars first |
|
| − | + | :{{Approval3|Blackwall Slightly Approves}}<br>{{Approval3|Sera Slightly Disapproves}}<br>{{Approval3|Vivienne Slightly Approves}} |
|
| + | Once the choice is made, Barris will ask you to explain your choice: |
||
| − | :'''Barris: Traditionally, a participant in the rite now explains their choices to those assembled.''' |
||
| − | + | *I decided based on politics. |
|
| − | + | :{{Approval3|Blackwall Slightly Disapproves}}<br>{{Approval3|Iron Bull Slightly Approves}}<br>{{Approval3|Sera slightly Disapproves}}<br>{{Approval3|Vivienne Approves}} |
|
| − | + | *I picked at random. |
|
| − | + | :{{Approval3|Blackwall Slightly Appproves}}<br>{{Approval3|Sera Slightly Approves}}<br>{{Approval3|Solas Slightly Disapproves}} |
|
| − | + | *I let faith guide me |
|
| − | + | :{{Approval3|Sera Slightly Disapproves}}<br>{{Approval3|Solas Slightly Disapproves}} |
|
| − | + | *My reasons are my own |
|
| − | + | :{{Approval3|Blackwall Slightly Approves}}<br>{{Approval3|Solas Approves}} |
|
Loot the courtyard before entering the door, as this area will no longer be accessible. |
Loot the courtyard before entering the door, as this area will no longer be accessible. |
||
| Line 100: | Line 93: | ||
A cutscene begins and how it plays out will differ depending on whether the ritual was skipped or not. |
A cutscene begins and how it plays out will differ depending on whether the ritual was skipped or not. |
||
| − | + | {{CodexConditionalParagraph|If the Herald '''performed''' the ritual| |
|
| − | + | '''[[Denam|Knight-Captain Denam]]: ''(Chuckles.)'' This is the grand alliance the Inquisition offers?''' |
|
| − | + | *Abernache, step back. |
|
| − | + | :{{Approval3|Varric Slightly Approves}} |
|
| − | + | *Barris, what's wrong with him? |
|
| − | + | :{{Approval3|Sera Slightly Approves}} |
|
| − | + | *Where is the Lord Seeker? |
|
| − | + | :{{Approval3|Vivienne Slightly Approves}}}} |
|
| − | + | {{CodexConditionalParagraph|If the Herald '''skipped''' the ritual| |
|
| ⚫ | |||
| − | |||
| ⚫ | |||
| − | |||
| ⚫ | |||
| ⚫ | |||
| ⚫ | |||
| ⚫ | |||
| − | + | :{{Approval3|Varric Slightly Approves}}<br>{{Approval3|Sera Slightly Approves}} |
|
| ⚫ | |||
| ⚫ | |||
| − | + | :{{Approval3|Vivienne Slightly Approves}}}} |
|
| ⚫ | |||
| ⚫ | |||
=== Fight through the corrupted templars === |
=== Fight through the corrupted templars === |
||
| + | [[File:Champions of the Just Image 2.png|thumb|300px|The Templar Order's corruption revealed]] |
||
| ⚫ | Either way, once the conversation ends, [[red templars]], including Denam, will attack. Barris will be fighting alongside the party. If Abernache lives, he will cower in a corner of the room. Once the battle is over, Barris will confirm that Denam is not dead, and the Herald says he will be judged later. The party will be fighting a mix of red templar knights and archers as they move through the castle to reach the Lord Seeker. There are '''no''' [[Supply Cache|supply caches]] available during this portion, but friendly templars, as well as Barris, will be assisting the party. Use them as shields, if necessary. |
||
| ⚫ | A couple of knights will be just outside the door. To the right are two rooms to loot, and one of them is locked. Move up the stairs to find another locked room on the right. Eventually the party will exit onto the courtyard area, only higher up, and several enemies will need to be eliminated. After defeating them all, a nearby door to a mess hall will open and a couple of friendly templars will be engaging enemies. [[Codex entry: To Be Corrupted]] is found in this room as well as a note. Continue up the large stairs to encounter another battle with about the same number of enemies. |
||
| ⚫ | Either way, once the conversation ends, [[red templars]], including Denam, will attack. |
||
| − | |||
| ⚫ | A couple of knights will be just outside the door. |
||
=== Confront the Lord Seeker === |
=== Confront the Lord Seeker === |
||
| ⚫ | After the battle, find the locked door nearby that leads to the captain's quarters (Denam's quarters). Entering will trigger some dialogue from Barris. Speak to him to learn more. Of particular note in this room is the large loot chest at the foot of the writing desk. Barris says to make good use of it. It contains some random loot, but also always contains a {{:Masterwork Seeker Shield Schematic|style=iconmini}}. |
||
| ⚫ | |||
| ⚫ | After the battle, find the locked door nearby that leads to the captain's quarters (Denam's quarters). |
||
| ⚫ | |||
| ⚫ | |||
| − | |||
| ⚫ | |||
| − | |||
| ⚫ | |||
| ⚫ | |||
[[File:Meeting-Cole-in-Nightmare1.png|thumb|180px|Meeting Cole inside the Herald's head]] |
[[File:Meeting-Cole-in-Nightmare1.png|thumb|180px|Meeting Cole inside the Herald's head]] |
||
| − | Move forward for a cutscene. |
+ | Move forward for a cutscene. The Lord Seeker is revealed to be an imposter: an [[Envy demon]] that assumed his form. Envy allowed the meeting with the Inquisition in the hope of "knowing" the Herald and assuming their form. |
| − | |||
| ⚫ | |||
| ⚫ | |||
| ⚫ | |||
| ⚫ | |||
| ⚫ | Approach the final set of statues and a second voice will begin speaking, which will annoy Envy. To the left is a room blocked by a barricade that is different for each class (locked door for rogue, magical barrier for mage, bashable wall for warrior). Inside, examine the Inscription to begin the side quest [[Demonic Dogma]]. |
||
| ⚫ | Approach the final set of statues and a second voice will begin speaking, which will annoy Envy. To the left is a room blocked by a barricade that is different for each class (locked door for rogue, magical barrier for mage, bashable wall for warrior). Inside, examine the Inscription to begin the side quest [[Demonic Dogma]]. The Herald receives +1 '''Cunning'''. Leave the room, walk into the opposite doorway and it will shut automatically. Open the door to begin a scene with [[Cole]]. He will explain where the Herald is, what exactly is going on and how the Herald can escape. |
||
| ⚫ | |||
| ⚫ | |||
Follow Cole and the Herald will transition to a new area. |
Follow Cole and the Herald will transition to a new area. |
||
| − | === Escape the prison |
+ | === Escape the prison === |
| ⚫ | The Herald appears in a room of jail cells. Note the open, dark cell to the right before moving forward into another conversation. The cells can be entered for some indications of what Envy may be hoping to accomplish as the Herald. Cole is in a cell at the far end of the corridor, on the right side. Speak to him, and a [[Veilfire]] brazier will appear once he vanishes. |
||
| ⚫ | Grab a torch and go back to the dark cell in the room of jail cells and pick up the '''Prison Key''', then light braziers in the three cells with prisoners. A fourth brazier will appear at the end of the main corridor. When you light it, the wall will move backward and stop at another pair of rooms. Open the door on the right (the Prison Key is required for this door) and light the brazier inside. Move back out of the room and light the brazier that has again appeared on the back wall. This causes the wall to move back completely, revealing a cavern containing another inscription to examine. The Herald receives +2 '''Constitution'''. Leave the prison by passing Josephine's cell in the final pair of rooms before the secret cavern. |
||
| ⚫ | The Herald appears in a room of jail cells. |
||
| ⚫ | |||
| ⚫ | Grab a torch and go back to the dark cell and pick up the Prison Key, then light braziers in the three cells with prisoners. |
||
| ⚫ | After the conversation, exit out into the "forest." As the Herald proceeds, the landscape will become more familiar. There will initially be a couple of Lesser [[Shade]]s accompanying the Herald, but they'll stop following at some point. Envy will attempt to goad the Herald into attacking the Imperial Army soldiers. They are all Level 1 so they won't be a challenge, but they are infinite. Cole will say that the Herald doesn't have to attack anyone. Indeed, all the Herald must do here is reach the point where Envy pulled them into this nightmare. If the Herald draws weapons, simply disengage. Also note that spires will pop out of the ground at random, similar to when attempting to close a Fade rift. These are more dangerous than any enemy here. |
||
| ⚫ | |||
| ⚫ | |||
| − | |||
| ⚫ | After the conversation, exit out into the "forest." |
||
| − | |||
| ⚫ | |||
Once the quest marker is reached, a scene plays. |
Once the quest marker is reached, a scene plays. |
||
=== Holding the Great Hall === |
=== Holding the Great Hall === |
||
| + | [[File:Champions of the Just Great Hall.png|thumb|300px|Holding the Great Hall]] |
||
| ⚫ | |||
| ⚫ | There are two new areas off of the Great Hall that will need to be visited at least once: the Upper Barracks and the Officers' Quarters. There are two entrances to each, one downstairs and one upstairs. Initially, only the lower doors are accessible. Be aware that there is only one supply cache for this portion of the quest. Another supply cache is located past the barrier. Some points to remember: |
||
| ⚫ | |||
| ⚫ | |||
| ⚫ | There are two new areas off of the Great Hall that will need to be visited at least once: the Upper Barracks and the Officers' Quarters. |
||
| − | |||
| ⚫ | |||
*When a veteran is saved, the gauge increases slightly. The mission will fail if the gauge is completely emptied. |
*When a veteran is saved, the gauge increases slightly. The mission will fail if the gauge is completely emptied. |
||
| − | + | *A party member says they hear fighting when the gauge depletes by about half. Another will warn the Herald when the gauge is depleted by about 75%. |
|
| − | + | *Every time the party returns to the Great Hall, at least one [[Red Templar|Red Templar Horror]] will be there. There will be more depending on how much of the gauge has depleted before returning. At 50% depleted, there will be 3-4 Horrors; at 75% depleted there will be 4-5. |
|
| − | + | *Barris, the veterans and any other templars in the Great Hall are invincible. They can be used to draw threat and let some party members pick at them from range, or even the upper level. |
|
| − | + | *'''Important:'''If the gauge depletes by 75%, the next time the party returns and fends off the horrors, Barris will grunt uncomfortably. The Herald asks him if he's alright, and Barris will dismiss it. However, he will die after the templars dispel the barrier. If Barris lives, however, he is automatically recruited as an [[Agent]] for [[Cullen Rutherford|Cullen]] so it is wise to return to the hall before the gauge reachs this point. There are also [[war table]] operations that will only be available if he lives. |
|
| − | + | *The gauge quickly refills to maximum after defeating all Horrors in the Great Hall. |
|
| − | + | *Enemy groups can be avoided in order to conserve time and health. [[Combat Roll]], [[Fade Step]], and [[Stealth (Inquisition)|Stealth]] can all be used, as can simply disengaging and running. However, enemies assailing a veteran ''must'' be killed in order for the veteran to move to the Great Hall. |
|
| − | + | *The main objectives can be done in one trip to each area. Acquiring all available loot will likely require at least two trips to each area. |
|
| − | {{Bug|The doors leading and coming from the Great Hall, Upper Barracks and Officers' Quarters may be labeled as both "Great Hall" and "Upper Barracks" or "Great Hall" and "Officers' Quarters." To get the correct label, rotate the camera and the position of the Inquisitor. If you enter a door when labeled as the same room you are already in, the game will take a long time loading and you'll reappear in the same room. The gauge will continue to decrease while this load time is occurring. |
+ | {{Bug|The doors leading and coming from the Great Hall, Upper Barracks, and Officers' Quarters may be labeled as both "Great Hall" and "Upper Barracks" or "Great Hall" and "Officers' Quarters." To get the correct label, rotate the camera and the position of the Inquisitor. If you enter a door when labeled as the same room you are already in, the game will take a long time loading and you'll reappear in the same room. The gauge will continue to decrease while this load time is occurring.}} |
| − | Before proceeding, exit the Great Hall |
+ | Before proceeding, exit the Great Hall. The templars will erect a barricade here after one of the new areas is entered. Examine the throne near the barrier to update [[Codex entry: Therinfal Redoubt]]. |
| − | There is no right way to do this, so the best advice is to get the veterans first, in order to make the defense of the Great Hall easier. |
+ | There is no right way to do this, so the best advice is to get the veterans first, in order to make the defense of the Great Hall easier. Since there are two in the Upper Barracks, its better to go there first. |
==== Upper Barracks ==== |
==== Upper Barracks ==== |
||
| ⚫ | *Turn left immediately. Turn right at the top of the ramp into the open area; a set of stairs immediately to the left leads to a sack. A group of enemies is here but they ''can'' be bypassed. However, [[Codex entry: Majestic Bastards]] can be found in the small shed that they spawn near, as well as some gold. A couple more enemies will spawn if the party lingers near this area for too long after killing the initial group of enemies. There is a bashable wall directly across the yard, and it contains three loot boxes. Go through the door to the left of the bashable wall. Pass through this room, and turn left at the T-intersection. Assist the first veteran, Knight-Lieutenant Abrahas. |
||
| ⚫ | *Head back to the T-intersection and go up the large stairs. Assist the second veteran, Knight-Lieutenant duBois. There is a locked door here that leads down to a prison. There are two locked cells here. One contains a loot box and some gold and the other contains a couple of sacks and some gold. There is a stack of crates that can be destroyed to reveal a hidden cell with good loot in it. There is a list of prisoners nearby but reading it does not award any XP. If two rogues are in the party, use tactical camera to assign each of them to unlock a door in order to save a little time. |
||
| ⚫ | |||
| ⚫ | When returning to the Great Hall for the first time, be sure to knock down a ladder, so the party can climb back up. After dispatching the Horrors, loot the upper level and knock down the rest of the ladders. One chest contains the [[Banners|Templar Order Banner]]. There is also [[Codex entry: A Nutty Affair]] and another note. |
||
| ⚫ | |||
| ⚫ | |||
| ⚫ | |||
| − | |||
| ⚫ | When returning to the Great Hall for the first time, be sure to knock down a ladder, so the party can climb back up. |
||
==== Officers' Quarters ==== |
==== Officers' Quarters ==== |
||
| − | |||
When ready, enter the Officers' Quarters from the second level. |
When ready, enter the Officers' Quarters from the second level. |
||
| + | [[File:Lyrium Cache Champions of the Just.png|thumb|300px|The Therinfal Redoubt Lyrium Cache]] |
||
| − | + | *Head downstairs, cross the bridge, turn right and pass through a room. Assist the third veteran, Knight-Lieutenant Primmer. |
|
| − | + | *Head east, veer around the right side of the tower and cross a bridge (it's parallel to the one crossed earlier), picking up some gold along the way. Bash down the wall, and fall down the hole. This is the only way to enter this room, which contains a couple of loot boxes. |
|
| − | + | *Exit the room. Dispatch enemies and enter the tower directly across to find a sack. Enter the middle door across the courtyard. A scene will play with Cole, who informs the party of a plot to assassinate the [[Celene Valmont I|Empress of Orlais]]. Afterwards, grab the Lord Seeker's Key and loot the large chest. This chest contains some random loot but always contains {{:The Sunless Staff|style=iconmini}} and a Bianca Arms II (if Varric is in the party, the upgrade will be installed automatically). |
|
| − | :*Exit the room and turn right. Jump over the railing and open the door to the right (requires Lord Seeker's Key). Go up the stairs on the left and grab the lyrium cache. There are three loot boxes in this room and a note. By this time, a couple more enemies may have spawned in the courtyard, but they can be avoided. |
||
| − | + | *Exit the room and turn right. Jump over the railing and open the door to the right (requires Lord Seeker's Key). Go up the stairs on the left and grab the lyrium cache. There is also a [[Note: Lyrium Manifest|lyrium manifest]] on a table. There are three loot boxes in this room and a note. By this time, a couple more enemies may have spawned in the courtyard, but they can be avoided. |
|
| + | :*Exit the room and veer to the left and enter the large archway. Turn right to reach the exit back to the Great Hall. |
||
=== Talk to Knight-Templar Barris === |
=== Talk to Knight-Templar Barris === |
||
| − | {{Note|Once the Herald speaks to him, access to the Upper Barracks and Officers' Quarters is cut off. |
+ | {{Note|Once the Herald speaks to him, access to the Upper Barracks and Officers' Quarters is cut off. Also, the ladders will be raised, so there will be no fighting on the upper level.}} |
=== Hold off the red templars === |
=== Hold off the red templars === |
||
| − | Barris, Fletcher and the three lieutenants will now dispel the barrier and the party must fight off waves of [[red templars]]. There is a gauge that indicates Magic Barrier Strength, and it takes about two minutes to fully deplete. The party will face waves of 6 enemies: 2 each of knights, archers and horrors. |
+ | Barris, [[Fletcher]] and the three lieutenants will now dispel the barrier and the party must fight off waves of [[red templars]]. There is a gauge that indicates Magic Barrier Strength, and it takes about two minutes to fully deplete. The party will face waves of 6 enemies: 2 each of knights, archers and horrors. Most of a wave must be dispatched before more enemies will spawn. |
| − | Because this fight is timed, a good strategy worth considering is retreating to the entrance of the hall and letting enemies waste time reaching the party. As soon as the fight begins, run back to the entrance and disengage to move faster. Use the tactical camera to position melee fighters just behind a column, and an archer or mage just a bit further behind them. |
+ | Because this fight is timed, a good strategy worth considering is retreating to the entrance of the hall and letting enemies waste time reaching the party. As soon as the fight begins, run back to the entrance and disengage to move faster. Use the tactical camera to position melee fighters just behind a column, and an archer or mage just a bit further behind them. When using the tactical camera to order party members to move to a point, select the point twice and the party member will move to that point and hold position. Archers and mages will weaken or kill enemies as they move down the hall, so that melee party members can finish them off when they get in range. This also forces enemies to move into choke points, allowing AoE skills/spells/combos/grenades to be very efficient. Enemy knights will generally charge the party, allowing melee fighters to kill them. Weakened enemy archers may move past the columns and then immediately run away, making them almost useless. The horrors tend to stay back and fight at range, but they become easy pickings once the archers and knights are defeated. A downside to this strategy is that if an entire wave is defeated quickly, the party may disengage on their own while the next wave is spawning, and the player may have to position them again. If they do disengage, just be quick and order them to hold position again. |
Any remaining enemies will die immediately once the barrier is dispelled. |
Any remaining enemies will die immediately once the barrier is dispelled. |
||
| − | Once the barrier is down, |
+ | Once the barrier is down, go up the stairs on the right and make a u-turn at the top to find a supply cache if needed. [[Codex entry: Her Perfumed Sanctuary]] is located on the pews on the right. |
| − | === Confront the envy demon |
+ | === Confront the envy demon === |
[[File:Envy-Demon-Therinfal-Redoubt.png|thumb|left|280px|Confronting the envy demon]] |
[[File:Envy-Demon-Therinfal-Redoubt.png|thumb|left|280px|Confronting the envy demon]] |
||
| − | The Envy demon fights much like a [[Terror demon]]. |
+ | The Envy demon fights much like a [[Terror demon]]. It can be level 6-8 with 21,000-32,000 HP. It is immune to all disabling effects. Much like a terror demon, it will do an AoE attack that slows down nearby party members. However, Envy's attack also does spirit damage and inflicts the fear status (much like the Horror spell). A mage can use Dispel to get rid of the fear status but not the slowdown effect. After it does this attack, it always goes underground. When it emerges it will throw spirit projectiles. Its melee attacks can hit multiple party members. |
| − | Once it loses about a third of its health, it will move behind a barrier and summon Red Templars as backup. |
+ | Once it loses about a third of its health, it will move behind a barrier and summon Red Templars as backup. Cole will say "it's trying to hide." Envy will then transform into a large, black shape, with glowing eyes, similar to how it looked in the nightmare portion and its attack style will change (perhaps mimicking the Herald). Once it takes the black form, Cole will join the fight until Envy is dead. Consider turning off any warrior's taunting skills after Cole joins, as he has a limitless supply of potions and Envy will attack him fairly consistently if not taunted. |
| − | When it has about a third of its health left, it will return to its default form and spires will begin erupting from the ground, similar to when closing a rift. |
+ | When it has about a third of its health left, it will return to its default form and spires will begin erupting from the ground, similar to when closing a rift. From this point it's a matter of the party's healing potions outlasting Envy's health. |
| + | Envy drops: |
||
| − | Envy drops {{:Audacity|style=iconmini}} and 5 of each type of essence ([[Spirit Essence (Inquisition)|spirit]], [[Fire Essence|fire]], [[Frost Essence|frost]] and [[Lightning Essence|lightning]]). |
||
| ⚫ | |||
| + | {{:Spirit Essence (Inquisition)|style=iconmini}} x5<br> |
||
| + | {{:Fire Essence|style=iconmini}} x5<br> |
||
| + | {{:Frost Essence|style=iconmini}} x5<br> |
||
| + | {{:Lightning Essence|style=iconmini}} x5<br> |
||
| + | {{:Sigil of the Revenant|style=iconmini}} (if ''[[Trespasser]]'' is installed) |
||
=== Return to the Great Hall === |
=== Return to the Great Hall === |
||
| − | Barris approaches from the main hall (or Fletcher, if Barris died), with the surviving templars and Abernache, if he also survived. |
+ | Barris approaches from the main hall (or Fletcher, if Barris died), with the surviving templars and Abernache, if he also survived. The Herald must decide how to receive the templars' aid. |
[[File:Therinfal-Redoubt-Barris-and-Templars.png|thumb|300px|The fate of the templar order]] |
[[File:Therinfal-Redoubt-Barris-and-Templars.png|thumb|300px|The fate of the templar order]] |
||
| ⚫ | |||
| ⚫ | |||
| ⚫ | |||
| ⚫ | |||
| ⚫ | |||
| ⚫ | |||
| ⚫ | |||
| ⚫ | |||
| ⚫ | |||
| ⚫ | |||
| ⚫ | |||
| ⚫ | |||
| ⚫ | |||
| ⚫ | |||
| ⚫ | |||
| ⚫ | |||
| ⚫ | |||
| ⚫ | |||
| − | + | :{{Approval3|Varric Slightly Disapproves}}}} |
|
| ⚫ | |||
| ⚫ | |||
| ⚫ | |||
| − | :::{{Approval3|Iron Bull Slightly Approves}} |
||
| ⚫ | |||
| ⚫ | |||
| ⚫ | |||
| ⚫ | |||
| ⚫ | |||
| ⚫ | |||
| ⚫ | |||
| ⚫ | |||
| + | :{{Approval3|Iron Bull Slightly Approves}}<br>{{Approval3|Sera Slightly Approves}}<br>{{Approval3|Varric Approves}} |
||
| ⚫ | |||
| ⚫ | |||
| ⚫ | |||
| ⚫ | |||
| ⚫ | |||
| − | ::*Rebuild as our partners. ''(Ask the templars to join you as free allies)'' |
||
| ⚫ | |||
| − | + | *Rebuild as our partners. ''(Ask the templars to join you as free allies)'' |
|
| − | + | :{{Approval3|Blackwall Approves}}<br>{{Approval3|Cassandra Greatly Approves}}<br>{{Approval3|Iron Bull Greatly Approves}}<br>{{Approval3|Sera Greatly Disapproves}}<br>{{Approval3|Solas Greatly Disapproves}}<br>{{Approval3|Varric Slightly Approves}} ''(only if he was brought for the quest)''<br>{{Approval3|Vivienne Approves}} |
|
| + | :{{Approval3|Cole Greatly Disapproves}} (occurs even though it's not yet recruited and it is not stated in-game) |
||
| + | :{{Approval3|Dorian Greatly Disapproves}} (occurs even though he's not yet recruited and it is not stated in-game) |
||
| + | : |
||
| + | :'''Points awarded to candidates up for [http://dragonage.wikia.com/wiki/Divine_election Divine Election]''': Leliana +1, Cassandra +10, Vivienne +5 |
||
| + | |||
| + | *Then yield and serve us. ''(Convince the templars to disband and become part of the Inquisition instead)'' |
||
| ⚫ | |||
| + | :{{Approval3|Cole Greatly Approves}} (occurs even though it's not yet recruited and it is not stated in-game) |
||
| + | :{{Approval3|Dorian Greatly Disapproves}} (occurs even though he's not yet recruited and it is not stated in-game) |
||
| + | : |
||
| + | :'''Points awarded to candidates up for [http://dragonage.wikia.com/wiki/Divine_election Divine Election]''': Leliana +1, Cassandra +5, Vivienne -5 |
||
| + | |||
| + | {{Note|Dorian does not appear to disapprove of either outcome if the Herald did not enter the Redcliffe Chantry, and therefore did not meet or speak to him prior to beginning this quest. Dorian's dialogue during [[In Your Heart Shall Burn]] and at [[Skyhold]] is also changed accordingly.}} |
||
Either way, the templars join the Inquisition in the effort to seal the Breach. |
Either way, the templars join the Inquisition in the effort to seal the Breach. |
||
=== Back at Haven === |
=== Back at Haven === |
||
| − | Two codex unlock at this point |
+ | Two codex unlock at this point: [[Codex entry: Red Templars]] and [[Codex entry: Champions of the Just]]. Leliana or Cullen will berate the Herald depending on whether the templars are allies or conscripts. With the Underworld Knowledge [[Inquisition perks|perk]] you can trigger the war table operation [[Secure More Lyrium for the Templars]] at the first dialogue choice. |
Cole will appear on the war table and eventually the Herald must decide whether to accept his help. |
Cole will appear on the war table and eventually the Herald must decide whether to accept his help. |
||
| − | + | '''Cole: I want to do that. I can help.''' |
|
| − | + | :Q What kind of help? |
|
| − | + | *He can stay; he's trustworthy. |
|
| − | + | :{{Approval3|Cassandra Slightly Disapproves}} |
|
| − | + | *He's too dangerous. Kill him. |
|
| − | + | :{{Approval3|Cassandra Approves}} |
|
If Cole is not recruited, he makes everyone forget about him and disappears. |
If Cole is not recruited, he makes everyone forget about him and disappears. |
||
| Line 282: | Line 284: | ||
* 200 Influence |
* 200 Influence |
||
* 2 Power |
* 2 Power |
||
| + | |||
Completing the quest yields |
Completing the quest yields |
||
* 2,658 XP |
* 2,658 XP |
||
| Line 291: | Line 294: | ||
== Results == |
== Results == |
||
| − | *The Templars are recruited to seal the Breach thus they are [[Red Templars|saved from their fate]] |
+ | *The Templars are recruited to seal the Breach, thus they are [[Red Templars|saved from their fate]] |
*The Mages are [[Venatori|left to their fate]] |
*The Mages are [[Venatori|left to their fate]] |
||
* The war table operation [[Nobility and Casualty]] becomes available |
* The war table operation [[Nobility and Casualty]] becomes available |
||
| Line 299: | Line 302: | ||
*''(Optional)'' The war table operation [[Negotiate with Hasmal's Templars]] becomes available ''(if the templars are conscripted)'' |
*''(Optional)'' The war table operation [[Negotiate with Hasmal's Templars]] becomes available ''(if the templars are conscripted)'' |
||
*''(Optional)'' The war table operation [[Investigate Redcliffe Castle]] can be made available when speaking to [[Cremisius Aclassi|Krem]] in Haven |
*''(Optional)'' The war table operation [[Investigate Redcliffe Castle]] can be made available when speaking to [[Cremisius Aclassi|Krem]] in Haven |
||
| + | |||
| + | == Notes == |
||
| + | Any [[Codex (Inquisition)|codex entries]] from [[Redcliffe Castle]] (only accessible by siding with the mages in [[In Hushed Whispers]]) will be available for purchase from [[Willvan]] in [[Val Royeaux]] with the completion of the quest. |
||
== Notable items == |
== Notable items == |
||
| − | {{:Masterwork Seeker Shield Schematic|style=iconmini}} |
+ | {{:Masterwork Seeker Shield Schematic|style=iconmini}} - In a chest in [[Denam|Knight-Captain Denam's]] Quarters<br> |
| + | {{:The Sunless Staff|style=iconmini}} - In the [[Lucius Corin|Lord Seeker's]] room<br> |
||
| ⚫ | |||
| − | {{: |
+ | {{:Bianca Arms II|style=iconmini}} - Only if [[Varric Tethras|Varric]] is in the party<br> |
| + | {{:Masterwork Enchanter Armor|style=iconmini}} - in the jail, on the Upper Barracks side of the Great Hall. You must break some crates in front of the cell to gain access. |
||
| ⚫ | |||
| − | {{:Audacity|style=iconmini}} |
+ | {{:Audacity|style=iconmini}} - Looted from the [[envy demon]]<br> |
| + | {{:Sigil of the Revenant|style=iconmini}} - Looted from the [[envy demon]] (requires ''[[Trespasser]]'' DLC) |
||
| ⚫ | |||
== Notes == |
== Notes == |
||
| − | * |
+ | * The Great Hall can be exited and entered indefinitely. Red Templar Horrors drop [[Everknit Wool]], [[Red Lyrium (Crafting)|Red Lyrium]] (used to craft corrupting runes), and [[Horror Claws]]. They also drop [[Essence Containment Apparatus]]es, three of which are required for the [[Tempest (Inquisition)|Tempest]] specialization. |
* Companions are able to pass freely through the barrier in the Great Hall while not controlled by the player. This makes it possible to get the whole party past the barrier without destroying it by switching to a companion while they are on the other side. This will not advance the quest, however, so the Great Hall still has to be completed in order to confront Envy. |
* Companions are able to pass freely through the barrier in the Great Hall while not controlled by the player. This makes it possible to get the whole party past the barrier without destroying it by switching to a companion while they are on the other side. This will not advance the quest, however, so the Great Hall still has to be completed in order to confront Envy. |
||
| + | * Glowing ravens can be spotted watching the Herald when they first enter Therinfal Redoubt. One is on the wall to the left of the entrance and across the bridge and another is perched high atop some scaffolding to the right of where Ser Barris is waiting for the Herald. |
||
== Codex entries == |
== Codex entries == |
||
| Line 325: | Line 334: | ||
{{:Codex entry: Cole|style=iconmini}}<br> |
{{:Codex entry: Cole|style=iconmini}}<br> |
||
{{:Note: Notes and Letters from Therinfal|style=iconmini}}<br> |
{{:Note: Notes and Letters from Therinfal|style=iconmini}}<br> |
||
| + | {{:Note: Lyrium Manifest|style=iconmini}}<br> |
||
== Trivia == |
== Trivia == |
||
| Line 332: | Line 342: | ||
* Any loot dropped from enemies in the upper courtyard area, and not picked up, will still be laying there when the Herald passes through the same areas during the nightmare portion. |
* Any loot dropped from enemies in the upper courtyard area, and not picked up, will still be laying there when the Herald passes through the same areas during the nightmare portion. |
||
* Sometimes the Prison Key is simply not there and therefore cannot be obtained. |
* Sometimes the Prison Key is simply not there and therefore cannot be obtained. |
||
| + | *Getting stuck on the other side of the green force field. |
||
| + | *Characters might remain in T-pose during the cutscene immediately preceding the final battle with Envy. During the battle itself, the Herald may also remain in T-pose, which leaves certain abilities bugged and unusable. |
||
== Gallery == |
== Gallery == |
||
| Line 341: | Line 353: | ||
Notes and Letters from Therinfal 2.png|Found in the Great Hall, upper level |
Notes and Letters from Therinfal 2.png|Found in the Great Hall, upper level |
||
Notes and Letters from Therinfal 3.png|Found in the Lord Seeker's office |
Notes and Letters from Therinfal 3.png|Found in the Lord Seeker's office |
||
| − | Lyrium Manifest.png|Found in the room where you collect the lyrium |
||
</gallery> |
</gallery> |
||
[[Category:Dragon Age: Inquisition quests]] |
[[Category:Dragon Age: Inquisition quests]] |
||
Revision as of 07:34, 20 October 2019
- For the ability of the same name, see Champions of the Just (ability).
Champions of the Just is a main quest in Dragon Age: Inquisition.
The templars have left Val Royeaux and refuse to negotiate with anyone. Gather enough Power, then work with the advisors to make contact with the templars.
Acquisition
This quest becomes available after the cutscene in Val Royeaux during the quest The Threat Remains. Begin the quest by spending 15 Power at the war table.
Walkthrough
Leliana and Josephine have been working tirelessly to convince, coerce, and win over some of Orlais' most influential houses. Ten noble families will help the Inquisition pressure the templars into sealing the Breach, traveling to Therinfal Redoubt and demanding the Lord Seeker deal with them or face the wrath of Orlais. The Inquisition has promised the Herald of Andraste as its voice in these negotiations. Recommended Levels: 4 to 7
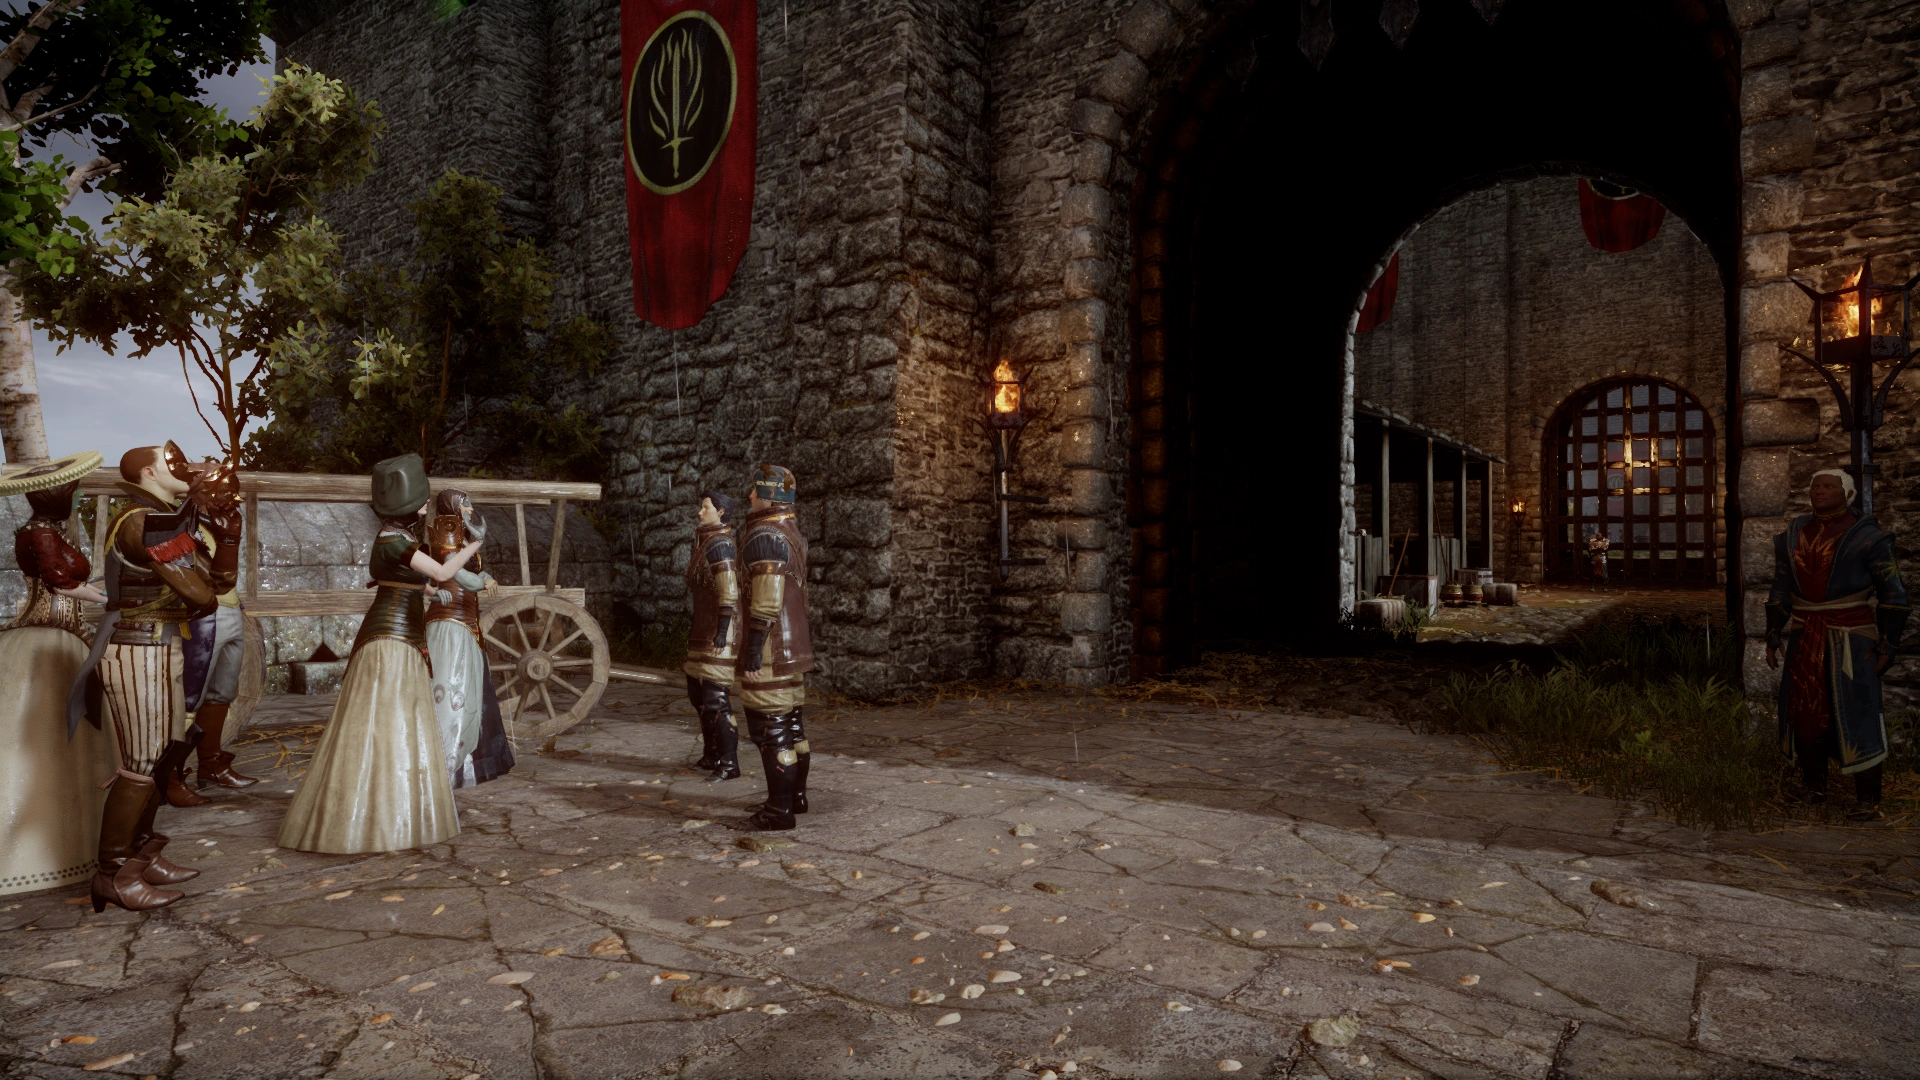
Upon arriving at Therinfal Redoubt, a cutscene will begin and Lord Esmeral Abernache introduces himself to the Herald:
Lord Abernache: Care to mark the moment? Ten Orlesian houses walk with you.
- (Nobility Knowledge) I celebrate this pairing.
 Cassandra Slightly Approves Sera Slightly Disapproves Vivienne Slightly Approves
- Of course.

- Perhaps an overblown speech?
- Cassandra Slightly Disapproves Iron Bull Slightly Approves Sera Slightly Approves Varric Slightly Approves
- Save it for the Lord Seeker.
- Sera Slightly Approves Iron Bull Slightly Approves Vivienne Slightly Disapproves
After the scene, Codex entry: Therinfal Redoubt will unlock. Turn around and head down the hill to pick up some gold.
Meet the templar contact
Approach the nobles and templars to listen to their banter. A couple of loot stashes and a note can also be found. Speak to Knight-Templar Delrin Barris when ready. There are no approval changes for any available party members during the entire following sequence, so feel free to choose any dialogue options. Cassandra has a special dialogue choice at one point, however.
Barris will lead the Herald to some banners. The Lord Seeker has requested that they perform a ritual that all templars are required to do. The choice here has some secondary consequences:
- I'll do the ritual. - Performing the ritual allows for approval changes from party members. The courtyard can also be looted. However, Lord Abernache will die in the following cutscene.
- Take us to the Lord Seeker. - No ritual, corresponding approval changes or loot, but Lord Abernache survives.
If the ritual is not performed, skip down to Meet the Lord Seeker.
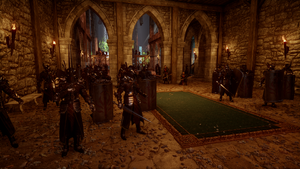
Raise the flags in order of importance
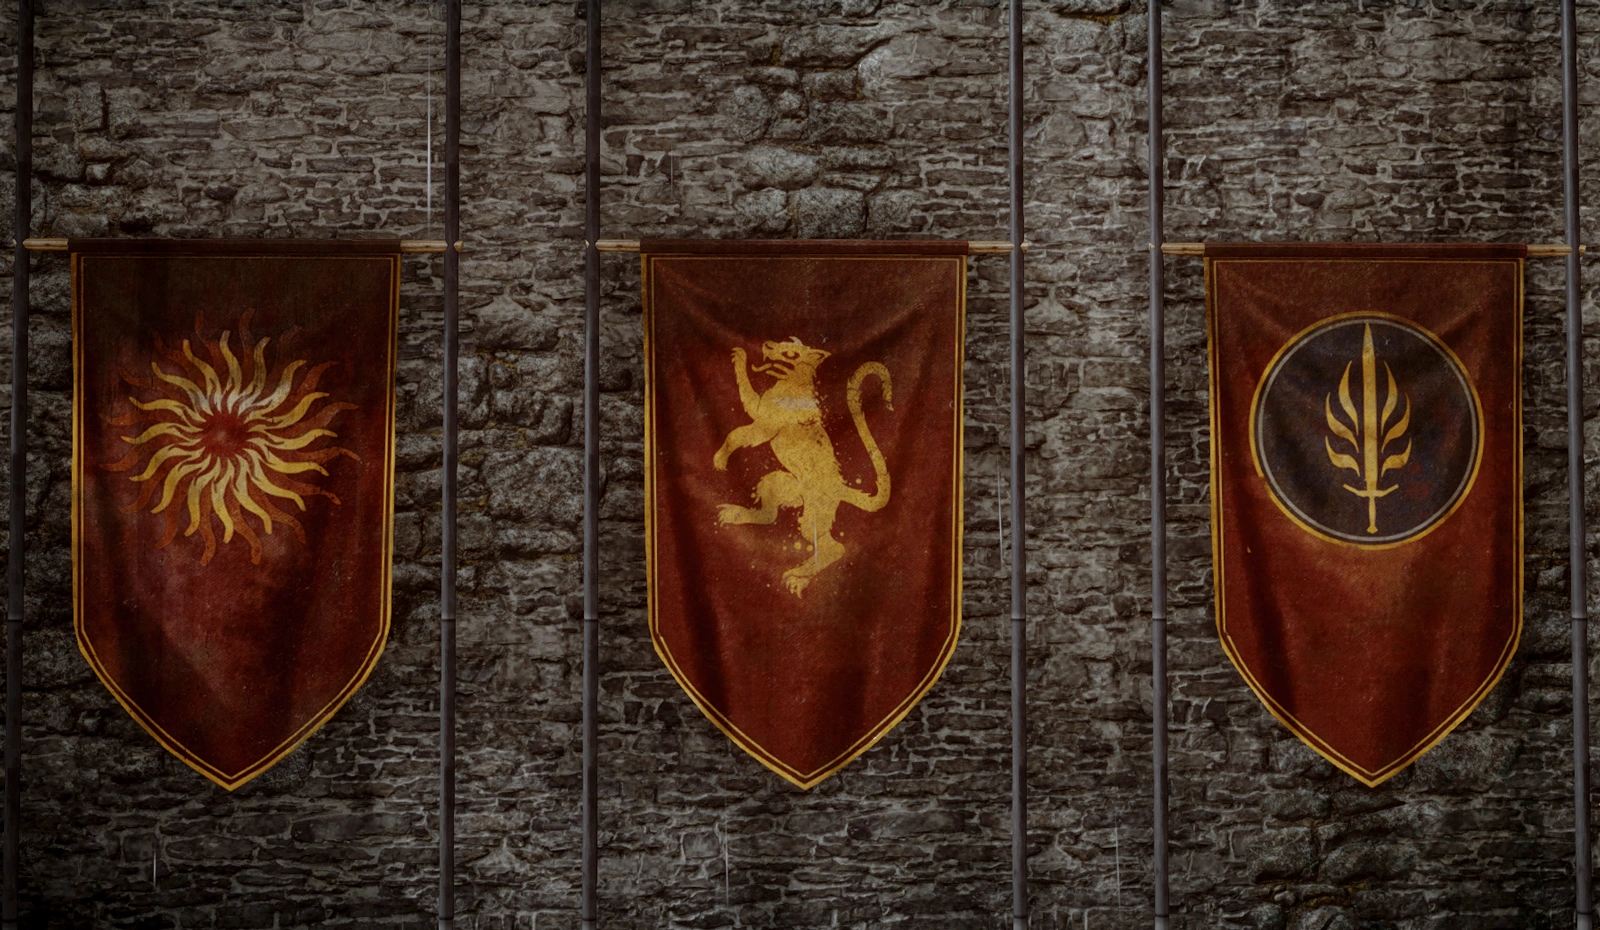
Flags representing Andraste, the people, and the templars
Use the wheels to raise the flags. As far as party approval goes, only the flag raised to the top matters. Party members will audibly hint at what they approve/disapprove of as the flags are moved. Full changes are as follows:
- Andraste first
- Cassandra Slightly Approves Solas Slightly Disapproves
- People first
- Varric Slightly Approves Sera Slightly Approves Vivienne Slightly Disapproves
- Templars first
- Blackwall Slightly Approves Sera Slightly Disapproves Vivienne Slightly Approves
Once the choice is made, Barris will ask you to explain your choice:
- I decided based on politics.
- Blackwall Slightly Disapproves Iron Bull Slightly Approves Sera slightly Disapproves Vivienne Approves
- I picked at random.
- Blackwall Slightly Appproves Sera Slightly Approves Solas Slightly Disapproves
- I let faith guide me
- Sera Slightly Disapproves Solas Slightly Disapproves
- My reasons are my own
- Blackwall Slightly Approves Solas Approves
Loot the courtyard before entering the door, as this area will no longer be accessible.
Meet the Lord Seeker

The Meeting
A cutscene begins and how it plays out will differ depending on whether the ritual was skipped or not.
Knight-Captain Denam: (Chuckles.) This is the grand alliance the Inquisition offers?
- Abernache, step back.
- Varric Slightly Approves
- Barris, what's wrong with him?
- Sera Slightly Approves
- Where is the Lord Seeker?
- Vivienne Slightly Approves
Knight-Captain Denam: So this is the herald of change. You are why everything must be moved ahead.
- I'm here to help.
- Blackwall Slightly Approves Cassandra Slightly Approves
- Barris, what's wrong with him?
- Varric Slightly Approves Sera Slightly Approves
- Where is the Lord Seeker?
- Vivienne Slightly Approves
Fight through the corrupted templars

The Templar Order's corruption revealed
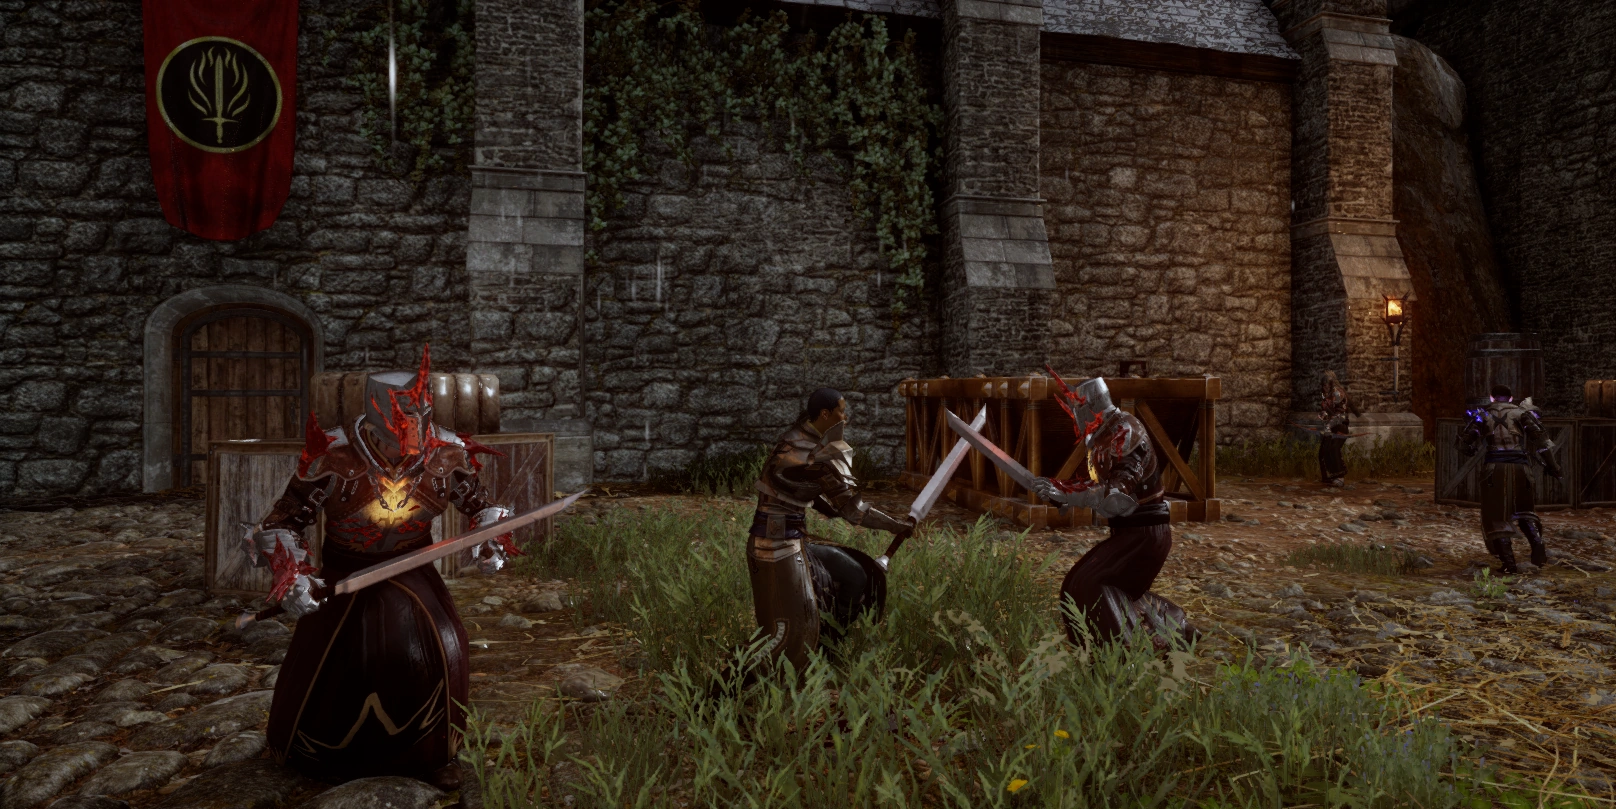
Either way, once the conversation ends, red templars, including Denam, will attack. Barris will be fighting alongside the party. If Abernache lives, he will cower in a corner of the room. Once the battle is over, Barris will confirm that Denam is not dead, and the Herald says he will be judged later. The party will be fighting a mix of red templar knights and archers as they move through the castle to reach the Lord Seeker. There are no supply caches available during this portion, but friendly templars, as well as Barris, will be assisting the party. Use them as shields, if necessary.
A couple of knights will be just outside the door. To the right are two rooms to loot, and one of them is locked. Move up the stairs to find another locked room on the right. Eventually the party will exit onto the courtyard area, only higher up, and several enemies will need to be eliminated. After defeating them all, a nearby door to a mess hall will open and a couple of friendly templars will be engaging enemies. Codex entry: To Be Corrupted is found in this room as well as a note. Continue up the large stairs to encounter another battle with about the same number of enemies.
Confront the Lord Seeker
After the battle, find the locked door nearby that leads to the captain's quarters (Denam's quarters). Entering will trigger some dialogue from Barris. Speak to him to learn more. Of particular note in this room is the large loot chest at the foot of the writing desk. Barris says to make good use of it. It contains some random loot, but also always contains a ![]() Masterwork Seeker Shield Schematic.
Masterwork Seeker Shield Schematic.
Once that is done, move up the next set of stairs and through the door. The Lord Seeker will call out to the Herald. Scour the area for loot and, when ready, walk to the top of the stairs. A cutscene begins and the Lord Seeker grabs the Herald, pulling them through the door.
Find a way out
Meeting Cole inside the Herald's head
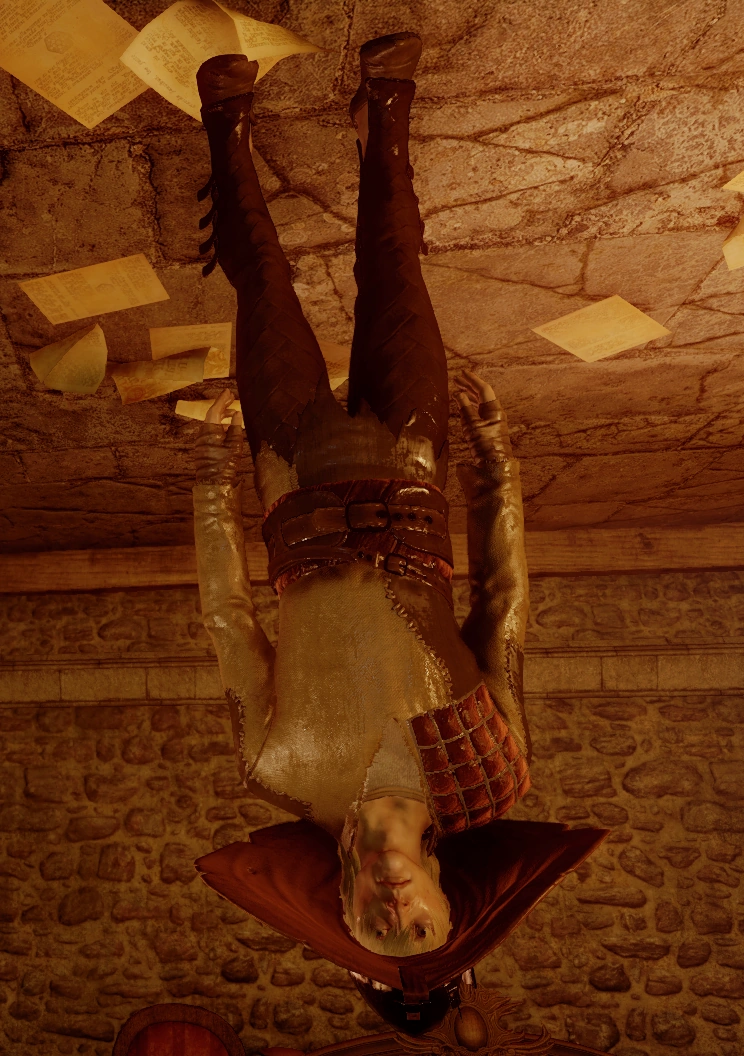
Move forward for a cutscene. The Lord Seeker is revealed to be an imposter: an Envy demon that assumed his form. Envy allowed the meeting with the Inquisition in the hope of "knowing" the Herald and assuming their form.
Proceed and the Herald will enter a conversation and have to make a dialogue choice. The choices have no practical effect on the quest. The point is to show that, no matter how the Herald answers, Envy learns a little bit more about them.
Move further into the room and some statues come to life breathing green flame. There are four statues and the inner two rotate. Use the sides of the room to navigate around the flames. If the flag ritual was performed, Envy will comment based on the Herald's choice.
Approach the final set of statues and a second voice will begin speaking, which will annoy Envy. To the left is a room blocked by a barricade that is different for each class (locked door for rogue, magical barrier for mage, bashable wall for warrior). Inside, examine the Inscription to begin the side quest Demonic Dogma. The Herald receives +1 Cunning. Leave the room, walk into the opposite doorway and it will shut automatically. Open the door to begin a scene with Cole. He will explain where the Herald is, what exactly is going on and how the Herald can escape.
Escape the Chantry
Follow Cole and the Herald will transition to a new area.
Escape the prison
The Herald appears in a room of jail cells. Note the open, dark cell to the right before moving forward into another conversation. The cells can be entered for some indications of what Envy may be hoping to accomplish as the Herald. Cole is in a cell at the far end of the corridor, on the right side. Speak to him, and a Veilfire brazier will appear once he vanishes.
Grab a torch and go back to the dark cell in the room of jail cells and pick up the Prison Key, then light braziers in the three cells with prisoners. A fourth brazier will appear at the end of the main corridor. When you light it, the wall will move backward and stop at another pair of rooms. Open the door on the right (the Prison Key is required for this door) and light the brazier inside. Move back out of the room and light the brazier that has again appeared on the back wall. This causes the wall to move back completely, revealing a cavern containing another inscription to examine. The Herald receives +2 Constitution. Leave the prison by passing Josephine's cell in the final pair of rooms before the secret cavern.
Escape the forest
After the conversation, exit out into the "forest." As the Herald proceeds, the landscape will become more familiar. There will initially be a couple of Lesser Shades accompanying the Herald, but they'll stop following at some point. Envy will attempt to goad the Herald into attacking the Imperial Army soldiers. They are all Level 1 so they won't be a challenge, but they are infinite. Cole will say that the Herald doesn't have to attack anyone. Indeed, all the Herald must do here is reach the point where Envy pulled them into this nightmare. If the Herald draws weapons, simply disengage. Also note that spires will pop out of the ground at random, similar to when attempting to close a Fade rift. These are more dangerous than any enemy here.
On the second floor of the mess hall, find the final inscription to examine for Demonic Dogma. The Herald gains a +3 attribute increase that is dependent on class.
Once the quest marker is reached, a scene plays.
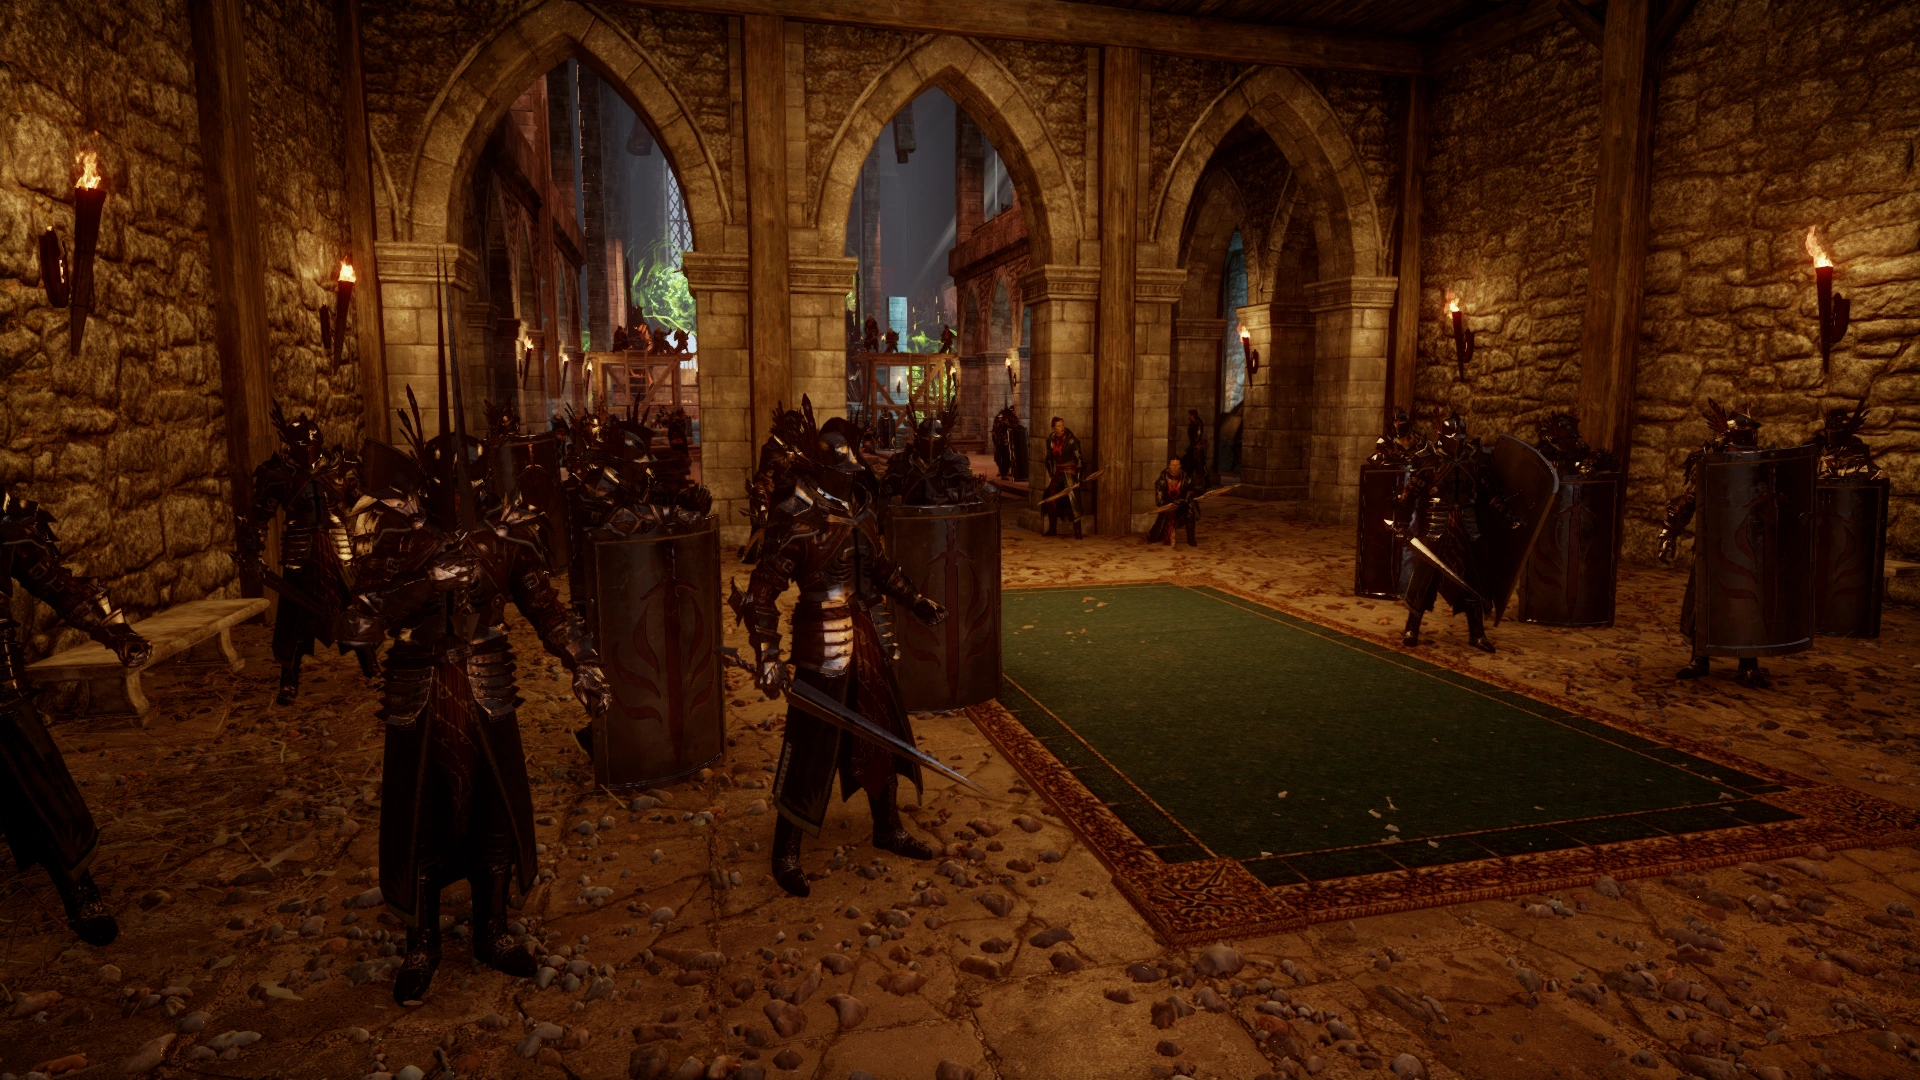
Holding the Great Hall
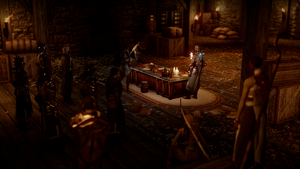
Holding the Great Hall
Another scene plays and Codex entry: Envy unlocks. Envy has retreated behind a barrier and the templars intend to dispel it. However, they will need uncorrupted lyrium and their uncorrupted lieutenants to proceed.
There are two new areas off of the Great Hall that will need to be visited at least once: the Upper Barracks and the Officers' Quarters. There are two entrances to each, one downstairs and one upstairs. Initially, only the lower doors are accessible. Be aware that there is only one supply cache for this portion of the quest. Another supply cache is located past the barrier. Some points to remember:
- The first time the party departs the Great Hall, the gauge will begin to tick down after a few moments. Every subsequent time the party leaves the Great Hall, the gauge will begin to tick down immediately.
- When a veteran is saved, the gauge increases slightly. The mission will fail if the gauge is completely emptied.
- A party member says they hear fighting when the gauge depletes by about half. Another will warn the Herald when the gauge is depleted by about 75%.
- Every time the party returns to the Great Hall, at least one Red Templar Horror will be there. There will be more depending on how much of the gauge has depleted before returning. At 50% depleted, there will be 3-4 Horrors; at 75% depleted there will be 4-5.
- Barris, the veterans and any other templars in the Great Hall are invincible. They can be used to draw threat and let some party members pick at them from range, or even the upper level.
- Important:If the gauge depletes by 75%, the next time the party returns and fends off the horrors, Barris will grunt uncomfortably. The Herald asks him if he's alright, and Barris will dismiss it. However, he will die after the templars dispel the barrier. If Barris lives, however, he is automatically recruited as an Agent for Cullen so it is wise to return to the hall before the gauge reachs this point. There are also war table operations that will only be available if he lives.
- The gauge quickly refills to maximum after defeating all Horrors in the Great Hall.
- Enemy groups can be avoided in order to conserve time and health. Combat Roll, Fade Step, and Stealth can all be used, as can simply disengaging and running. However, enemies assailing a veteran must be killed in order for the veteran to move to the Great Hall.
- The main objectives can be done in one trip to each area. Acquiring all available loot will likely require at least two trips to each area.
Before proceeding, exit the Great Hall. The templars will erect a barricade here after one of the new areas is entered. Examine the throne near the barrier to update Codex entry: Therinfal Redoubt.
There is no right way to do this, so the best advice is to get the veterans first, in order to make the defense of the Great Hall easier. Since there are two in the Upper Barracks, its better to go there first.
Upper Barracks
- Turn left immediately. Turn right at the top of the ramp into the open area; a set of stairs immediately to the left leads to a sack. A group of enemies is here but they can be bypassed. However, Codex entry: Majestic Bastards can be found in the small shed that they spawn near, as well as some gold. A couple more enemies will spawn if the party lingers near this area for too long after killing the initial group of enemies. There is a bashable wall directly across the yard, and it contains three loot boxes. Go through the door to the left of the bashable wall. Pass through this room, and turn left at the T-intersection. Assist the first veteran, Knight-Lieutenant Abrahas.
- Head back to the T-intersection and go up the large stairs. Assist the second veteran, Knight-Lieutenant duBois. There is a locked door here that leads down to a prison. There are two locked cells here. One contains a loot box and some gold and the other contains a couple of sacks and some gold. There is a stack of crates that can be destroyed to reveal a hidden cell with good loot in it. There is a list of prisoners nearby but reading it does not award any XP. If two rogues are in the party, use tactical camera to assign each of them to unlock a door in order to save a little time.
- Return to where the second veteran was encountered, head past the wooden structure, cross the bridge and enter the tower to find a door that leads back to the upper level of the Great Hall.
When returning to the Great Hall for the first time, be sure to knock down a ladder, so the party can climb back up. After dispatching the Horrors, loot the upper level and knock down the rest of the ladders. One chest contains the Templar Order Banner. There is also Codex entry: A Nutty Affair and another note.
Officers' Quarters
When ready, enter the Officers' Quarters from the second level.
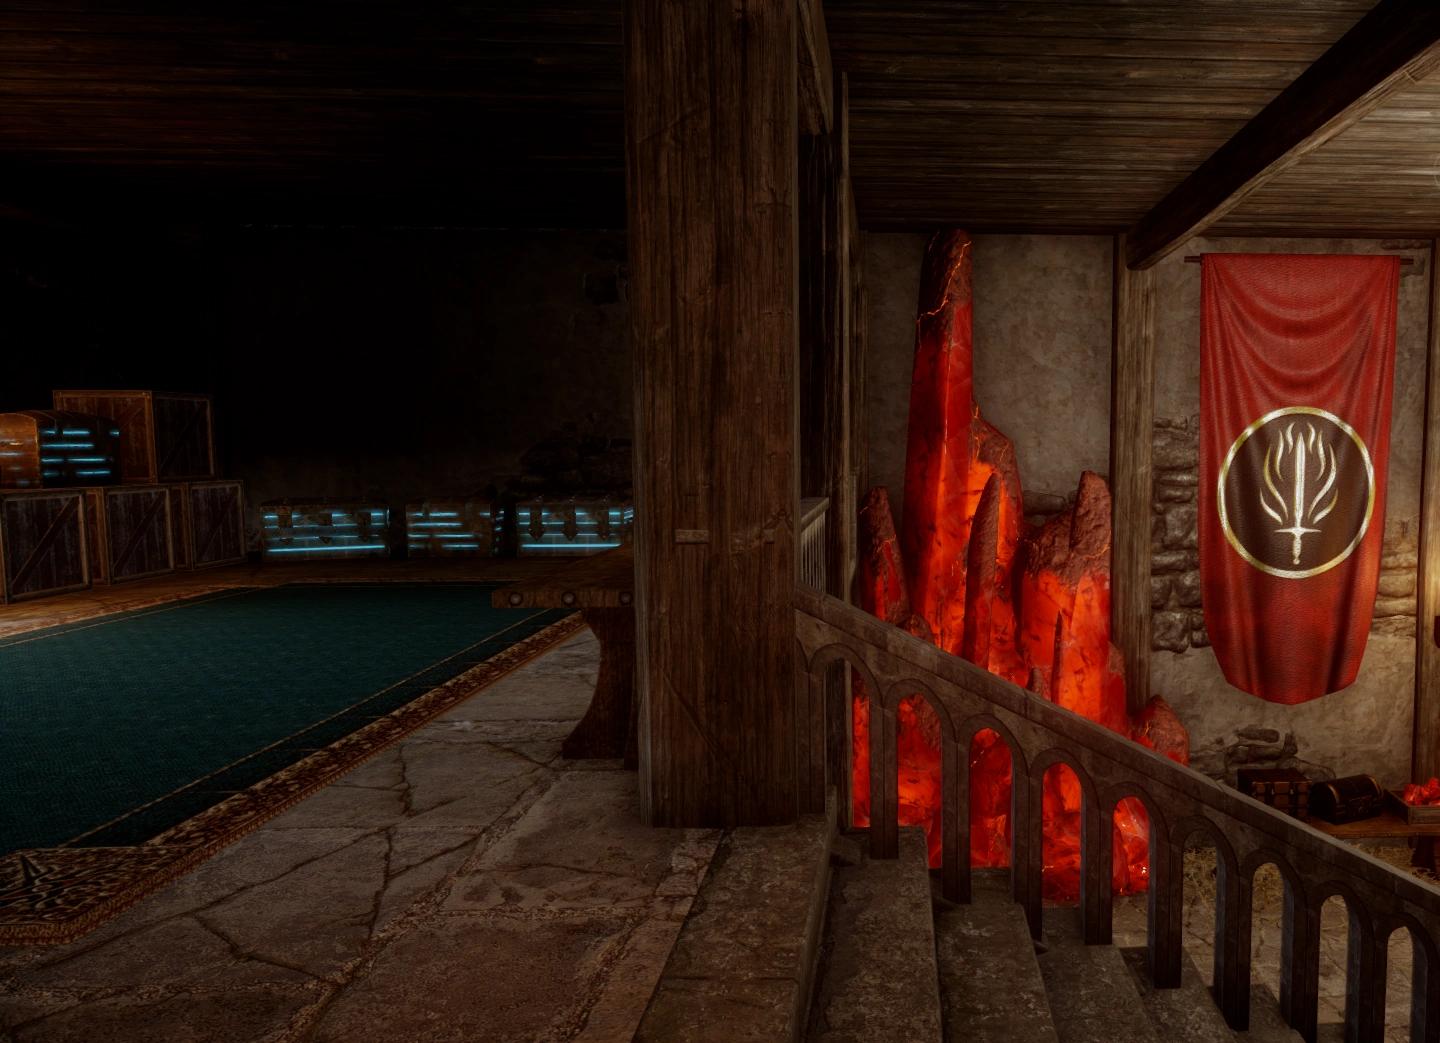

The Therinfal Redoubt Lyrium Cache
- Head downstairs, cross the bridge, turn right and pass through a room. Assist the third veteran, Knight-Lieutenant Primmer.
- Head east, veer around the right side of the tower and cross a bridge (it's parallel to the one crossed earlier), picking up some gold along the way. Bash down the wall, and fall down the hole. This is the only way to enter this room, which contains a couple of loot boxes.
- Exit the room. Dispatch enemies and enter the tower directly across to find a sack. Enter the middle door across the courtyard. A scene will play with Cole, who informs the party of a plot to assassinate the Empress of Orlais. Afterwards, grab the Lord Seeker's Key and loot the large chest. This chest contains some random loot but always contains The Sunless Staff and a Bianca Arms II (if Varric is in the party, the upgrade will be installed automatically).
- Exit the room and turn right. Jump over the railing and open the door to the right (requires Lord Seeker's Key). Go up the stairs on the left and grab the lyrium cache. There is also a lyrium manifest on a table. There are three loot boxes in this room and a note. By this time, a couple more enemies may have spawned in the courtyard, but they can be avoided.
- Exit the room and veer to the left and enter the large archway. Turn right to reach the exit back to the Great Hall.
Talk to Knight-Templar Barris
Hold off the red templars
Barris, Fletcher and the three lieutenants will now dispel the barrier and the party must fight off waves of red templars. There is a gauge that indicates Magic Barrier Strength, and it takes about two minutes to fully deplete. The party will face waves of 6 enemies: 2 each of knights, archers and horrors. Most of a wave must be dispatched before more enemies will spawn.
Because this fight is timed, a good strategy worth considering is retreating to the entrance of the hall and letting enemies waste time reaching the party. As soon as the fight begins, run back to the entrance and disengage to move faster. Use the tactical camera to position melee fighters just behind a column, and an archer or mage just a bit further behind them. When using the tactical camera to order party members to move to a point, select the point twice and the party member will move to that point and hold position. Archers and mages will weaken or kill enemies as they move down the hall, so that melee party members can finish them off when they get in range. This also forces enemies to move into choke points, allowing AoE skills/spells/combos/grenades to be very efficient. Enemy knights will generally charge the party, allowing melee fighters to kill them. Weakened enemy archers may move past the columns and then immediately run away, making them almost useless. The horrors tend to stay back and fight at range, but they become easy pickings once the archers and knights are defeated. A downside to this strategy is that if an entire wave is defeated quickly, the party may disengage on their own while the next wave is spawning, and the player may have to position them again. If they do disengage, just be quick and order them to hold position again.
Any remaining enemies will die immediately once the barrier is dispelled.
Once the barrier is down, go up the stairs on the right and make a u-turn at the top to find a supply cache if needed. Codex entry: Her Perfumed Sanctuary is located on the pews on the right.
Confront the envy demon


Confronting the envy demon
The Envy demon fights much like a Terror demon. It can be level 6-8 with 21,000-32,000 HP. It is immune to all disabling effects. Much like a terror demon, it will do an AoE attack that slows down nearby party members. However, Envy's attack also does spirit damage and inflicts the fear status (much like the Horror spell). A mage can use Dispel to get rid of the fear status but not the slowdown effect. After it does this attack, it always goes underground. When it emerges it will throw spirit projectiles. Its melee attacks can hit multiple party members.
Once it loses about a third of its health, it will move behind a barrier and summon Red Templars as backup. Cole will say "it's trying to hide." Envy will then transform into a large, black shape, with glowing eyes, similar to how it looked in the nightmare portion and its attack style will change (perhaps mimicking the Herald). Once it takes the black form, Cole will join the fight until Envy is dead. Consider turning off any warrior's taunting skills after Cole joins, as he has a limitless supply of potions and Envy will attack him fairly consistently if not taunted.
When it has about a third of its health left, it will return to its default form and spires will begin erupting from the ground, similar to when closing a rift. From this point it's a matter of the party's healing potions outlasting Envy's health.
Envy drops:
![]() Audacity
Audacity
![]() Spirit Essence x5
Spirit Essence x5
![]() Fire Essence x5
Fire Essence x5
![]() Frost Essence x5
Frost Essence x5
![]() Lightning Essence x5
Lightning Essence x5
![]() Sigil of the Revenant (if Trespasser is installed)
Sigil of the Revenant (if Trespasser is installed)
Return to the Great Hall
Barris approaches from the main hall (or Fletcher, if Barris died), with the surviving templars and Abernache, if he also survived. The Herald must decide how to receive the templars' aid.
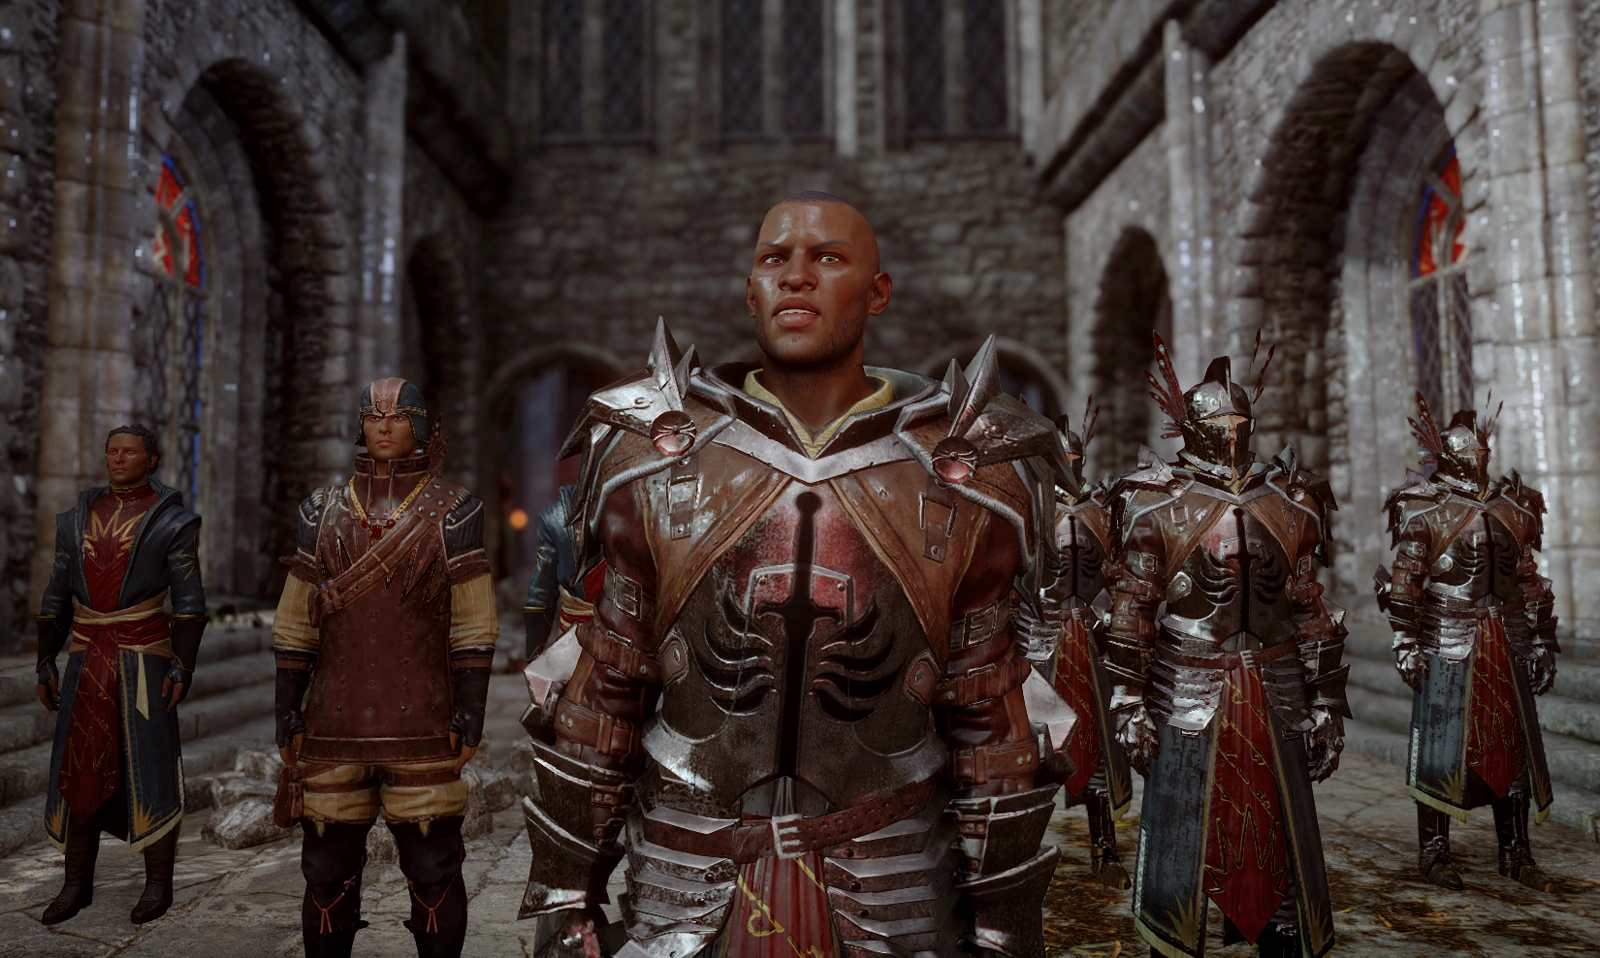
The fate of the templar order
Abernache: I do hope it won't effect our concord.
- You're still a needed ally.
- Varric Slightly Approves Vivienne Slightly Approves
- You can still serve.
- Just get out of my way.
- Varric Slightly Disapproves
Barris (or Fletcher): The templars are ready to hear what the Inquisition needs of us.
- (Special) Andraste sent me to you. (faithful Herald only)
- Solas Disapproves
- Varric Slightly Approves
- We need true templars.
- Vivienne Approves
- Help against the Breach. Fast.
- Iron Bull Slightly Approves Sera Slightly Approves Varric Approves
- You know what you need to do.
- Iron Bull Slightly Approves
Barris: But the Order is leaderless, gutted by betrayal. We must rebuild it.
- Rebuild as our partners. (Ask the templars to join you as free allies)
- Blackwall Approves Cassandra Greatly Approves Iron Bull Greatly Approves Sera Greatly Disapproves Solas Greatly Disapproves Varric Slightly Approves (only if he was brought for the quest) Vivienne Approves
- Cole Greatly Disapproves (occurs even though it's not yet recruited and it is not stated in-game)
- Dorian Greatly Disapproves (occurs even though he's not yet recruited and it is not stated in-game)
- Points awarded to candidates up for Divine Election: Leliana +1, Cassandra +10, Vivienne +5
- Then yield and serve us. (Convince the templars to disband and become part of the Inquisition instead)
- Blackwall Disapproves Cassandra Disapproves Iron Bull Disapproves Sera Greatly Approves Solas Greatly Approves Vivienne Slightly Disapproves
- Cole Greatly Approves (occurs even though it's not yet recruited and it is not stated in-game)
- Dorian Greatly Disapproves (occurs even though he's not yet recruited and it is not stated in-game)
- Points awarded to candidates up for Divine Election: Leliana +1, Cassandra +5, Vivienne -5
Either way, the templars join the Inquisition in the effort to seal the Breach.
Back at Haven
Two codex unlock at this point: Codex entry: Red Templars and Codex entry: Champions of the Just. Leliana or Cullen will berate the Herald depending on whether the templars are allies or conscripts. With the Underworld Knowledge perk you can trigger the war table operation Secure More Lyrium for the Templars at the first dialogue choice.
Cole will appear on the war table and eventually the Herald must decide whether to accept his help.
Cole: I want to do that. I can help.
- Q What kind of help?
- He can stay; he's trustworthy.
- Cassandra Slightly Disapproves
- He's too dangerous. Kill him.
- Cassandra Approves
If Cole is not recruited, he makes everyone forget about him and disappears.
The quest comes to an end as preparations are underway to receive the templars and seal the Breach.
Rewards
Escaping the forest yields
- 512 XP
- 200 Influence
- 2 Power
Completing the quest yields
- 2,658 XP
- 1,600 Influence
- 3 Power
(Optional) If Barris survives he is automatically acquired as an Agent for Cullen which grants
- 50 Influence
- 1 Power
Results
- The Templars are recruited to seal the Breach, thus they are saved from their fate
- The Mages are left to their fate
- The war table operation Nobility and Casualty becomes available
- (Optional) Cole joins the Inquisition
- (Optional) Ser Barris' war table operations become available (if he survives and the templars are recruited as free allies)
- (Optional) The war table operation The Order's Obligations becomes available (if the templars are allies)
- (Optional) The war table operation Negotiate with Hasmal's Templars becomes available (if the templars are conscripted)
- (Optional) The war table operation Investigate Redcliffe Castle can be made available when speaking to Krem in Haven
Notes
Any codex entries from Redcliffe Castle (only accessible by siding with the mages in In Hushed Whispers) will be available for purchase from Willvan in Val Royeaux with the completion of the quest.
Notable items
![]() Masterwork Seeker Shield Schematic - In a chest in Knight-Captain Denam's Quarters
Masterwork Seeker Shield Schematic - In a chest in Knight-Captain Denam's Quarters
![]() The Sunless Staff - In the Lord Seeker's room
The Sunless Staff - In the Lord Seeker's room
![]() Bianca Arms II - Only if Varric is in the party
Bianca Arms II - Only if Varric is in the party
![]() Masterwork Enchanter Armor - in the jail, on the Upper Barracks side of the Great Hall. You must break some crates in front of the cell to gain access.
Masterwork Enchanter Armor - in the jail, on the Upper Barracks side of the Great Hall. You must break some crates in front of the cell to gain access.
![]() Audacity - Looted from the envy demon
Audacity - Looted from the envy demon
![]() Sigil of the Revenant - Looted from the envy demon (requires Trespasser DLC)
Sigil of the Revenant - Looted from the envy demon (requires Trespasser DLC)
- Templar Order Banner - In a chest on the upper level of the Great Hall
Notes
- The Great Hall can be exited and entered indefinitely. Red Templar Horrors drop Everknit Wool, Red Lyrium (used to craft corrupting runes), and Horror Claws. They also drop Essence Containment Apparatuses, three of which are required for the Tempest specialization.
- Companions are able to pass freely through the barrier in the Great Hall while not controlled by the player. This makes it possible to get the whole party past the barrier without destroying it by switching to a companion while they are on the other side. This will not advance the quest, however, so the Great Hall still has to be completed in order to confront Envy.
- Glowing ravens can be spotted watching the Herald when they first enter Therinfal Redoubt. One is on the wall to the left of the entrance and across the bridge and another is perched high atop some scaffolding to the right of where Ser Barris is waiting for the Herald.
Codex entries
![]() Codex entry: Therinfal Redoubt
Codex entry: Therinfal Redoubt
![]() Codex entry: Red Templar Archers
Codex entry: Red Templar Archers
![]() Codex entry: Red Templar Foot Soldier
Codex entry: Red Templar Foot Soldier
![]() Codex entry: To Be Corrupted
Codex entry: To Be Corrupted
![]() Codex entry: Envy
Codex entry: Envy
![]() Codex entry: Horror
Codex entry: Horror
![]() Codex entry: Majestic Bastards
Codex entry: Majestic Bastards
![]() Codex entry: A Nutty Affair
Codex entry: A Nutty Affair
![]() Codex entry: Her Perfumed Sanctuary
Codex entry: Her Perfumed Sanctuary
![]() Codex entry: Red Templars
Codex entry: Red Templars
![]() Codex entry: Champions of the Just
Codex entry: Champions of the Just
![]() Codex entry: Cole
Codex entry: Cole
![]() Notes and Letters from Therinfal
Notes and Letters from Therinfal
![]() Lyrium Manifest
Lyrium Manifest
Trivia
- Most of the quest names in the main plot refer to specific verses of the Chant of Light. "The champions of the just" can be found in the Canticle of Benedictions 4:10.
Bugs
- Any loot dropped from enemies in the upper courtyard area, and not picked up, will still be laying there when the Herald passes through the same areas during the nightmare portion.
- Sometimes the Prison Key is simply not there and therefore cannot be obtained.
- Getting stuck on the other side of the green force field.
- Characters might remain in T-pose during the cutscene immediately preceding the final battle with Envy. During the battle itself, the Herald may also remain in T-pose, which leaves certain abilities bugged and unusable.
Gallery
")
")
")
")
")
")