m (adding Category:Quests and Category:Origins Quest before Awakening) |
m (adding Category:Quests and Category:Origins Quest before Awakening) |
||
| Line 226: | Line 226: | ||
[[Category:Quests]] |
[[Category:Quests]] |
||
[[Category:Quests]] |
[[Category:Quests]] |
||
| − | [[Category:Origins |
+ | [[Category:Origins Quests]] |
Revision as of 20:55, 4 March 2010
Broken Circle is one of the quests associated with main plot development in Dragon Age: Origins.
In order to combat the Blight, the Warden must find allies, including the mages of the Circle of Magi. To this end, he must travel to their base at Kinloch Hold, often referred to simply as Circle Tower, on an island in Lake Calenhad.
Background
After being rescued by Flemeth from the Tower of Ishal, the Warden decides to use the treaties from the The Grey Wardens' Cache to gather aid against the Blight. One of these treaties is with the Circle of Magi. Deciding to use the treaties will result in the Broken Circle quest being recorded in the Journal, but the quest cannot be started until Lothering and the Imperial Highway have been negotiated.
After that stage, this quest can be started at any time when it is possible to access the World Map. There are certainly considerations in favour of doing it early in the campaign, especially on a first playthrough, specifically that during it Wynne can join the party and a range of attribute bonuses can be obtained. However, it can be left until later if desired: see for more discussion of the optimum order for completing main story quests.
To complete the Broken Circle quest, the Warden must first find a way to access the Circle Tower. Before heading to Lake Calenhad Docks, it is possible to hear rumours that all is not well at the Circle, for example from Ser Bryant in Lothering, innkeepers, Bodahn Feddic, or by eavesdropping on gossips.
And indeed, once The Warden arrives at the Apprentice Quarters, they discover a dire situation. Knight-Commander Greagoir is organizing troops and barricading off the first floor of the Tower. He will explain that the Tower has been overrun by Blood Mages and Abominations, with some Demons sprinkled in for good measure. He doesn't know exactly what has happened, but he is convinced everyone in the Tower is dead, and has sent off for the Rite of Annulment. Using the Rite he intends to kill everything in the Tower. The Warden can either:
- Check for any survivors of the Circle and rescue any surviving mages.
- Purge/kill everything in the tower with the idea that "they cannot be saved" and to take no chances of any demon surviving.
The first option will obtain the aid of the mages while the second will obtain the aid of the templars to end the Blight. If pressed, Greagoir says he would accept that the tower is safe only if First Enchanter Irving stands in front of him and says so. Greagoir will allow the Warden entry into the Tower, but will bar the door behind them—there is no turning back until the quest is complete.
Walkthrough
Getting into Circle Tower

Carroll, a Templar ... and the Queen of Antiva!?
- Travel to Lake Calenhad Docks on the World Map. Upon arrival, there are a number of people with whom The Warden may interact:
- If Sten's approval is high enough and he has told The Warden about his lost sword, then there will be a Scavenger immediately to the left on entering the area who has some important information.
- The ferry man, Kester. If The Warden is a Mage, Kester will mention the first trip across the Lake with Duncan. He will also allude to something happening in the Tower and say that the Templars have confiscated his ferry and will not allow anyone to go to the Tower.
- A representative of the Mages' Collective.
- If the Dereliction of Duty quest has been accepted from the Blackstone Irregulars, Sammael the Deserter here can be confronted here.
- There is a landmark boat that can be examined by Dog for a stat boost in this area.
- The Spoiled Princess Inn can also be found in this area.
- On the jetty, The Warden should talk to Carroll, a templar who is determined to make life hard for anyone attempting to access the Tower. Shale will have no patience with Carroll and will force him to relent. Carroll can also be persuaded or intimidated into taking The Warden to the Tower (if the check for the first one tried fails, then the check for the second will always be passed). If Morrigan, Leliana, or Sten are in the party, they can help get past Carroll (choose the conversation option "Can't we work something out?").
- Carroll will permit The Warden to travel to the Tower. Speak to Knight-Commander Greagoir and persuade him to allow the party to investigate or clean out the Tower.
- The Quartermaster behind Greagoir sells some useful items. Once past this lobby area of the Tower, there is no turning back until the quest is complete, so stocking up is a good idea.
- Once ready, pass through the doors further into the Tower.
Walkthrough: Part One
Circle Tower during Broken Circle
After the doors have closed behind The Warden, a cut scene will begin. Wynne is fighting a Rage Demon with the help of some apprentices in order to defend some children. This is where the we are introduced to the best NPC healer within the game. After quickly vanquishing her fiery foe, The Warden will be able to talk to Wynne (there is no way to avoid it, she has raised a shield over the doorway and you must speak to Wynne to move on). Wynne will want to know what's happening outside, and how it is you got there. The Warden will inform her that Gregoir has sent for the Right of Annulment, and that you have come to try and save those you can, and stop this nightmare before it is too late. The two of you will discuss things a bit. The Warden can side with Wynne, or tell her she is not needed. If you side with her, she will forcibly join the party. If you tell Wynne she is not needed, she will attack you. *Note: If Morrigan is 'in the party, she will join in the conversation. If Wynne discovers she is an Apostate, and sees you siding with her, she will attack. Wynne is VERY loyal to the Circle, and the rules it has established.
First Floor
- See also: [[:Apprentice Quarters.|Apprentice Quarters.]]
Regardless of what The Warden chooses, the protective shield over the doorway is removed. If you search around the first room where you either fought, or acquired Wynne, you will find the door going down to the basement is locked. There is a side quest gotten within the Tower that will require The Warden to return to this door once the Broken Circle Quest is complete.
- Note: All combat is described from the point of view of a Level 10-11 Party.
The first floor is the former Apprentices Quarters. There are few tough enemies here, though the enemies will become more challenging as the Party goes up the tower. The worst enemy on the first floor is a Greater Rage Demon before the stairs up to the second floor. Pay close attention to all the loot options on the first floor. There are many chests and such that can be looted, but there also many Codex entries to be found here as well. The beginning of the quests Watchguard of the Reaching and Summoning Sciences can be found on the first floor.
Second Floor
Upon entering the second floor The Warden will encounter Owain; loot Charred Corpse for Water-Stained Portrait. If The Warden is a Mage, they will recognize Owain as the Tranquil keeper to the Circle stockroom. Owain will speak briefly with the party about some of the things happening within the Tower and tell you about a mage named Niall. Niall had come to Owain and received the Litany of Adralla from him. The litany is a chant that will keep a Blood Mage from dominating a person's mind.
After leaving Owain, The Warden will encounter a group of Blood Mages blocking the way into the rest of the building. They will attack on sight. When the battle is finished, one of the Mages will beg for mercy. She tells The Warden a little about Uldred and why she and her brethren succumbed to the temptation to become Blood Mages. The Warden may decide to either let her escape or to kill her or to recruit her into the mage army.
Once the encounter is finished, the way to the rest of the floor is clear; loot Pile of Books for The Rose of Orlais. Much of the combat is similar, except now Shambling Skeletons and Blood Mages will be added to the list of encounters. Groups of Mages can be capable of doing high amounts of damage. It is best to handle them with whatever forms of Area Effect damage you can, and any and all forms of interrupts like Paralysis, Crushing Prison, Stuns, Shield Bashing, etc...
Exploring all the rooms will bring, for the most part, encounters with Mages, Demons and Shambling Skeletons. It will also net you more pages for the Watchguard of the Reaching quest. In the large room to the north-east; loot Vanity for Silver Chain, The Warden will encounter the Mage Godwin, who has locked himself inside of a cabinet. He will give you a little more information on Uldred, and you can either kill him, or let him go. If you let him go, regardless of the amount of carnage you left in your wake, he will quietly climb back into his little shelter and leave you to your business of saving everyone.
Continuing around the Tower, you will come across the former chapel, you can loot Soldier Corpse which carries Chantry Amulet. There will be a Toppled Statue to inspect along the back wall. Behind the statue will be a phylactery, trying to pick it up will cause it to fall apart in you hands and spawn a Revenant. This Revenant is one of many The Warden must kill in order to complete The Black Vials Quest.
In the southern most room, just after the chapel on this floor, you will discover First Enchanter Irving's quarters. Here you will find several Codex entries, but more importantly, looted from: Irving's Chest, Black Grimoire (to give to Morrigan to start Flemeth's Real Grimoire) and First Enchanter's Desk, Small Painted Box used in the quest Friends of Red Jenny. Then continue following the Tower hall and take the stairs to the third floor.
Third Floor
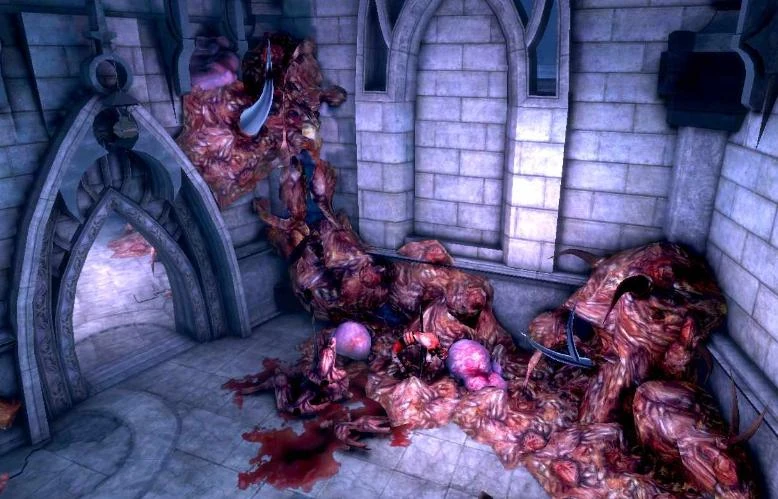
When The Warden reaches the third floor, they will find a chest behind the statue. The next room the party enters will have three large pillars in the middle, and three statues along the back wall. The statues look important, but they cannot be interacted with at this time. After the party has gone half way through room, The Warden and the rest of the Party is attacked by the Undead.
The undead start coming up out of the very ground, and quickly swarm the party. There will be two waves of Shambling Skeletons, and at some point an Arcane Horror will join the fray. If The Warden has already been to the Ruins within the Brecilian Forest, then they are already familiar with the devastation these corrupted Mage corpses can be capable of. Take it out first. From this point on, remember to keep any spell casters you have in your party away from any door you intend to open. The third floor has been converted to the Chantry Templar's quarters. Just as the Mages encountered before, the Demons have taken control of these Templars.
Possessed Templars and Charmed Templars are found in every room, and behind every door on this floor. The Templars are particularly effective at taking out Mages. If a caster is within line of site of any door opened to a room containing a group of Templars, they will find themselves the recipient of a devastating rain of Holy Smite that can be fatal. In one of the rooms the Party will encounter a Desire Demon and her group of Charmed Templars. As in any fight with some form of spell caster in the enemy ranks, take her out first, from range, and with as much stunning, paralyzing, knocking down, and other interrupts as possible. Don't ignore the character who is keeping the Templars occupied though—the Templars can be formidable in their own right. Loot Small Gold Bar from one of the dead Charmed Templars.
In many of the rooms there are codex entries and some "Torn Pages." These pages will start the quest, Five Pages, Four Mages, so be sure to get them all. The last room on the third floor holds the strongest set of enemies. Demons, Abominations, a giant statue of a shield holding warrior, and a single Tranquil standing in their midst. Once you enter the room, everything except the statue and the Tranquil attack. Loot White Runestone from the dead Abomination.
At the end of the battle, take a look around. The large statue in the middle of the room looks important. Remember those three statues along the back wall in the great hall where The Warden encountered the ambush? They all play their part in the quest Watchguard of the Reaching.
Fourth Floor

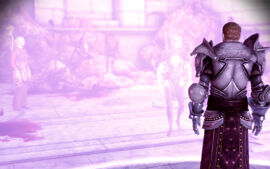
Desire Demon and Bewitched Templar
The fourth floor is relatively sparse in enemies, and only a portion of it is accessible at this time. Stay away from the central room for the time being.
There's two difficult fights on the fourth floor. The first of which is a cut scene of another Desire Demon bewitching yet another Templar. The Demon informs The Warden that in him she saw desire for a family life and happiness, which is the illusion she gives him. They can try and snap the Templar out of it, but will not succeed, leaving only two choices. Kill them both, or let the Demon go. If the Demon is allowed to flee, she'll disappear and take the Templar with her. If The Warden decides to fight them, the Templar joins in; between the two of them, it's a pretty tough match. They even summon a couple of undead to help. The Templar will use abilities, while the Desire Demon is a potent spell caster. One tactic is to freeze one of them via spells like paralysis or petrify, and keep them that way while focusing on the other until it's dead. Don't ignore the undead, but don't really focus on them either; let area effect abilities handle them. Afterwards, loot Vanity for Sun Blonde Vint-1.
The second encounter will be a much more powerful Blood Mage than has been encountered before and has somehow made friends with a large group of Charmed and Possessed Templars. Keep the Party's spell casters away from the door again, and kill the Mage as soon as possible. With the Mage out of the way, the Templars are just like those on the third floor; they're tough, but not un-manageable. Loot Archon Robes from the dead Blood Mage, then continue on.
Now is a good time to rest up, and go back and do the Watchguard of the Reaching side quest if The Warden hasn't already—once you enter the central chamber on the fourth floor, things are going to change. Walk in the room, and enter an immediate cut scene.
Sloth is an Abomination, and so much more. He hovers over the body of an as yet un-named Mage. No matter the dialogue options you choose, Sloth will put The Warden and his party into a comatose sleep. Once the cut scene ends, The Warden will find them selves in some form of hazy reality only ever knowingly visited by Magi. If The Warden is a Mage, or has completed the quest to save Connor, the Arl of Redcliffe's son, then they will recognize where they are.
Fourth Floor Map (before Fade)
The Fade: Lost in Dreams
In the Fade The Warden must break the defenses of the Demon Sloth, and kill him. Here we will discover that the nameless Mage that Sloth was standing over is, in fact, none other than the aforementioned Niall.
Because the quest to escape from the Fade and kill Sloth is so long, it will be covered in a separate walkthrough. Please follow the link below:
Walkthrough: Part Two
Welcome back: Fourth Floor

Cullen's Prison
After returning from the Fade, The Warden will be returned to the fourth floor of the Tower. Laying nearby is the corpse of Niall, from him loot Litany of Adralla. In the next room loot Charred Corpse for The Libertarian's Cowl. As the Party continues towards to top of the Tower to confront Uldren, they will be assaulted by Dragonlings, also there is the possibility that there will be a drake directly outside of the room were you take the Litany from Niall. This fight is rather simple as long as you have some form of paralysis and you avoid his flame breath. There will be some Demons and a room that appears empty of all but a chest until The Warden attempts to retrieve its contents; This fight can be rather difficult as it consists of high-level demons, and after returning from the Fade you may be low on supplies, luckily there is a multitude of potions around for you to loot. Going for the chest will trigger a trap and spawn several more Demons to attack the Party. One of the locked Chest contain's Beastman's Dagger.
By the stairs leading up to the Harrowing Chamber, The Warden will find Cullen, trapped in a magical prison. If The Warden is a Mage, Cullen may have been encountered before during the Origin quest, and Cullen reacts accordingly. Regardless, Cullen believes the Party members are demons sent to torment him and if The Warden is Female confesses his infatuation with her.
Once The Warden has calmed Cullen down enough, they will be presented with a large moral decision. Cullen describes his torment as ghastly, and explains to you that Uldred is upstairs in the Harrowing Chamber, forcing the rest of the living Mages to become either Blood Mages, Abominations, or some version of both. He is convinced that not a single Mage can be allowed to make it out of that chamber alive, and everyone must be killed.
- The Warden may agree with him. Going upstairs and slaughtering everything with or without a heartbeat and ending all hope of getting the Mages Circle to help with the Blight. Doing so will allow the Templars to be recruited. Note that agreeing with this course of action causes Wynn to attack the party immediately, forcing the Warden to kill her before being able to proceed. Once you have agreed, you cannot back-pedal out of the decision!
- The Warden can disagree with Cullen outright and lose any and all support from the Templars. This means the Mages will join against the Blight instead.
- Or The Warden may choose to refrain from making the decision until they have at least gone upstairs and witnessed just how horrible the situation is. This will put off the decision until Cullen and Irving can make their case to Greagoir. If Sten is in the group, he may support Cullen's recommendation; the Warden may try to persuade him otherwise; a negative result (e.g.: -5 from Sten's approval) may result - note that if you pick the dialog choice 'I have made my detition' when it is first presented, Sten does not interfere nor looses approval; seems he simply doesn't like you to change your mind or even debate the point after your initial pick.
With the decision made, The Warden may go upstairs.
BUG: In the PC and PS3 versions, after returning from the fade, the select party members icon may become active, and Wynne can be replaced by any other character, this way she will not attack when the annulment chat option is choosen. (Worked in 1.01b PC version of DA and PS3, not sure about X Box; you can also go downstairs and do the same thing). (XBox 360 - Party change can only be done in the room containing Niall's body. You can leave the room and re-enter to change party members at will. Party members cannot be changed outside of that room.). If Wynne is replaced by another character, during your conversation with Cullen, Wynne's voice is still heard (but the character is not present) and Cullen will respond to Wynne as if she was still there.
Completed Map of the Fourth Floor
The Harrowing Chamber


Confronting Uldred
In the Harrowing Chamber, The Warden will finally meet Uldred. Uldred is the Mage that offered the services of the Circle of Magi to light the beacon way back during the Battle of Ostagar. Having been shot down for that honor, he turned to the darker arts.
A cut scene plays upon entering the Harrowing Chamber, wherein Uldred forces a mage to become an Abomination. Uldred himself has become possessed by a Pride Demon. There is an extended dialogue The Warden may engage in, in order to learn more of Uldred's goals and motivations. The Warden is free to chose any number of dialogue options, but ultimately, Uldred must be killed.
Combat
Once the cut scene ends, Uldred shows his true form as a Pride Demon. He has a lot of health and some very strong abilities. His three lacky Abominations aren't the same as the previous ones the Party fought either—they are a fair bit stronger.
Every so often during the fight Uldred will attempt to corrupt one of the other Mages that are bound up around the room. Using the Litany of Adralla every time a Mage is surrounded by three rings of pulsing light will prevent Uldred from adding another Abomination to the battled. In the PC version, the Litany will usually appear on the action bar when it is looted from Niall's dead body; if not, spend the time to find it. For console players, the Litany is accessed through the radial menu, on the advanced tab. If a single Mage lives through the fight, The Warden will have sided with the Magi in the moral decision presented by Cullen.
Uldred himself is incredibly powerful almost certainly the most powerful foe you've faced so far. He greatly resembles an ogre, and has three abominations by his side. Wynne, Morrigan and Alistair are the ideal companions, although Sten may substitute for Alistair in this mix. Wynne shall be invaluble, as she heals the party frequently. Morrigan is likewise, as her many offensive spells seem to have the desired effect when it comes to mass damage. Sten/Alistair could either be used to distract Uldred, or, ideally, to slay the abominations first. Now, if The Warden usually flanks an opponent, they should do so more from the side, as Uldred has a nasty habit of kicking those behind him without turning.
Once Uldred finally goes down, loot Cinderfel Gauntlets from him, then speak with First Enchanter Irving (or Cullen, should you have killed all the mages) will speak with you. The Warden's dialogue with Irving/Cullen may have lasting effects on the game.
Result
When Uldred is killed, First Enchanter Irving or Cullen will take The Warden downstairs to Knight-Commander Greagoir, where the matter of the treaty will be discussed. Should you have sided with the mages during the previous discussion with Cullen, he will try to convince Greagoir that all the mages need to be killed; The Warden may fan the flames or vouch for the mages through dialog options.
To side with the Templars:
- Irving must have died during the fight with Uldred, in which case Greagoir will side with The Warden against the Blight;
- If Irving survived, The Warden must mention to Greagoir that some blood mages may have survived. In that case, Irving will agree with this fact and willingly go into containment and put the mages' lives in the Templars' hands. This ending results with +12 approval from Morrigan.
To side with the Mages:
- Irving must have survived the fight with Uldred. Then, The Warden just needs to ask Greagoir what he thinks, or simply mention that order has been restored to the Circle. This ending results with +7 approval from Wynne.
It is not possible to gain both Templars and Mages. If The Warden asks Greagoir what he thinks, and Greagoir had said before that he would accept no less than First Enchanter Irving saying it is safe, he will stick to his word and call off the Annulment. Irving will then confirm that the mages will aid you against the Blight. Later back at camp, the mage's envoy will state that the Templars have sided with you as well, however, this appears to be merely dialogue, as only the mages appear as selectable allies during the Final Battle.
Note: Some walkthroughs report that if the warden is a blood mage and Wynne is in your party, she will report her suspicions to Greagoir after defeating Uldred(this is not the case if you decided to kill her earlier). If the warden confirms this, he or she is attacked by the remaining templars and mages. Both groups are then no longer available for the final battle. A possible codex entry for Greagoir refers to him being killed by the warden. On pc, this event does not in fact occur, regardless of whether the warden sides with the templars or the mages. This event may have been changed at a late date in development, or possibly a bug prevents it from being triggered.
Side Quests
All of the following quests may be accessed once Broken Circle has been started.
[[File:|20px|middle|link=Friends of Red Jenny|Friends of Red Jenny]] Friends of Red Jenny
Items
See Quartermaster (Circle Tower) for Merchant Items.
![]() Archon Robes, source: Drop Blood Mage
Archon Robes, source: Drop Blood Mage
![]() Beastman's Dagger, source: locked Chest
Beastman's Dagger, source: locked Chest
![]() Black Grimoire, Gift, source: Irving's Chest
Black Grimoire, Gift, source: Irving's Chest
![]() Beef Bone, Gift, source: Chest
Beef Bone, Gift, source: Chest
![]() Buckle of the Winds, source: Pile of Fifth
Buckle of the Winds, source: Pile of Fifth
![]() Chantry Amulet, Gift, source: Soldier Corpse
Chantry Amulet, Gift, source: Soldier Corpse
![]() Charged Mitts, source: SideQuest Drop Fade Rifter
Charged Mitts, source: SideQuest Drop Fade Rifter
![]() Cinderfel Gauntlets, source: Boss Drop Uldred
Cinderfel Gauntlets, source: Boss Drop Uldred
![]() Kaddis of the Lady of the Skies, source: Chest
Kaddis of the Lady of the Skies, source: Chest
![]() Litany of Adralla, source: Niall's Corpse
Litany of Adralla, source: Niall's Corpse
![]() Love Letter, source: locked Chest
Love Letter, source: locked Chest
![]() Mabari War Harness, source: Chest
Mabari War Harness, source: Chest
![]() Sailor's Charm, source: Vanity
Sailor's Charm, source: Vanity
![]() Scroll of Banastor x2, source: Pile of Books
Scroll of Banastor x2, source: Pile of Books
![]() Shiver, source: Drop Desire Demon
Shiver, source: Drop Desire Demon
![]() Silver Chain, Gift, source: Vanity
Silver Chain, Gift, source: Vanity
![]() Small Gold Bar, Gift, source: Drop Charmed Templar
Small Gold Bar, Gift, source: Drop Charmed Templar
![]() Small Painted Box, Quest Item, source: First Enchanter's Desk
Small Painted Box, Quest Item, source: First Enchanter's Desk
![]() Sun Blonde Vint-1, Gift, source: Vanity
Sun Blonde Vint-1, Gift, source: Vanity
![]() The Libertarian's Cowl, source: Charred Corpse
The Libertarian's Cowl, source: Charred Corpse
![]() The Rose of Orlais, Gift, source: Pile of Books
The Rose of Orlais, Gift, source: Pile of Books
![]() Water-Stained Portrait, Gift, source: Charred Corpse
Water-Stained Portrait, Gift, source: Charred Corpse
![]() White Runestone, Gift, source: Boss Drop Abomination
White Runestone, Gift, source: Boss Drop Abomination
![]() Yusaris, source: SideQuest Boss Drop Shah Wyrd
Yusaris, source: SideQuest Boss Drop Shah Wyrd