(→Bugs: If romance-partner Fenris is kidnapped, you can add him to the party before going to The Wounded Coast, resulting in 2 Fenrises, same as Isabela.) Tag: Visual edit |
mNo edit summary Tag: Source edit |
||
| (20 intermediate revisions by 10 users not shown) | |||
| Line 1: | Line 1: | ||
<onlyinclude>{{QuestTransformer |
<onlyinclude>{{QuestTransformer |
||
|style = {{{style|}}} |
|style = {{{style|}}} |
||
| + | |supertitle = |
||
|name = [[Best Served Cold]] |
|name = [[Best Served Cold]] |
||
|act = 3 |
|act = 3 |
||
|icon = Quest icon DA2.png |
|icon = Quest icon DA2.png |
||
|image = Best_served_cold.jpg |
|image = Best_served_cold.jpg |
||
| − | |px = |
+ | |px = 270x360px |
| ⚫ | |||
| ⚫ | |||
|start = [[Orsino]] or [[Meredith Stannard|Meredith]] |
|start = [[Orsino]] or [[Meredith Stannard|Meredith]] |
||
| − | |end = |
+ | |end = Orsino or Meredith |
| − | | |
+ | |rewards = 1200 XP |
| ⚫ | |||
| ⚫ | |||
|previous = [[On the Loose]] |
|previous = [[On the Loose]] |
||
|next = [[The Last Straw]] |
|next = [[The Last Straw]] |
||
| ⚫ | |||
| ⚫ | |||
| + | |prereqs = [[On the Loose]] |
||
|appearances = [[Dragon Age II]] |
|appearances = [[Dragon Age II]] |
||
}}</onlyinclude> |
}}</onlyinclude> |
||
| Line 23: | Line 25: | ||
== Walkthrough == |
== Walkthrough == |
||
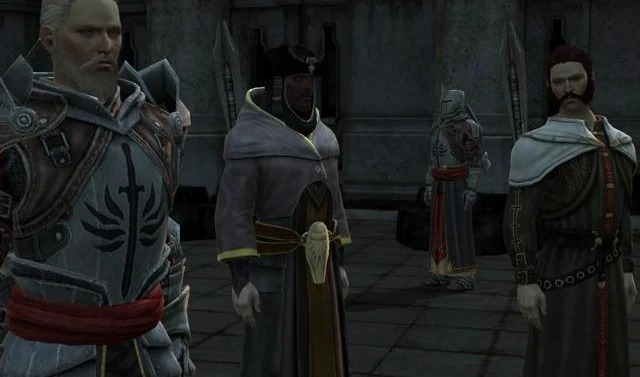
| − | + | [[File:Hightown_meeting.jpg|thumb|220px|The midnight [[Hightown]] Meeting]] |
|
=== Templar Hall === |
=== Templar Hall === |
||
Go to the Gallows and then to the Templar Hall. Talk to Orsino or Meredith, depending on who sent the [[Letter: Best Served Cold|letter]]. |
Go to the Gallows and then to the Templar Hall. Talk to Orsino or Meredith, depending on who sent the [[Letter: Best Served Cold|letter]]. |
||
| − | When accepting the quest from |
+ | When accepting the quest from Meredith: |
| + | |||
| ⚫ | |||
| + | * If you say "How does this involve me?" at the first conversation choice then you skip the second conversation choice, meaning you cannot investigate and find out why Meredith hates mages. |
||
| ⚫ | |||
| ⚫ | |||
| ⚫ | |||
| − | + | * "I don't believe you." {{Approval2|Anders|+10}} |
|
| + | |||
| ⚫ | |||
| + | When accepting the quest from Orsino: |
||
| + | |||
| + | * Choosing the Diplomatic options: |
||
| ⚫ | |||
| ⚫ | |||
| + | |||
| ⚫ | |||
| ⚫ | |||
| ⚫ | |||
=== Hightown === |
=== Hightown === |
||
| Line 61: | Line 72: | ||
** {{Approval2|Merrill|-5}} |
** {{Approval2|Merrill|-5}} |
||
** {{Approval2|Sebastian|-10}} |
** {{Approval2|Sebastian|-10}} |
||
| ⚫ | |||
| ⚫ | |||
| + | <br> |
||
If Hawke agrees with his views on Meredith, then he will automatically be allowed to leave. |
If Hawke agrees with his views on Meredith, then he will automatically be allowed to leave. |
||
| Line 69: | Line 81: | ||
=== The Wounded Coast === |
=== The Wounded Coast === |
||
Head to the Wounded Coast. Take the low path and head south towards the Ruins. Fight a small group of Templars and Mages on the way. A cut-scene will then occur where [[Samson]] will approach Hawke. |
Head to the Wounded Coast. Take the low path and head south towards the Ruins. Fight a small group of Templars and Mages on the way. A cut-scene will then occur where [[Samson]] will approach Hawke. |
||
| − | *Hawke states that they want to help the Mages. |
+ | * Hawke states that they want to help the Mages. |
| − | + | ** {{Approval2|Anders|+10}} |
|
| − | + | ** {{Approval2|Fenris|-10}} |
|
| − | + | ** {{Approval2|Merrill|+10}} |
|
| − | + | ** {{Approval2|Sebastian|-5}} |
|
| ⚫ | |||
| ⚫ | |||
| ⚫ | |||
| ⚫ | |||
| ⚫ | |||
| ⚫ | |||
| ⚫ | |||
| ⚫ | |||
| ⚫ | |||
| ⚫ | |||
| ⚫ | |||
| ⚫ | |||
| + | "Release your hostage!": |
||
| ⚫ | After the scene continue down the path until the party reaches the main group of Templars/Mages. They are being led by the templar [[Thrask]], who will implore Hawke to side with them against Meredith. Behind him, whoever was taken hostage will be lying on the ground, unconscious. |
||
| − | + | * {{Approval2|Merrill|+5}} |
|
| + | "I don't support Meredith.": |
||
| − | Or the diplomatic response gives the following, if Hawke speaks in support of the mages: |
||
| − | + | * {{Approval2|Merrill|-5}} |
|
| ⚫ | |||
| ⚫ | |||
| − | :{{Approval2|Sebastian| |
+ | * diplomatic response: :{{Approval2|Sebastian|+5}}. |
| − | :{{Approval2| |
+ | * humorous/aggressive response: {{Approval2|Sebastian|-5}}. |
| + | |||
| + | Grace order Alain to kill the hostage; if you choose the diplomatic or humorous response then he will refuse to do it. |
||
| + | |||
| + | Grace kills Thrask and then attacks you. |
||
| ⚫ | |||
| ⚫ | |||
| − | Or the diplomatic response gives: |
||
| ⚫ | |||
During this battle, Grace herself is easily taken down, but becomes a Pride Abomination upon death. After the battle, Samson will return with [[Cullen]]. As with Keran earlier in this quest, Hawke will have the opportunity to decide the fate of [[Alain]] and [[Samson]]. |
During this battle, Grace herself is easily taken down, but becomes a Pride Abomination upon death. After the battle, Samson will return with [[Cullen]]. As with Keran earlier in this quest, Hawke will have the opportunity to decide the fate of [[Alain]] and [[Samson]]. |
||
| Line 99: | Line 113: | ||
Note: [[Mage Hunter and Arcane Defender]] Achievement: |
Note: [[Mage Hunter and Arcane Defender]] Achievement: |
||
This is the final chance to side with either the Templars or Mages. During the conversation with Cullen: |
This is the final chance to side with either the Templars or Mages. During the conversation with Cullen: |
||
| − | *(Side with the templars) Say " |
+ | *(Side with the templars) Say "He's one of Grace's." and then either "Give Samson another chance." or "Kill them all". |
| − | *(Side with the mages) Say |
+ | *(Side with the mages) Say "Don't hurt Alain." and "Be merciful." |
The achievement will not pop up until Hawke reports back to either Meredith/Orsino to end the Quest, providing they have sided with the same faction 4 times previously. |
The achievement will not pop up until Hawke reports back to either Meredith/Orsino to end the Quest, providing they have sided with the same faction 4 times previously. |
||
| + | Cullen says to take Alain in for questioning. |
||
| − | When Hawke speaks in defense of the mages with Cullen: |
||
| + | * "Don't hurt Alain.": |
||
| ⚫ | |||
| − | + | ** {{Approval2|Sebastian|+5}}. |
|
| + | * "He's one of Grace's.": |
||
| − | If Hawke tells Cullen Alain was working with Grace and to kill Alain: |
||
| − | + | ** {{Approval2|Aveline|-10}}. |
|
| ⚫ | |||
| + | |||
{{Note|Cullen will make reference to his experience in Ferelden's Circle Tower.}} |
{{Note|Cullen will make reference to his experience in Ferelden's Circle Tower.}} |
||
| + | |||
| ⚫ | |||
| + | Cullen asks if you have any recommendation for him to bring to Meredith: |
||
| ⚫ | |||
| + | * "Be merciful." This would save the lives of the mages as Meredith will simply lock them in the Gallows while the templars involved in the conspiracy lose their pay instead. |
||
| ⚫ | |||
| + | ** {{Approval2|Merrill|+10}}. |
||
| + | * "Give Samson another chance." Cullen says he will look into Samson rejoining the Templars: |
||
| + | ** {{Approval2|Aveline|+10}}. |
||
| ⚫ | |||
| + | ** {{Approval2|Merrill|-15}}. |
||
| + | ** {{Approval2|Varric|-10}}. |
||
| + | ** If Anders is in the party, surprisingly he says nothing at this. |
||
| + | |||
| + | {{Note|If Hawke's romance partner was the hostage, and you had them join the party before coming to The Wounded Coast, then they leave the party now.}} |
||
=== Gallows === |
=== Gallows === |
||
| Line 118: | Line 145: | ||
Return to Orsino/Meredith to complete the quest. |
Return to Orsino/Meredith to complete the quest. |
||
| + | * Talking to Orsino: |
||
| − | If Hawke tells Meredith that she is paranoid: |
||
| + | ** If Hawke says that Meredith was not involved: |
||
| ⚫ | |||
| + | *** {{Approval2|Anders|-5}} |
||
| ⚫ | |||
| − | If Hawke |
+ | ** If Hawke says that Meredith must be stopped: |
| − | + | *** {{Approval2|Anders|+5}} |
|
| + | * Talking to Meredith: |
||
| ⚫ | |||
| + | ** "You're paranoid.": |
||
| ⚫ | |||
| ⚫ | |||
| ⚫ | |||
| ⚫ | |||
| + | ** "I'll name names." (whether you said "Orsino is blameless." or not): |
||
| + | *** {{Approval2|Anders|-5}} |
||
| ⚫ | |||
| ⚫ | |||
| + | ** "Orsino is blameless", and "I'll name names.": |
||
| + | *** {{Approval2|Aveline|-5}} |
||
| + | *** Meredith gives Hawke the Hearth Shield. |
||
| + | ** "You must let this go." |
||
| + | *** {{Approval2|Anders|+5}} |
||
| + | |||
| ⚫ | |||
Afterwards, if Hawke returns to their estate, they will find a letter from either Meredith or Orsino that pertains to the quest [[The Last Straw]]. Note that once this letter from Meredith/Orsino is read, Hawke can no longer return to the Gallows without triggering the endgame. To indefinitely postpone that and still be able to read messages at home, Hawke can finish the quest except for returning to the Gallows and thus no message will appear at home. |
Afterwards, if Hawke returns to their estate, they will find a letter from either Meredith or Orsino that pertains to the quest [[The Last Straw]]. Note that once this letter from Meredith/Orsino is read, Hawke can no longer return to the Gallows without triggering the endgame. To indefinitely postpone that and still be able to read messages at home, Hawke can finish the quest except for returning to the Gallows and thus no message will appear at home. |
||
| Line 135: | Line 174: | ||
If Bethany/Carver is dead, the love interest is in the party, or there is no love interest, the companion with the highest friendship score who is not in the party at the time will be kidnapped. |
If Bethany/Carver is dead, the love interest is in the party, or there is no love interest, the companion with the highest friendship score who is not in the party at the time will be kidnapped. |
||
| + | |||
| + | If Bethany/Carver is dead, all possible companions have left or have not been recruited, and all remaining companions are in Hawke's party, Anders will be kidnapped even though he is no longer a companion. |
||
Sebastian cannot be taken as a hostage. |
Sebastian cannot be taken as a hostage. |
||
== Rewards == |
== Rewards == |
||
| ⚫ | |||
| − | *{{:Hood of the Champion|style=iconmini}} (Mage) or{{clrl}}{{:Helm of the Champion (Rogue)|style=iconmini}} (Rogue) or{{clrl}}{{:Helm of the Champion (Warrior)|style=iconmini}} (Warrior) |
+ | * {{:Hood of the Champion|style=iconmini}} (Mage) or{{clrl}}{{:Helm of the Champion (Rogue)|style=iconmini}} (Rogue) or{{clrl}}{{:Helm of the Champion (Warrior)|style=iconmini}} (Warrior) - looted from Grace |
| − | *{{:The Tiger's Tail|style=iconmini}} - looted from Grace{{clrl}} |
||
| − | *{{: |
+ | * {{:The Tiger's Tail|style=iconmini}} - looted from Grace{{clrl}} |
| − | *{{: |
+ | * {{:Protection of the Faith|style=iconmini}} (armor upgrade for [[Sebastian]] found at Hightown estate encounter){{clrl}} |
| − | * |
+ | * {{:Sigil of the Mage Underground|style=iconmini}} (armor upgrade for [[Anders]] found in the Dock's warehouse) |
| + | * [[Three Wolf Boon]] (found after the fight on one of the corpses in the Dock's warehouse) |
||
| − | *{{:Blade of Mercy|style=iconmini}} (a gift for [[Fenris]]) |
+ | * {{:Blade of Mercy (gift)|style=iconmini}} (a gift for [[Fenris]]) |
| ⚫ | |||
| − | *{{:Cumberland Circle Robes|style=iconmini}} from Orsino |
+ | * {{:Cumberland Circle Robes|style=iconmini}} from Orsino (or) |
| ⚫ | |||
| − | or |
||
| ⚫ | |||
| − | |||
| ⚫ | |||
| ⚫ | |||
| ⚫ | *After encountering the mages in the warehouse at the Docks (night), return to Hawke's estate and leave. Even if Isabela or Fenris were kidnapped, Hawke will still be able to select them for the party. If Hawke brings them to the Wounded Coast, this leads to an amusing scene where there are two Fenrises or Isabelas: one unconscious on the ground and the other fighting. |
||
| ⚫ | |||
| ⚫ | |||
| ⚫ | |||
| ⚫ | **If completing the quest for Meredith, if Hawke names names, they will refer to Keran as a templar, even if he was dismissed from the Order. If completing the quest for Orsino and he was allowed to leave, however, a dismissed Keran will stand outside the Hanged Man for the rest of the game wearing leather hides, stating he is glad to not be part of the order right now. |
||
| ⚫ | |||
| ⚫ | |||
| ⚫ | |||
== Notes == |
== Notes == |
||
| − | *The name of the quest takes its name from the common expression dating from at least "Don Quixote" |
+ | * The name of the quest takes its name from the common expression dating from at least "Don Quixote"<ref>[http://books.google.com/books?id=ogm0c8mYtQUC&pg=PT576#v=onepage&q&f=false A Dictionary of Proverbs]</ref> that "revenge is a dish best served cold". |
| − | *If Hawke chooses not to side with either Meredith or Orsino in the beginning of Act 3, it appears that the quest is given based on how a character responds to Meredith at the end of On The Loose. (Confirmed for Xbox 360) |
+ | * If Hawke chooses not to side with either Meredith or Orsino in the beginning of Act 3, it appears that the quest is given based on how a character responds to Meredith at the end of On The Loose. (Confirmed for Xbox 360) |
| − | *Cullen will kill Samson if told to kill all the Mages. However, there is no option for this in the Dragon Age Keep. Thus, regardless of this choice in Dragon Age II, Samson will always be alive in Dragon Age Inquisition. |
+ | * Cullen will kill Samson if told to kill all the Mages. However, there is no option for this in the ''Dragon Age Keep''. Thus, regardless of this choice in ''Dragon Age II'', Samson will always be alive in ''Dragon Age: Inquisition''. |
| + | |||
| ⚫ | |||
| ⚫ | |||
| ⚫ | * After encountering the mages in the warehouse at the Docks (night), return to Hawke's estate and leave. Even if Isabela or Fenris were kidnapped, Hawke will still be able to select them for the party. If Hawke brings them to the Wounded Coast, this leads to an amusing scene where there are two Fenrises or Isabelas: one unconscious on the ground and the other fighting. |
||
| ⚫ | |||
| ⚫ | |||
| ⚫ | |||
| ⚫ | ** If completing the quest for Meredith, if Hawke names names, they will refer to Keran as a templar, even if he was dismissed from the Order. If completing the quest for Orsino and he was allowed to leave, however, a dismissed Keran will stand outside the Hanged Man for the rest of the game wearing leather hides, stating he is glad to not be part of the order right now. |
||
| ⚫ | |||
| ⚫ | |||
| ⚫ | |||
== Gallery == |
== Gallery == |
||
| + | <gallery widths="210" spacing="small" position="center" captionalign="center" orientation="landscape"> |
||
| − | <gallery> |
||
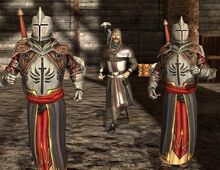
BSC 1.jpg|[[Samson]] arrives with Knight-Captain [[Cullen]] and other templars at the [[Wounded Coast]] |
BSC 1.jpg|[[Samson]] arrives with Knight-Captain [[Cullen]] and other templars at the [[Wounded Coast]] |
||
BSC 2.jpg |
BSC 2.jpg |
||
| Line 174: | Line 214: | ||
== References == |
== References == |
||
<references /> |
<references /> |
||
| + | |||
| + | <!--Categories--> |
||
[[Category:Dragon Age II main quests]] |
[[Category:Dragon Age II main quests]] |
||
| + | <!--Interwiki links--> |
||
Revision as of 00:49, 19 June 2021
Best Served Cold is an Act 3 main quest in Dragon Age II.
Acquisition
Best Served Cold is received via a letter from First Enchanter Orsino after finding the three mages for Knight-Commander Meredith. If Hawke sided with the Templars at the beginning of Act 3, this quest will alternatively be received from Knight-Commander Meredith.
Walkthrough
The midnight Hightown Meeting
Templar Hall
Go to the Gallows and then to the Templar Hall. Talk to Orsino or Meredith, depending on who sent the letter.
When accepting the quest from Meredith:
- If you say "How does this involve me?" at the first conversation choice then you skip the second conversation choice, meaning you cannot investigate and find out why Meredith hates mages.
- "How can I help?"
 Anders: rivalry (+10)
 - "I don't believe you." Anders: friendship (+10)
When accepting the quest from Orsino:
- Choosing the Diplomatic options:
- Anders: friendship (+10)
- Aveline: friendship (+5)
- Choosing the aggressive options:
- Anders: rivalry (+10)
- Aveline: rivalry (+5)
Hightown
After Hawke gets the quest, go to Hightown at night and head to the Hightown estates neighborhood.
There, a battle with a group of Templars and 5-6 Mages will automatically begin when the party enters the area near to where Hawke need to be. Afterwards, loot the bodies to find a note that will instruct Hawke to head to the Docks (and an armor upgrade for Sebastian).

The meeting at the Docks
Docks
Go to the Docks and follow the arrow to the destination.
Secret Meeting Place
There will be another cut-scene before Hawke has to battle another group of Templars and Mages. There are two Standard-ranked traps (requiring 20 Cunning to disarm) in the main room, one on the eastern side and one on the western side.
There are at least two Templar Hunters and a Lieutenant alongside an Elite-ranked Enchanter in this fight.
There is an armor upgrade for Anders in the Warehouse and a gift for Fenris.
Keran will be here in templar plate regardless of the resolution of Enemies Among Us; he will tell Hawke that someone close to them has been kidnapped by the rebels and that they have been taken to a hideout on the Wounded Coast. At this point Hawke has the choice of:
- Letting Keran go:
- Aveline: rivalry (+10)
- Sebastian: friendship (+10)
- Turning him in to the Knight-Commander:
- Merrill: rivalry (+10)
- Varric: rivalry (+5)
- Aveline: friendship (+10)
- Killing him:
- Merrill: rivalry (+5)
- Sebastian: rivalry (+10)
If Hawke agrees with his views on Meredith, then he will automatically be allowed to leave.
Loot the area, there is a Complex-ranked chest (30 Cunning, 150xp) to the right of the entrance and the Blade of Mercy.
The Wounded Coast
Head to the Wounded Coast. Take the low path and head south towards the Ruins. Fight a small group of Templars and Mages on the way. A cut-scene will then occur where Samson will approach Hawke.
- Hawke states that they want to help the Mages.
- Anders: friendship (+10)
- Fenris: rivalry (+10)
- Merrill: friendship (+10)
- Sebastian: rivalry (+5)
- Varric: friendship (+10)
- Hawke states that the mages must be stopped:
- Anders: rivalry (+10)
- Fenris: friendship (+10)
- Merrill: rivalry (+15)
- Sebastian: friendship (+5)
After the scene continue down the path until the party reaches the main group of Templars/Mages. They are being led by the templar Thrask, who will implore Hawke to side with them against Meredith. Behind him, whoever was taken hostage will be lying on the ground, unconscious.
"Release your hostage!":
- Merrill: friendship (+5)
"I don't support Meredith.":
- Merrill: rivalry (+5)
Whether she was sent to the Circle, or let her go during the quest Act of Mercy, Grace will call for the hostage to be killed and then turn on Hawke. When speaking to Grace:
- diplomatic response: : Sebastian: friendship (+5).
- humorous/aggressive response: Sebastian: rivalry (+5).
Grace order Alain to kill the hostage; if you choose the diplomatic or humorous response then he will refuse to do it.
Grace kills Thrask and then attacks you.
During this battle, Grace herself is easily taken down, but becomes a Pride Abomination upon death. After the battle, Samson will return with Cullen. As with Keran earlier in this quest, Hawke will have the opportunity to decide the fate of Alain and Samson.
After the fight, talk with Cullen to decide the fate of the surrendering mages and rogue templars. Cullen will permit Samson to become a Templar again if Hawke requests that he give him another chance. Hawke can also ask Cullen to be merciful to Alain and the other mages who are arrested.
Note: Mage Hunter and Arcane Defender Achievement: This is the final chance to side with either the Templars or Mages. During the conversation with Cullen:
- (Side with the templars) Say "He's one of Grace's." and then either "Give Samson another chance." or "Kill them all".
- (Side with the mages) Say "Don't hurt Alain." and "Be merciful."
The achievement will not pop up until Hawke reports back to either Meredith/Orsino to end the Quest, providing they have sided with the same faction 4 times previously.
Cullen says to take Alain in for questioning.
- "Don't hurt Alain.":
- Sebastian: friendship (+5).
- "He's one of Grace's.":
- Aveline: rivalry (+10).
- Merrill: rivalry (+10).
Cullen asks if you have any recommendation for him to bring to Meredith:
- "Be merciful." This would save the lives of the mages as Meredith will simply lock them in the Gallows while the templars involved in the conspiracy lose their pay instead.
- Aveline: friendship (+10).
- Merrill: friendship (+10).
- "Give Samson another chance." Cullen says he will look into Samson rejoining the Templars:
- Aveline: friendship (+10).
- "Kill them all." Cullen will kill Samson as well on the grounds that if he knew so much about the conspiracy he must be part of it.
- Merrill: rivalry (+15).
- Varric: rivalry (+10).
- If Anders is in the party, surprisingly he says nothing at this.
Gallows
On return to the Gallows Courtyard, speaking to Cullen will discover how Hawke's recommendation decided the fate of the surviving conspirators, but this step is not required.
Result
Return to Orsino/Meredith to complete the quest.
- Talking to Orsino:
- If Hawke says that Meredith was not involved:
- Anders: rivalry (+5)
- If Hawke says that Meredith must be stopped:
- Anders: friendship (+5)
- If Hawke says that Meredith was not involved:
- Talking to Meredith:
- "You're paranoid.":
- Aveline: friendship (+5)
- Meredith will not give Hawke the Hearth Shield.
- "I'll name names." (whether you said "Orsino is blameless." or not):
- Anders: rivalry (+5)
- Sebastian: rivalry (+10)
- Meredith gives Hawke the Hearth Shield.
- "Orsino is blameless", and "I'll name names.":
- Aveline: rivalry (+5)
- Meredith gives Hawke the Hearth Shield.
- "You must let this go."
- Anders: friendship (+5)
- "You're paranoid.":
Afterwards, if Hawke returns to their estate, they will find a letter from either Meredith or Orsino that pertains to the quest The Last Straw. Note that once this letter from Meredith/Orsino is read, Hawke can no longer return to the Gallows without triggering the endgame. To indefinitely postpone that and still be able to read messages at home, Hawke can finish the quest except for returning to the Gallows and thus no message will appear at home.
Hostage
Bethany/Carver will be kidnapped if they are alive. It does not matter if they are with the Mages, Templars or the Grey Wardens.
If Bethany/Carver is dead, then Hawke's love interest will be kidnapped. However, they will only be taken if they are not in their party when they travel to the Wounded Coast.
If Bethany/Carver is dead, the love interest is in the party, or there is no love interest, the companion with the highest friendship score who is not in the party at the time will be kidnapped.
If Bethany/Carver is dead, all possible companions have left or have not been recruited, and all remaining companions are in Hawke's party, Anders will be kidnapped even though he is no longer a companion.
Sebastian cannot be taken as a hostage.
Rewards
- 1200 XP (quest completion)
- Hood of the Champion (Mage) or Helm of the Champion (Rogue) or Helm of the Champion (Warrior) - looted from Grace
- The Tiger's Tail - looted from Grace
- Protection of the Faith (armor upgrade for Sebastian found at Hightown estate encounter)
- Sigil of the Mage Underground (armor upgrade for Anders found in the Dock's warehouse)
- Three Wolf Boon (found after the fight on one of the corpses in the Dock's warehouse)
- Blade of Mercy (a gift for Fenris)
- Cumberland Circle Robes from Orsino (or)
- Hearth Shield from Meredith (only if you didn't call her mad or paranoid at the end of the quest)
Notes
- The name of the quest takes its name from the common expression dating from at least "Don Quixote"[1] that "revenge is a dish best served cold".
- If Hawke chooses not to side with either Meredith or Orsino in the beginning of Act 3, it appears that the quest is given based on how a character responds to Meredith at the end of On The Loose. (Confirmed for Xbox 360)
- Cullen will kill Samson if told to kill all the Mages. However, there is no option for this in the Dragon Age Keep. Thus, regardless of this choice in Dragon Age II, Samson will always be alive in Dragon Age: Inquisition.
Bugs
- When encountering the mages in Hightown (night) the corpse that is supposed to be looted might disappear. Loading an earlier save is the only way to proceed with this quest. Sustained modes that draw health or mana from dead bodies will always trigger this bug.
- After encountering the mages in the warehouse at the Docks (night), return to Hawke's estate and leave. Even if Isabela or Fenris were kidnapped, Hawke will still be able to select them for the party. If Hawke brings them to the Wounded Coast, this leads to an amusing scene where there are two Fenrises or Isabelas: one unconscious on the ground and the other fighting.
- If Bethany or Carver joined the Grey Wardens and is kidnapped, she/he may appear wearing their Circle outfit/Templar outfit instead of their Warden Uniform. This is a graphic-only effect and does not affect/change game decisions (Confirmed on all consoles).
- If Keran was forced out of the Templars at the end of Enemies Among Us, he will still be one of the Templar Conspirators. The dialogue will be the same regardless of the earlier decision.
- On 1.03, this is not the case; Keran states he cannot stand by idly in good conscience despite having been discharged.
- If completing the quest for Meredith, if Hawke names names, they will refer to Keran as a templar, even if he was dismissed from the Order. If completing the quest for Orsino and he was allowed to leave, however, a dismissed Keran will stand outside the Hanged Man for the rest of the game wearing leather hides, stating he is glad to not be part of the order right now.
- On
- If Samson is made a Templar again, he will still appear in Lowtown(night) begging.
- If Death Syphon is active, it is possible that Grace's corpse will disappear and therefore not be able to be looted.
- When exiting the warehouse, the marker on the door says "Lowtown" but in fact exits to the docks where Hawke entered.
Gallery
")
")