(Bug detected in PC v1.04 where you can talk to grace twice) Tag: Visual edit |
(slight tweak of the previous edits) |
||
| (33 intermediate revisions by 19 users not shown) | |||
| Line 21: | Line 21: | ||
== Walkthrough == |
== Walkthrough == |
||
| − | |||
=== [[Wounded Coast Approach]] === |
=== [[Wounded Coast Approach]] === |
||
| − | + | Travel to the Wounded Coast Approach and defeat the dragonlings who occupy the initial section (if you have not fought their kind yet, they are vulnerable to cold damage). Talk to [[Thrask|Ser Thrask]] near the entrance to the [[Runaway's Cavern]], who informs Hawke of some [[apostate]] mages within. They fled the Circle in [[Starkhaven]], which burned to the ground recently, and escaped mid-transfer to Kirkwall. |
|
| + | |||
| + | If Hawke has blackmailed Ser Thrask during [[An Errant Letter]], the aggressive answer to the first dialogue option ("You want to pay me in person?") results in: |
||
| ⚫ | |||
| + | Ser Thrask requests Hawke's help in bringing them in peacefully, before another group of more violent [[Templar Order|templars]] led by Ser [[Karras]] arrives to outright kill the apostates. |
||
| ⚫ | |||
| ⚫ | |||
| ⚫ | |||
| ⚫ | |||
| ⚫ | |||
| ⚫ | |||
| ⚫ | |||
| ⚫ | |||
| + | |||
| + | Enter the caves. |
||
=== Runaway's Cavern === |
=== Runaway's Cavern === |
||
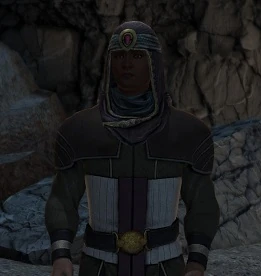
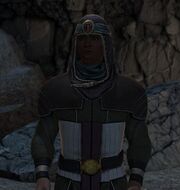
[[File:Alain-ActofMercy.jpg|thumb|right|Alain]] |
[[File:Alain-ActofMercy.jpg|thumb|right|Alain]] |
||
| + | Upon entering the Runaway's Cavern, Hawke's party will be attacked by a few Normal-ranked Corpses and an Elite-ranked Apostate Mage who readily resorts to [[blood magic]]. Despite his use of blood magic, he is still immune to the spirit element on Nightmare, not to mention his AoE spells can quickly demolish your party while restoring his own health at the same time, so take him down with full force before dealing with the corpses. After a breather, there are three more corpses in the room below. In the following chamber with the mine cart rails (the entire map is an inversion of the route through the Slaver Caverns during [[Wayward Son]]), a few Critter-ranked Skeleton Archers join the mix. |
||
| ⚫ | |||
| + | ==== Alain ==== |
||
| ⚫ | |||
| ⚫ | |||
| + | When talking with Alain, if you choose the last aggressive answer ("Turn yourself in."): |
||
| ⚫ | |||
| ⚫ | |||
| ⚫ | |||
| − | Decimus can be found at the end of the cavern, and he will attack under the belief that Hawke is working for the templars (once combat starts, you will receive [[Codex entry: Blood Magic: The Forbidden School]], if you did not get it from your interaction with Idunna in [[Enemies Among Us]], [[Main quests (Dragon Age II)|main quest]]). This battle will include numerous undead, as well as three other apostate mages. After Decimus is defeated, [[Grace]] will approach and request that Hawke kill Ser Thrask so the surviving mages can flee to the outskirts of the [[Free Marches]]. |
||
| ⚫ | |||
| − | When Hawke returns to the entrance of the cave two groups of skeletons attack, unless Hawke agreed to kill Ser Thrask in which case two groups of templars will attack instead. |
||
| − | === |
+ | ==== Decimus ==== |
| + | Decimus can be found at the end of the cavern (once combat starts, you will receive [[Codex entry: Blood Magic: The Forbidden School]], if you have not yet gotten it from your interaction with [[Idunna]] during [[Enemies Among Us]]), initially supported by Corpses and Skeleton Archers. Decimus himself fights very much like the blood mage you fought earlier. One strategy is to cast Horror on him (or some lesser stunning ability such as Miasmic Flask) and then kill him before he casts a single spell. This strategy favors dual-wielding rogues and heavy hitters, after which you turn your attention to the walking dead. However, a great deal of Skeleton Archers spawn in after only a couple more kills, with three Critter-ranked Apostates who shoot plumes of fire magic. This gives the second wave a great deal of ranged power, so respond in kind and take out as many archers as you can first, ignoring the melee Corpses until the ranged enemies are dealt with. Another method is order everyone back to the mine cart room to choke their advance. Decimus doesn't pursue very often in this scenario, allowing the corpses to be picked off before returning to him and extricating your team from what would otherwise be a turkey shooting. He drops [[The Hypnotist's Staff]], one of the better electrical staves in Act 1, so hold onto it. |
||
| ⚫ | When Hawke returns to the entrance of the cave |
||
| + | ==== Grace ==== |
||
| − | If the decision to return the mages to the Circle was made, Hawke will be given the opportunity to: |
||
| + | After Decimus is defeated, [[Grace]] will approach and say that Decimus gave them the courage to fight the Templars, and without him they would still be prisoners. |
||
| − | * Return the mages to the Circle. Ser Thrask will promise to return them unharmed and Ser Karras implies that Ser Thrask will not survive long enough to do so. |
||
| − | * Free the mages instead, resulting in a fight with the templar reinforcements. |
||
| − | If |
+ | If Hawke is a Rogue or Warrior and Merrill is in the party: |
| ⚫ | |||
| − | * "I killed the mages." All subsequent conversation options lead to combat with the templars. |
||
| ⚫ | |||
| − | * "I'm a friend of Thrask's." Leads immediately to combat. |
||
| − | * "I'm a friend of the mages." Leads immediately to combat. |
||
| − | * Defer to Varric if he is in the party. Varric will tell the templars that Hawke is a foreign templar that Knight-Commander Meredith specially requested to help investigate the situation. Alternatively if Hawke is a mage, he'll tell them you are Enchanter Hawke from Ferelden who came to root out rebel mages. He then says that some of the mages are dead and others escaped to the coast. The templars will leave and the mages can escape without any form of combat. |
||
| − | * "I'm your best friend." This option is only available to a sarcastic Hawke. Hawke will claim that Karras has been done a favor, and that some of the mages are dead but their leader fled towards the coast. The templars will leave in pursuit and the mages can then escape without a fight. There is no variation for a Hawke mage and Ser Karras appears to be unaware of the fact. |
||
| + | She laments that Decimus went against the group's wishes by resorting to blood magic, and that without your help the Templars will kill all of you for Decimus' crimes. |
||
| − | If you choose to defer to Varric, you will have the option to tell the templars how they died. |
||
| − | * They killed each other. |
||
| − | * Their leader escaped. |
||
| − | * We killed them. |
||
| − | Varric will explain that a couple may have fled in "back-passages" to the sea prior to Hawke's arrival. If Hawke is a mage, the templars express surprise that mages are capable of cooperating with the templars. |
||
| − | |||
| ⚫ | |||
| − | |||
| − | == Friendship/Rivalry == |
||
| − | |||
| − | '''When conversing with Ser Thrask:''' |
||
| ⚫ | |||
| ⚫ | |||
| ⚫ | |||
| ⚫ | |||
| − | |||
| ⚫ | |||
| ⚫ | |||
| ⚫ | |||
| − | **{{Approval2|Merrill|-10}} |
||
| − | **{{Approval2|Varric|-10}} (PC 1.04 was not received with Merrill and Aveline in the party). |
||
| − | |||
| − | |||
| − | '''When speaking with Alain (first mage encountered in caverns):''' |
||
| − | *Choosing the last aggressive answer |
||
| ⚫ | |||
| − | |||
| − | |||
| − | '''When speaking with Grace:''' |
||
| − | |||
| − | Choice 1 ''(If Hawke is a Rogue or Warrior, skipped if Hawke is a Mage):'' |
||
| − | *"I'm sorry." |
||
| ⚫ | |||
| ⚫ | |||
| − | *"He was a blood mage." |
||
| ⚫ | |||
| + | If Hawke is a Mage and you choose the aggressive response: {{Approval2|Anders|-10}}. |
||
| + | Seeking freedom for the remaining mages, she requests that Hawke kill Ser Thrask so they can get clear of Kirkwall before more templars arrive to the outskirts of the [[Free Marches]]. |
||
| ⚫ | |||
| ⚫ | |||
| − | *Aggressive option: |
||
** {{Approval2|Anders|-10}} |
** {{Approval2|Anders|-10}} |
||
| ⚫ | |||
| ⚫ | |||
| ⚫ | |||
| ⚫ | |||
| ⚫ | |||
| + | * "I'll convince him you're dead." / "Murder is going too far.": You tell Grace that you will convince Thrask they are dead without having to kill him. Grace allows you to do this, but she remains unconvinced it will work. |
||
| ⚫ | |||
| ⚫ | |||
| ⚫ | |||
| ⚫ | |||
| ⚫ | |||
| ⚫ | |||
| ⚫ | |||
| ⚫ | |||
| ⚫ | |||
| ⚫ | |||
| ⚫ | |||
| ⚫ | |||
| ⚫ | |||
| ⚫ | |||
| + | On Hawke's return through the cave, two groups of undead attack, one in the mine cart chamber, another in the entrance chamber. (If Bethany is in the party, she states they are leftovers of Decimus' acts of reanimation, that he was prepared for a siege.) A mage with enough points in Magic can equip the Hypnotist's Staff they just picked up to deal far greater damage to these corpses than the ones they slew on the way in. If Hawke agreed to kill Ser Thrask, two groups of templars will attack instead, of roughly the same makeup of melee fighters and archers. The templars in the entrance chamber will be joined by a Lieutenant, however his blue aura does not seem to regenerate health, thus it is not as bothersome as the more typical yellow aura. Either enemy type yields 200xp in each encounter (400xp total), with a negligible 11xp extra for killing the Lieutenant in the second templar fight. |
||
| + | === Confrontation with Ser Karras === |
||
| − | Choice 2 ''(If Hawke is a Rogue or Warrior)'': no effect |
||
| ⚫ | When Hawke returns to the entrance of the cave, Ser Karras will have arrived with his contingent of templars. The dispute varies slightly depending on the previous choices made in conversation with Grace, but all quarrels seem to indicate that Ser Karras intends to simply execute the mages rather than return them to the Circle. |
||
| + | * Refused to help Grace: |
||
| + | ** Tell Grace to go with Karras: Karras leaves. This is the only route to siding with the templars for the purposes of [[Mage Hunter and Arcane Defender]]. |
||
| ⚫ | |||
| ⚫ | |||
| ⚫ | |||
| ⚫ | |||
| ⚫ | |||
| ⚫ | |||
| + | ** Tell Grace she is free: Karras attacks. |
||
| ⚫ | |||
| ⚫ | |||
| ⚫ | |||
| ⚫ | |||
| ⚫ | |||
| + | * Convince the Templars that the mages are dead: |
||
| + | ** If [[Varric Tethras|Varric]] is in the party and you call on him, he convinces Karras that the Mages are gone. Karras leaves. |
||
| ⚫ | |||
| ⚫ | |||
| ⚫ | |||
| ⚫ | |||
| + | ** If Hawke has a humorous personality and "I'm your best friend.": |
||
| ⚫ | |||
| ⚫ | |||
| ⚫ | |||
| + | ** Tell Karras that you killed the Mages or you're a friend of Thrask's : Karras attacks. |
||
| + | ** Tell Karras that you're a friend of the mages: Karras attacks. |
||
| ⚫ | |||
| ⚫ | |||
| + | * Agreed to kill Thrask: Karras attacks. |
||
| + | ==== Combat with Karras ==== |
||
| − | Choice 3: |
||
| + | Ser Thrask will always assist Hawke in combat with the templars. On Nightmare it behooves Hawke to follow Thrask's advice and run; fleeing towards the main thoroughfare of this coastal area will separate the templars from each other, allowing Thrask to hold a great number of them, and as he is invincible they will not be able to dispatch him and resume pursuing you. However, if the Templar Hunter and Ser Karras pursue the party simultaneously, the battle can turn sour very quickly. Exploit their weakness to cold and spirit elements to punch through their armor and defenses, and focus on the Hunter first; Karras' regenerative aura is blue and does not restore health, thus he does not fortify enemies the way other commanders do. Take out the archers second, then kill the Normal-ranked Templars while keeping Karras stunned. Defeat him with the full force of the party, then return to Thrask to help kill the ones he has been holding back. |
||
| ⚫ | |||
| ⚫ | |||
| ⚫ | |||
| ⚫ | |||
| ⚫ | |||
| ⚫ | |||
| − | **{{Approval2|Merril|-10}} ''(If Hawke is a Mage)'' |
||
| − | *"I'll convince him you're dead." / "Murder is going too far." |
||
| ⚫ | |||
| ⚫ | |||
| ⚫ | |||
| ⚫ | |||
| ⚫ | |||
| ⚫ | |||
| ⚫ | |||
| ⚫ | |||
| ⚫ | |||
| ⚫ | |||
| ⚫ | |||
| ⚫ | |||
| ⚫ | |||
| ⚫ | |||
| + | After the battle, if you tell Thrask that you're sorry and Varric is in the party then {{Approval2|Varric|+5}} only if you told Grace that you'd convince the templars that the Mages are dead. |
||
| ⚫ | |||
| − | '''Outside the Cavern''' |
||
| − | |||
| − | ''If Hawke chose to return the mages to the Circle'' |
||
| − | * Return the mages to the Circle |
||
| ⚫ | |||
| ⚫ | |||
| ⚫ | |||
| ⚫ | |||
| − | **{{Approval2|Merrill|-10}} |
||
| ⚫ | |||
| − | * Free the Mages |
||
| ⚫ | |||
| ⚫ | |||
| ⚫ | |||
| ⚫ | |||
| ⚫ | |||
| − | |||
| − | |||
| − | ''If Hawke chose to lie to the Templars'' |
||
| − | * "I killed the mages." |
||
| − | * "I'm a friend of Thrask's." |
||
| − | * "I'm a friend of the mages." |
||
| ⚫ | |||
| ⚫ | |||
| − | * Letting Varric speak |
||
| ⚫ | |||
| ⚫ | |||
| ⚫ | |||
| ⚫ | |||
| − | * "I'm your best friend." ''Only available to a sarcastic Hawke'' |
||
| ⚫ | |||
| ⚫ | |||
| ⚫ | |||
| − | |||
| − | * "I'm sorry Ser Thrask" ''After combat'' |
||
| − | ** {{Approval2|Varric|+5}} (''if "I'm a friend of Thrask's." or "I'm a friend of the mages." was chosen'') |
||
| − | |||
| − | '''Max possible approval changes:''' |
||
| − | *Between {{Approval2|Anders|-40}} and {{Approval2|Anders|+15}} |
||
| − | *Between {{Approval2|Aveline|-15}} and {{Approval2|Aveline|+20}} |
||
| − | *Up to {{Approval2|Bethany|-15}} |
||
| − | *Between {{Approval2|Carver|-10}} and {{Approval2|Carver|+20}} |
||
| − | *Between {{Approval2|Fenris|-10}} and {{Approval2|Fenris|+15}} |
||
| − | *Up to {{Approval2|Isabela|+10}} |
||
| − | *Between {{Approval2|Merril|-35}} and {{Approval2|Merril|+20}} |
||
| − | *Between {{Approval2|Varric|-15}} and {{Approval2|Varric|+20}} |
||
== Rewards summary == |
== Rewards summary == |
||
* 400 XP (Quest) + 318 XP (Combat) If the Templars were killed: Up to 718 XP |
* 400 XP (Quest) + 318 XP (Combat) If the Templars were killed: Up to 718 XP |
||
| + | * {{Currency|20000}} (does not occur on {{Platforms|PS3}}) |
||
| − | * 2{{g}} 0{{s}} 0{{c}} |
||
* Random [[Currency|coins]], [[Junk|junk]], [[:Category:Dragon Age II potions|potions]], [[:Category:Dragon Age II equipment|equipment]] |
* Random [[Currency|coins]], [[Junk|junk]], [[:Category:Dragon Age II potions|potions]], [[:Category:Dragon Age II equipment|equipment]] |
||
* '''Unique items:''' |
* '''Unique items:''' |
||
| Line 185: | Line 148: | ||
If the mages are returned to the Circle, Hawke can talk to Thrask in Act 1 in the Gallows courtyard to learn that Meredith ordered three Starkhaven mages executed at random. |
If the mages are returned to the Circle, Hawke can talk to Thrask in Act 1 in the Gallows courtyard to learn that Meredith ordered three Starkhaven mages executed at random. |
||
| − | If the mages are allowed to escape and are not sent back to the Circle, they will eventually be caught and returned to the Circle in the next three years. Also, If Karras is alive and spoken to in Act 2, he will tell Hawke that he knows he lied about the mages, but he caught them |
+ | If the mages are allowed to escape and are not sent back to the Circle, they will eventually be caught and returned to the Circle in the next three years. Also, If Karras is alive and spoken to in Act 2, he will tell Hawke that he knows she/he lied about the mages, but he caught them anyway. |
Regardless of Hawke's decision in this quest, in Act 3 Grace will team up with Ser Thrask to rebel against Knight-Commander Meredith. She will, however, kill Thrask with blood magic when Hawke comes to intervene. |
Regardless of Hawke's decision in this quest, in Act 3 Grace will team up with Ser Thrask to rebel against Knight-Commander Meredith. She will, however, kill Thrask with blood magic when Hawke comes to intervene. |
||
| − | [[Category:Dragon Age II main quests]] |
||
== Notes == |
== Notes == |
||
| Line 196: | Line 158: | ||
* For PC v1.04, it is possible to gain double the friendship/rivalry when talking to Grace. After defeating Decimus, right click to converse with Grace before she begins her automatic conversation with you. The conversation will then occur twice in a row. This will enable you to gain twice the rivalry/friendship. |
* For PC v1.04, it is possible to gain double the friendship/rivalry when talking to Grace. After defeating Decimus, right click to converse with Grace before she begins her automatic conversation with you. The conversation will then occur twice in a row. This will enable you to gain twice the rivalry/friendship. |
||
* In some cases, the rumor about this quest may remain in the quests list. This seems to happen if Act of Mercy is accepted before completing [[A Business Discussion]]. To fix this you can use gffeditor -> SAVEGAME_CAMPAIGN -> SAVEGAME_JORNAL -> SAVEGAME_JORNAL_ACTIVE_LIST -> 0 -> rumors_act_of_mercy. If you find it, you can right click on full tree of 0 -> delete. You can then add your save back to your savegame folder. |
* In some cases, the rumor about this quest may remain in the quests list. This seems to happen if Act of Mercy is accepted before completing [[A Business Discussion]]. To fix this you can use gffeditor -> SAVEGAME_CAMPAIGN -> SAVEGAME_JORNAL -> SAVEGAME_JORNAL_ACTIVE_LIST -> 0 -> rumors_act_of_mercy. If you find it, you can right click on full tree of 0 -> delete. You can then add your save back to your savegame folder. |
||
| − | * For Xbox 360 the rumor of this quest may remain in the quest list. If so then select as your active quest and return |
+ | * For Xbox 360 the rumor of this quest may remain in the quest list. If so then select as your active quest and return to Gamlen's house, you may be able to reselect this quest from the message board there. |
| + | |||
| + | [[ru:Милосердный_поступок]] |
||
[[Category:Dragon Age II main quests]] |
[[Category:Dragon Age II main quests]] |
||
Revision as of 11:33, 25 February 2020
Act of Mercy is an Act 1 main quest in Dragon Age II.
Acquisition
Hawke will find this quest on the Writing Desk in Gamlen's House at some point after completing the quest Wayward Son.
Walkthrough
Wounded Coast Approach
Travel to the Wounded Coast Approach and defeat the dragonlings who occupy the initial section (if you have not fought their kind yet, they are vulnerable to cold damage). Talk to Ser Thrask near the entrance to the Runaway's Cavern, who informs Hawke of some apostate mages within. They fled the Circle in Starkhaven, which burned to the ground recently, and escaped mid-transfer to Kirkwall.
If Hawke has blackmailed Ser Thrask during An Errant Letter, the aggressive answer to the first dialogue option ("You want to pay me in person?") results in:
 Varric: rivalry (+10)
Ser Thrask requests Hawke's help in bringing them in peacefully, before another group of more violent templars led by Ser Karras arrives to outright kill the apostates.
- Agreeing to help Thrask:
 Aveline: friendship (+5)
- Anders: friendship (+5)
- Joking response results in no approval changes.
- "Do it yourself.":
 Anders: rivalry (+5)
- Aveline: rivalry (+5)
- Merrill: rivalry (+10)
Enter the caves.
Runaway's Cavern
Alain
Upon entering the Runaway's Cavern, Hawke's party will be attacked by a few Normal-ranked Corpses and an Elite-ranked Apostate Mage who readily resorts to blood magic. Despite his use of blood magic, he is still immune to the spirit element on Nightmare, not to mention his AoE spells can quickly demolish your party while restoring his own health at the same time, so take him down with full force before dealing with the corpses. After a breather, there are three more corpses in the room below. In the following chamber with the mine cart rails (the entire map is an inversion of the route through the Slaver Caverns during Wayward Son), a few Critter-ranked Skeleton Archers join the mix.
Alain
After this encounter Hawke will meet Alain, who informs Hawke that the apostate leader Decimus has turned to blood magic. Alain will then appear as if he is going to join Ser Thrask at the cavern's entrance so he can return to the Circle.
When talking with Alain, if you choose the last aggressive answer ("Turn yourself in."):
- Anders: rivalry (+5).
The cave contains one Standard-ranked chest and no traps. Make sure to grab the Raw Lyrium west of where you met Alain.
Decimus
Decimus can be found at the end of the cavern (once combat starts, you will receive Codex entry: Blood Magic: The Forbidden School, if you have not yet gotten it from your interaction with Idunna during Enemies Among Us), initially supported by Corpses and Skeleton Archers. Decimus himself fights very much like the blood mage you fought earlier. One strategy is to cast Horror on him (or some lesser stunning ability such as Miasmic Flask) and then kill him before he casts a single spell. This strategy favors dual-wielding rogues and heavy hitters, after which you turn your attention to the walking dead. However, a great deal of Skeleton Archers spawn in after only a couple more kills, with three Critter-ranked Apostates who shoot plumes of fire magic. This gives the second wave a great deal of ranged power, so respond in kind and take out as many archers as you can first, ignoring the melee Corpses until the ranged enemies are dealt with. Another method is order everyone back to the mine cart room to choke their advance. Decimus doesn't pursue very often in this scenario, allowing the corpses to be picked off before returning to him and extricating your team from what would otherwise be a turkey shooting. He drops The Hypnotist's Staff, one of the better electrical staves in Act 1, so hold onto it.
Grace
After Decimus is defeated, Grace will approach and say that Decimus gave them the courage to fight the Templars, and without him they would still be prisoners.
If Hawke is a Rogue or Warrior and Merrill is in the party:
- "So raise him from the dead.": Merrill: rivalry (+10)
- "He was a blood mage.": Merrill: rivalry (+25)
She laments that Decimus went against the group's wishes by resorting to blood magic, and that without your help the Templars will kill all of you for Decimus' crimes.
If Hawke is a Mage and you choose the aggressive response: ![]() Anders: rivalry (+10).
Anders: rivalry (+10).
Seeking freedom for the remaining mages, she requests that Hawke kill Ser Thrask so they can get clear of Kirkwall before more templars arrive to the outskirts of the Free Marches.
- "I won't help you.":
- Anders: rivalry (+10)
- Aveline: friendship (+10)
- Bethany: rivalry (+5)
- Carver: friendship (+10)
- Fenris: friendship (+5)
- Merril: rivalry (+10) (If Hawke is a Mage)
- "I'll convince him you're dead." / "Murder is going too far.": You tell Grace that you will convince Thrask they are dead without having to kill him. Grace allows you to do this, but she remains unconvinced it will work.
- Anders: friendship (+5)
- Aveline: friendship (+5)
- Fenris: rivalry (+5)
- Isabela: friendship (+5)
- Merrill: friendship (+10)
- Varric: friendship (+10)
- "I will kill Thrask.":
- Anders: friendship (+5)
- Aveline: rivalry (+15)
- Carver: rivalry (+10)
- Fenris: rivalry (+5)
- Isabela: friendship (+5)
- Merrill: friendship (+10)
- Varric: rivalry (+5)
On Hawke's return through the cave, two groups of undead attack, one in the mine cart chamber, another in the entrance chamber. (If Bethany is in the party, she states they are leftovers of Decimus' acts of reanimation, that he was prepared for a siege.) A mage with enough points in Magic can equip the Hypnotist's Staff they just picked up to deal far greater damage to these corpses than the ones they slew on the way in. If Hawke agreed to kill Ser Thrask, two groups of templars will attack instead, of roughly the same makeup of melee fighters and archers. The templars in the entrance chamber will be joined by a Lieutenant, however his blue aura does not seem to regenerate health, thus it is not as bothersome as the more typical yellow aura. Either enemy type yields 200xp in each encounter (400xp total), with a negligible 11xp extra for killing the Lieutenant in the second templar fight.
Confrontation with Ser Karras
When Hawke returns to the entrance of the cave, Ser Karras will have arrived with his contingent of templars. The dispute varies slightly depending on the previous choices made in conversation with Grace, but all quarrels seem to indicate that Ser Karras intends to simply execute the mages rather than return them to the Circle.
- Refused to help Grace:
- Tell Grace to go with Karras: Karras leaves. This is the only route to siding with the templars for the purposes of Mage Hunter and Arcane Defender.
- Anders: rivalry (+15)
- Aveline: friendship (+5)
- Bethany: rivalry (+10)
- Carver: friendship (+10)
- Fenris: friendship (+10)
- Merrill: rivalry (+10)
- Tell Grace she is free: Karras attacks.
- Anders: friendship (+15)
- Aveline: rivalry (+5)
- Carver: rivalry (+10)
- Fenris: rivalry (+10)
- Merrill: friendship (+10)
- Tell Grace to go with Karras: Karras leaves. This is the only route to siding with the templars for the purposes of Mage Hunter and Arcane Defender.
- Convince the Templars that the mages are dead:
- If Varric is in the party and you call on him, he convinces Karras that the Mages are gone. Karras leaves.
- Anders: friendship (+5)
- Fenris: rivalry (+5)
- Isabela: friendship (+5)
- Varric: friendship (+5)
- If Hawke has a humorous personality and "I'm your best friend.":
- Anders: friendship (+5)
- Fenris: rivalry (+5)
- Isabela: friendship (+5)
- Tell Karras that you killed the Mages or you're a friend of Thrask's : Karras attacks.
- Tell Karras that you're a friend of the mages: Karras attacks.
- Anders: friendship (+5)
- Fenris: rivalry (+5)
- If Varric is in the party and you call on him, he convinces Karras that the Mages are gone. Karras leaves.
- Agreed to kill Thrask: Karras attacks.
Combat with Karras
Ser Thrask will always assist Hawke in combat with the templars. On Nightmare it behooves Hawke to follow Thrask's advice and run; fleeing towards the main thoroughfare of this coastal area will separate the templars from each other, allowing Thrask to hold a great number of them, and as he is invincible they will not be able to dispatch him and resume pursuing you. However, if the Templar Hunter and Ser Karras pursue the party simultaneously, the battle can turn sour very quickly. Exploit their weakness to cold and spirit elements to punch through their armor and defenses, and focus on the Hunter first; Karras' regenerative aura is blue and does not restore health, thus he does not fortify enemies the way other commanders do. Take out the archers second, then kill the Normal-ranked Templars while keeping Karras stunned. Defeat him with the full force of the party, then return to Thrask to help kill the ones he has been holding back.
After the battle, if you tell Thrask that you're sorry and Varric is in the party then ![]() Varric: friendship (+5) only if you told Grace that you'd convince the templars that the Mages are dead.
Varric: friendship (+5) only if you told Grace that you'd convince the templars that the Mages are dead.
If the templars are slain, Ser Karras can be looted for the Edge of Song and Glory and the Dragon Hunter's Hauberk. If the templars are fooled, these items cannot be obtained. As long as the apostates are freed, regardless of method, Grace will award the Chanters' Staff.
Rewards summary
- 400 XP (Quest) + 318 XP (Combat) If the Templars were killed: Up to 718 XP
- 2 0 0 (does not occur on )
- Random coins, junk, potions, equipment
- Unique items:
- The Hypnotist's Staff from Decimus
- Edge of Song and Glory from the Templars, if they are killed
- Dragon Hunter's Hauberk from the Templars, if they are killed
- Chanters' Staff rewarded by Grace, if the mages are freed
- Crafting materials:
- Raw Lyrium from the Runaway's Cavern
Consequences
If the templars were killed, a group of their order will seek revenge against Hawke in the Act 2 side quest, The Midnight Meeting. Also in Act 2, Hawke will have the option of further helping the templars (Side quest: Bounty Hunter) or mages (Side quest: The Underground Railroad) depending on whose side Hawke chose in the quest.
If the mages are returned to the Circle, Hawke can talk to Thrask in Act 1 in the Gallows courtyard to learn that Meredith ordered three Starkhaven mages executed at random.
If the mages are allowed to escape and are not sent back to the Circle, they will eventually be caught and returned to the Circle in the next three years. Also, If Karras is alive and spoken to in Act 2, he will tell Hawke that he knows she/he lied about the mages, but he caught them anyway.
Regardless of Hawke's decision in this quest, in Act 3 Grace will team up with Ser Thrask to rebel against Knight-Commander Meredith. She will, however, kill Thrask with blood magic when Hawke comes to intervene.
Notes
- Due to the way in which the quest progresses, you will be unable to change party members between the two largest friendship/rivalry gains, which are speaking to Grace and making your final decision. Therefore, certain party members such as Carver, Anders, and Fenris will be subject to a double-check no matter what and must either add to their gains or have them reduced. In Carver's case, for example, the (+10) from refusing to kill Thrask is negated by (+10) if you decide to let the mages go. In short, between these two scenarios and despite your dialogue choices he may only gain +20 Friendship, +10 Rivalry, or no change at all. There is no way around this.
Bugs
- For PC v1.04, it is possible to gain double the friendship/rivalry when talking to Grace. After defeating Decimus, right click to converse with Grace before she begins her automatic conversation with you. The conversation will then occur twice in a row. This will enable you to gain twice the rivalry/friendship.
- In some cases, the rumor about this quest may remain in the quests list. This seems to happen if Act of Mercy is accepted before completing A Business Discussion. To fix this you can use gffeditor -> SAVEGAME_CAMPAIGN -> SAVEGAME_JORNAL -> SAVEGAME_JORNAL_ACTIVE_LIST -> 0 -> rumors_act_of_mercy. If you find it, you can right click on full tree of 0 -> delete. You can then add your save back to your savegame folder.
- For Xbox 360 the rumor of this quest may remain in the quest list. If so then select as your active quest and return to Gamlen's house, you may be able to reselect this quest from the message board there.