m (→Ser Perth: move closing parenthesis to the right spot) |
|||
| (33 intermediate revisions by 12 users not shown) | |||
| Line 5: | Line 5: | ||
|name = [[A Village Under Siege]] |
|name = [[A Village Under Siege]] |
||
|image = A Village Under Siege.png |
|image = A Village Under Siege.png |
||
| − | |px = |
+ | |px = 270px |
| − | |start = [[Teagan Guerrin|Bann Teagan]], [[Village chantry]] |
+ | |start = [[Teagan Guerrin|Bann Teagan]], [[Village chantry|Redcliffe chantry]] |
|end = [[Murdock]] or [[Perth|Ser Perth]] |
|end = [[Murdock]] or [[Perth|Ser Perth]] |
||
|location = [[Redcliffe Village]] |
|location = [[Redcliffe Village]] |
||
| Line 14: | Line 14: | ||
}}</onlyinclude> |
}}</onlyinclude> |
||
| − | '''A Village Under Siege''' is one of the main plotline |
+ | '''A Village Under Siege''' is one of the main plotline sub-quests in ''[[Dragon Age: Origins]]''. It is activated upon arriving at [[Redcliffe Village]] - while pursuing [[The Arl of Redcliffe]] questline - and speaking with [[Teagan Guerrin|Bann Teagan]]. |
== Background == |
== Background == |
||
| Line 20: | Line 20: | ||
== Walkthrough == |
== Walkthrough == |
||
| + | Bann Teagan asks the Warden for assistance in fending off the undead. Agreeing to help fight off the undead without reservations will result in approval from: |
||
| + | * [[Alistair]] {{Approval|7}} |
||
| + | * [[Leliana]] {{Approval|4}} |
||
| + | * [[Wynne]] {{Approval|2}} |
||
| + | * [[Oghren]] {{Approval|4}} |
||
| + | * [[Morrigan]] {{Approval|-5}} |
||
| + | * [[Sten]] {{Approval|-5}} (although Sten can be persuaded that helping the village is a good idea, in which case {{Approval|Sten|2}}) |
||
| − | + | Bann Teagan sends the Warden to talk with the mayor, [[Murdock]], and [[Perth|Ser Perth]] about the militia and the knights, respectively. |
|
| + | {{Note|If you refuse to help: |
||
| + | * {{Approval|Alistair|-5}} |
||
| + | * {{Approval|Morrigan|+4}} |
||
| + | * {{Approval|Oghren|-3}} |
||
| + | * {{Approval|Sten|+4}} |
||
| + | * {{Approval|Wynne|-3}} |
||
| + | * Leliana does not want to leave the villagers to their fate |
||
| + | ** If you persuade her that you are doing all you can {{Approval|Leliana|+1}} |
||
| + | ** If you tell her it is not open for discussion {{Approval|Leliana|-15}}}} |
||
| + | {{Note|If you initially refuse and later change your mind, deciding to help the village, you get both sets of approval changes.}} |
||
| + | |||
| + | {{-}} |
||
=== Help the militia === |
=== Help the militia === |
||
| − | [[Murdock]] is found right outside the [[Village chantry|chantry]]. He makes two requests, convince blacksmith [[Owen]] to make armor repairs and get veteran dwarf [[Dwyn]] to assist in the defense of the village. |
+ | [[Murdock]] is found right outside the [[Village chantry|chantry]]. He makes two requests, convince blacksmith [[Owen]] to make armor repairs and get veteran [[dwarf]] [[Dwyn]] to assist in the defense of the village. |
| − | If you continue to question Murdock, he explains that he is stationed outside the chantry in order to protect the women, children and elderly within. If Sten is present he will object to this, saying that no [[Qunari]] would act in this manner - that all would fight |
+ | If you continue to question Murdock, he explains that he is stationed outside the chantry in order to protect the women, children and elderly within. If Sten is present he will object to this, saying that no [[Qunari]] would act in this manner - that all would fight (if Leliana is also in the group, she will interject that the comment is unworthy of him). Murdock will point out that the villagers are not Qunari; the end result is {{Approval|-3}} from Sten. |
| − | {{Note|In addition to completing requested assistance (Owen and Dwyn), the Warden can raise the militia's morale by bolstering Murdock's confidence |
+ | {{Note|In addition to completing requested assistance (Owen and Dwyn), the Warden can raise the militia's morale by bolstering Murdock's confidence and/or providing ale to the militia. See notes below.}} |
| ⚫ | Owen is located inside his [[Blacksmith's Store|store]], but you will have to find a way past his locked door ([[Coercion|coerce]] him to open, pick the lock, or break the door down). In order to convince him to help the cause, you can agree to help find his [[Valena|daughter]], which annoys Morrigan and Sten ({{Approval|-5}} each) but impresses Leliana {{Approval|1}} and Wynne {{Approval|4}}. See [[Lost in the Castle]] for further details. |
||
| ⚫ | |||
| ⚫ | |||
If you'd rather not help Owen, you can kill him. This loses {{Approval|-5}} from Alistair and Leliana and {{Approval|Wynne|-10}} if performed through dialogue, or none if he is provoked by the Warden's inspection of his locked floor trapdoor under a crate. If he is killed, retrieve a [[Owen's Key|key]] from his corpse. This will open a secret cache where you will find [[Bundle of Equipment|equipment]] for the militia. Killing him gains {{Approval|4}} from [[Zevran Arainai|Zevran]]. |
If you'd rather not help Owen, you can kill him. This loses {{Approval|-5}} from Alistair and Leliana and {{Approval|Wynne|-10}} if performed through dialogue, or none if he is provoked by the Warden's inspection of his locked floor trapdoor under a crate. If he is killed, retrieve a [[Owen's Key|key]] from his corpse. This will open a secret cache where you will find [[Bundle of Equipment|equipment]] for the militia. Killing him gains {{Approval|4}} from [[Zevran Arainai|Zevran]]. |
||
| + | {{Note|If you kill Owen you can still equip the villagers; take the [[Bundle of Equipment]] from the trapdoor and give it to Murdock.}} |
||
| ⚫ | |||
| ⚫ | |||
| − | ====Convince Dwyn==== |
||
| + | {{-}} |
||
| ⚫ | |||
| + | [[File:Dwyn.png|thumb|230px|Dwyn]] |
||
{{Note|Dwyn also is involved in the [[Companion quests (Origins)|companion quest]] for Sten. See [[The Sword of the Beresaad]] for details.}} |
{{Note|Dwyn also is involved in the [[Companion quests (Origins)|companion quest]] for Sten. See [[The Sword of the Beresaad]] for details.}} |
||
| − | Head to [[Dwyn's Home]] in the village. Gain entrance by picking the lock (having a companion with such skill in party doesn't help) or breaking the door down. You can do one of |
+ | Head to [[Dwyn's Home]] in the village. Gain entrance by picking the lock (having a companion with such skill in party doesn't help) or breaking the door down. You can do one of four things to convince Dwyn to defend the village: [[Coercion|persuade, intimidate]], or bribe him for a sovereign (50 silvers with persuasion). A female [[Dwarf]] [[The Warden|Warden]] can offer sex in exchange for his assistance, but must still pass a persuade check to seduce him. |
| − | If you ask him why he shut himself in there and call him a coward this nets {{Approval|+ |
+ | If you ask him why he shut himself in there and call him a coward this nets {{Approval|+1}} if Oghren is in the party. Successfully intimidating Dwyn into joining the militia nets an additional {{Approval|+2}} for Oghren (with no approval change for either persuasion or bribery). A non-dwarf female Warden can suggest sex with Dwyn in order to convince him to fight, but the proposal will never be accepted; he'll just say that it is a tempting offer. Furthermore, the conversation with a dwarven Warden will be slightly different. |
If Dwyn is not convinced to help before the battle starts, he will not participate. If the Warden kills Dwyn and then tells Murdock that they did so, the milita's attack score will suffer. |
If Dwyn is not convinced to help before the battle starts, he will not participate. If the Warden kills Dwyn and then tells Murdock that they did so, the milita's attack score will suffer. |
||
| − | {{Note|During the battle Dwyn and his men will fight |
+ | {{Note|During the battle Dwyn and his men will fight beside the knights and not the militia.}} |
| + | {{Note|After [[The Attack at Nightfall]] Dwyn's Home is empty (if he did not survive). If you did not loot the locked chest in the back room before the battle then it is now unlocked (you no longer require [[Dwyn's Lockbox Key]] to open it).}} |
||
| − | ====Additional militia assistance==== |
||
| + | {{-}} |
||
| ⚫ | |||
| ⚫ | |||
| ⚫ | |||
The bartender, [[Lloyd]], has been charging the militia for ale. As they have very little coin remaining and are fighting just to survive, they believe they should drink for free. |
The bartender, [[Lloyd]], has been charging the militia for ale. As they have very little coin remaining and are fighting just to survive, they believe they should drink for free. |
||
| − | Talk to the Redcliffe Militiaman seated on the far left at the table in the [[Tavern (Redcliffe Village)|tavern]] (the redhead), and complete the conversation tree associated with him. |
+ | Talk to the Redcliffe Militiaman seated on the far left at the table in the [[Tavern (Redcliffe Village)|tavern]] (the redhead), and complete the conversation tree associated with him. (Quest journal will update to start this optional sub-quest.) |
| − | You can either: |
+ | You can either:<br> |
| − | + | 1. Pay Lloyd 100{{s}} to cover the militia's drinks. ({{Approval|Oghren|2}})<br> |
|
| ⚫ | |||
| − | * Intimidate Lloyd into giving you ownership of the tavern (medium Intimidation required) and then insist he give the militia drinks for free. You can then push him out to fight with the militia, but [[Bella]] won't have the option to give out your ale. |
||
| − | * Kill Lloyd, then take ownership of the tavern or give it to Bella. Afterward, have her serve free ale. |
||
| − | * Force Lloyd into fighting alongside the militia. Bella then takes charge of the tavern and can be asked to give out free drinks. |
||
| ⚫ | |||
| − | The optimal path is to sell to him what you want, then threaten to kill him, resulting in gaining partnership of the tavern ({{Approval|Wynne|-3}},{{Approval|Zevran|+2}}), then ask to see what he has (which he will now give you for free, but you will not be able to sell him anything). Then, talk to Lloyd again and once again, you can choose "I hear you're charging the militia for ale," but this time follow up with, "Maybe not, but I would. And this is my tavern, remember?" After this point, you can demand more share of the profits ("So how's business in my tavern?) and then, force him to help defend the village (select "Answer a few questions"). |
||
| + | {{Bug|DAO|If Oghren is in the party there is no approval change but if he is not in your party {{Approval|4}}.}} |
||
| − | Depending on how you succeed, the following may happen: |
||
| − | * The morale of the militia increases. |
||
| − | * Paying for the militia's drinks, or asking Bella to give them drinks for free, gives Oghren {{Approval|+1}}. |
||
| − | * Persuading Lloyd to give the militia free drinks gives Oghren {{Approval|+2}}. |
||
| + | 3. Have someone else take charge of the bar (the waitress or you), and then, give out free ale.<br> |
||
| ⚫ | |||
| + | * The waitress, [[Bella]], can takeover if Lloyd joins the militia or is killed. |
||
| + | ** If Lloyd goes outside to fight, speak to her to confirm that she is in charge now. Then, ask her to serve the militia free ale (Oghren {{Approval|2}}). |
||
| + | ** If Lloyd is killed via dialogue options (Alistair {{Approval|-3}}, Leliana {{Approval|-5}}, Wynne {{Approval|-10}}, unless persuaded, then, {{Approval|-3}}, Zevran {{Approval|2}}), talk to Bella afterward. Then, tell her to run the place (Sten {{Approval|4}}). |
||
| + | |||
| + | * The Warden can gain ownership by [[Coercion|intimidating]] or killing Lloyd. |
||
| + | ** To gain ownership of the tavern via intimidation, speak to Lloyd about him charging the militia for ale. When he responds, state that his customers' money won't help when he's dead, and then, ask him if anyone would miss him. He offers you 80 {{S}} to protect him. Don't accept. Intimidate him to make you the full owner of the tavern (medium [[Coercion#Difficulty score|difficulty]]) and give you the 80 {{S}} as a share of the profits. An additional 20 {{S}} can be collected by asking him how '''YOUR''' business is and that you want a cut of the profits now (Wynne {{Approval|-3}}, Zevran {{Approval|2}}). |
||
| + | ** Otherwise, kill Lloyd outright (Alistair {{Approval|-3}}, Leliana {{Approval|-5}}, Wynne {{Approval|-10}}, unless persuaded, then, {{Approval|-3}}, Zevran {{Approval|2}}), then, talk to Bella and declare that it is your tavern now. |
||
| + | |||
| + | 4. Take Lloyd's "protection" money (after you threatened his welfare) and walk away or try other options, i.e. force him to join the militia.<br> |
||
| + | |||
| + | 5. Agree with him about not giving away ale for free and drop the subject. (And, not complete this optional sub-quest.)<br> |
||
| + | |||
| + | Initially, Lloyd is a trading [[Merchants (Origins)|merchant]] with a small [[Lloyd#Inventory|stock]], but if he goes outside to defend the village or is killed by you, Bella will open up the [[Bella#Inventory|stores]] for free, but not buy anything. Also, if you take ownership of the tavern, Lloyd's inventory will shift to a non-trading free inventory, same as Bella's. ({{GiftLink|Ale}} is gone, {{GiftLink|Wine}} is added). |
||
| + | |||
| + | After dealing with the free drinks issue, Lloyd can be "convinced" to help defend the village ({{Approval|Sten|4}}). |
||
| + | |||
| ⚫ | |||
| + | |||
| + | This is the optimal path to be taken with Lloyd: |
||
| + | |||
| + | # Sell him all items you want. |
||
| + | # Threaten to kill him, which results in gaining partnership of the tavern. |
||
| + | # Commandeer his inventory, which he will now give you for free, although you will not be able to sell him anything now. |
||
| + | # Talk to Lloyd a second time, and then a third time - say ''"I hear you're charging the militia for ale"'', but this time you can follow up with ''"Maybe not, but I would. And this is my tavern, remember?"''. |
||
| + | # After this point, you can demand more share of the profits (''"So how's business in my tavern?"''). |
||
| + | # Finally, force him to help defend the village (select ''"Answer a few questions"''). |
||
| + | |||
| + | If the militia get free drinks (from Lloyd or Bella) then the morale of the militia increases. |
||
| + | |||
| ⚫ | |||
| + | {{-}} |
||
=== Help the knights === |
=== Help the knights === |
||
| ⚫ | |||
| + | ==== Ser Perth ==== |
||
| ⚫ | |||
| ⚫ | |||
| + | |||
| ⚫ | |||
If you ask him what you can do to help, he will ask the Warden if [[Hannah|Mother Hannah]] will bless the knights for the attack. |
If you ask him what you can do to help, he will ask the Warden if [[Hannah|Mother Hannah]] will bless the knights for the attack. |
||
| − | ====Convince Mother Hannah ==== |
||
She will initially refuse, believing that Ser Perth wants mystical protection from the [[Maker]] - which is not within her (or anyone's) power to give. Ser Perth's request can be resolved in one of two ways: |
She will initially refuse, believing that Ser Perth wants mystical protection from the [[Maker]] - which is not within her (or anyone's) power to give. Ser Perth's request can be resolved in one of two ways: |
||
| − | * [[Coercion|Coerce]] Mother Hannah. She will provide ordinary amulets for the knights, letting them believe in their "holy" protection to raise their morale. |
+ | * {{Platforms|PS3|Xbox360}}[[Coercion|Coerce]] Mother Hannah. This requires a skill total (Intimidate or Persuade) of 50. She will provide ordinary amulets for the knights, letting them believe in their "holy" protection to raise their morale. Inform Ser Perth that they may pick up the amulets: |
| + | ** [[Leliana]] {{Approval|-5}} |
||
| + | ** [[Morrigan]] {{Approval|+2}} but only if Alistair and Leliana are also in the party. |
||
* Tell Ser Perth he will have to do without the blessing. He will accept the decision, and the knights' morale will be unchanged. |
* Tell Ser Perth he will have to do without the blessing. He will accept the decision, and the knights' morale will be unchanged. |
||
| + | * If the Warden is a mage and Morrigan comes along she will have something to say about [[Hannah|Mother Hannah]]'s beliefs about magic |
||
| − | {{Bug|DAO|{{ |
+ | {{Bug|DAO|{{Platforms|PC}}Due to a scripting error, the knights' morale never changes, so obtaining the amulets will make no difference other than the potential approval changes mentioned above.}} |
| + | {{-}} |
||
| − | ====Visit the general store==== |
+ | ==== Visit the general store ==== |
| − | [[File: |
+ | [[File:Barrels in general store.png|thumb|200px|Oil barrels]] |
* Go to the [[General Store|general store]], select the oil barrels there, then talk to Ser Perth and he'll agree to set up a flame trap for the undead on the upper-level path. |
* Go to the [[General Store|general store]], select the oil barrels there, then talk to Ser Perth and he'll agree to set up a flame trap for the undead on the upper-level path. |
||
| Line 89: | Line 141: | ||
(See [[The Attack at Nightfall]] regarding potential drawbacks to this strategy). |
(See [[The Attack at Nightfall]] regarding potential drawbacks to this strategy). |
||
| − | {{Bug|DAO|{{ |
+ | {{Bug|DAO|{{Platforms|PC}}}}If you discover the oil barrels, but choose not to tell Ser Perth of them, he can still have an active quest marker after you finish this quest. |
| + | {{-}} |
||
| − | |||
| − | ===Additional assistance=== |
+ | === Additional assistance === |
| ⚫ | |||
| ⚫ | |||
| + | ==== Berwick ==== |
||
| ⚫ | |||
| ⚫ | |||
| ⚫ | |||
| ⚫ | |||
# With Leliana or Zevran in the party: |
# With Leliana or Zevran in the party: |
||
## Talk to Berwick. Leliana will notice he's a spy. Zevran will simply point out that he's acting extremely suspiciously; Berwick's nervous reaction reveals that he has something to hide. |
## Talk to Berwick. Leliana will notice he's a spy. Zevran will simply point out that he's acting extremely suspiciously; Berwick's nervous reaction reveals that he has something to hide. |
||
## Ask him about what he's been told to do. |
## Ask him about what he's been told to do. |
||
## Ask him for proof, which can be done after using coercion to get him tell the Warden everything "because that will make things easier". |
## Ask him for proof, which can be done after using coercion to get him tell the Warden everything "because that will make things easier". |
||
| − | ## If the Warden has enough [[Coercion|coercion]] s/he can talk him into defending the village.<br><br> |
||
| ⚫ | |||
# Pickpocket Berwick for a [[Letter (Berwick)|letter]]. |
# Pickpocket Berwick for a [[Letter (Berwick)|letter]]. |
||
## Call Berwick by his name. |
## Call Berwick by his name. |
||
## Ask about the letter. |
## Ask about the letter. |
||
| − | ## If the Warden has enough coercion |
+ | ## If the Warden has enough coercion they can talk him into defending the village. |
# Talk to [[Bella]] or [[Lloyd]] to learn Berwick's name. |
# Talk to [[Bella]] or [[Lloyd]] to learn Berwick's name. |
||
## Call Berwick by his name. |
## Call Berwick by his name. |
||
## Ask him for proof, which can be done after using coercion to have him reveal everything "because that will make things easier". |
## Ask him for proof, which can be done after using coercion to have him reveal everything "because that will make things easier". |
||
| − | ## If the Warden has enough coercion |
+ | ## If the Warden has enough coercion they can talk him into defending the village.<br> |
| + | If you convince him to defend the village: |
||
| − | Making Berwick defend the village will earn approval from Sten. Letting Oghren talk the Warden into killing Berwick also nets {{Appoval|+4}} from him (only tested on {{PC}}). |
||
| + | * If [[Oghren]] is in the party he says you should kill him: |
||
| + | ** [[Coercion|Persuade]] Oghren that Berwick needs to earn his redemption. |
||
| + | ** Tell Oghren you won't kill Berwick. [[Oghren]] {{Approval|-5}} |
||
| + | ** Agree with Oghren; you fight Berwick. [[Oghren]] {{Approval|+4}} |
||
| + | * [[Sten]] {{Approval|+2}} |
||
{{Note|During the battle Berwick will fight besides the knights and not the militia.}} |
{{Note|During the battle Berwick will fight besides the knights and not the militia.}} |
||
| + | {{-}} |
||
| − | |||
| − | === |
+ | === Done preparations === |
| − | * Intimidate [[Lloyd]] the tavernkeeper into joining the defense ({{Approval|Sten|+4}}, {{Approval|Oghren|+2}} if you let him give free ale to the militia instead). [[Bella]] is left in charge (unless you intimidated Lloyd into giving you the tavern) and will give you Lloyd's stock for free. Note that you will also be unable to sell any items to Bella; however, if Owen is alive and cooperating this is not really a problem. |
||
| − | |||
| − | {{Bug|DAO|Even if Oghren is not in your active party, when you intimidate Lloyd, his approval goes up anyway}} |
||
| − | |||
| ⚫ | |||
| − | |||
| ⚫ | |||
| − | * In the [[Blacksmith's Store]] his hiding place is found under a crate. If Owen is helping, then he will offer to unlock the hidden trapdoor, revealing a set of old Tier 1 weapons and armor. You can take it and immediately sell it to him, but it's not worth much. |
||
| − | |||
When you are done with preparations, you can end the quest and start [[The Attack at Nightfall]] by talking to either Ser Perth or Murdock and saying "I am ready." |
When you are done with preparations, you can end the quest and start [[The Attack at Nightfall]] by talking to either Ser Perth or Murdock and saying "I am ready." |
||
| Line 130: | Line 177: | ||
== Abandoning Redcliffe == |
== Abandoning Redcliffe == |
||
| − | The Warden can initially refuse to help the villagers defend Redcliffe Village. However, speaking with Bann Teagan allows a chance to offer aid. If the Warden leaves Redcliffe and moves to any location in the [[World map (Origins)|World Map]], except the [[Party Camp]], then Redcliffe will be marked as abandoned, even if the Warden offered aid. When the Warden returns, the village is a ghost town. Most buildings are empty |
+ | The Warden can initially refuse to help the villagers defend Redcliffe Village. However, speaking with Bann Teagan allows a chance to offer aid. If the Warden leaves Redcliffe and moves to any location in the [[World map (Origins)|World Map]], except the [[Party Camp]], then Redcliffe will be marked as abandoned, even if the Warden offered aid. When the Warden returns, the village is a ghost town. Most buildings are empty with exception to the blacksmith shop where [[Far Song]] can be purchased and a scavenger outside. The scavenger directs the Warden to the Chantry, where the only survivor is a wounded Bann Teagan. The Warden heals Bann Teagan's wounds and he hastily runs away. Things will then proceed as if the Warden had saved Redcliffe, except for minor dialogue changes. |
Later, when infiltrating Castle Redcliffe, the Warden will find most of the named villagers from Redcliffe turned undead. They present no more of a threat than the normal corpses found there and none contain any special loot. |
Later, when infiltrating Castle Redcliffe, the Warden will find most of the named villagers from Redcliffe turned undead. They present no more of a threat than the normal corpses found there and none contain any special loot. |
||
| − | Refusing to help also removes the [[Chanter's Board]], [[The Mages' Collective]], and the [[Blackstone Irregulars]] from Redcliffe Village, including their respective quests. There is no way to obtain these quests in-game if this route has been chosen. |
+ | Refusing to help also removes the [[Chanter's Board]], [[The Mages' Collective]], and the [[Blackstone Irregulars]] from Redcliffe Village, including their respective quests. There is no way to obtain these quests in-game if this route has been chosen. However all preparation quests for the battle against the undead can be completed for experience, just don't tell Murdock you're ready after completing them all and instead leave the village. |
The following quests are unique to Redcliffe and will not be available if Redcliffe is abandoned: |
The following quests are unique to Redcliffe and will not be available if Redcliffe is abandoned: |
||
| Line 149: | Line 196: | ||
== Result == |
== Result == |
||
| − | + | Completing this quest by waiting for the nightfall, [[The Attack at Nightfall]] quest will begin. Based on the choices you made on this quest this may have an impact on the performance of your forces. |
|
== Rewards == |
== Rewards == |
||
| + | |||
| ⚫ | |||
| − | + | === Help the militia === |
|
| − | * |
+ | * 100 XP - for convincing Owen to fix the militia's armor. |
| + | * 100 XP - for giving Murdock the [[Bundle of Equipment]] from Owen's Blacksmithy to arm the militia (if you pickpocket Owen). |
||
| − | ===Help the knights=== |
||
| − | * |
+ | * 150 XP - for getting Dwyn to defend the village. |
| + | |||
| ⚫ | |||
| ⚫ | |||
| + | * 100 XP - for convincing Mother Hannah to provide holy symbols (whether Mother Hannah provided holy symbols or not). |
||
| ⚫ | |||
| + | |||
{{Note|Be sure to report back to each quest giver, Murdock or Ser Perth, to complete each sub-quest and receive experience points.}} |
{{Note|Be sure to report back to each quest giver, Murdock or Ser Perth, to complete each sub-quest and receive experience points.}} |
||
| Line 164: | Line 215: | ||
* '''Affecting morale of militia and knights:''' |
* '''Affecting morale of militia and knights:''' |
||
:''Morale starts at 0.'' |
:''Morale starts at 0.'' |
||
| − | :*If Murdock is convinced that victory is possible (either after equipping the militia and telling him "We're not only ready, Murdock. We're going to win." (high Persuasion required) or saying, "Have faith, good man. We will defeat this evil together." (medium Persuasion required): +1 |
+ | :* If Murdock is convinced that victory is possible (either after equipping the militia and telling him "We're not only ready, Murdock. We're going to win." (high Persuasion required) or saying, "Have faith, good man. We will defeat this evil together." (medium Persuasion required): +1 |
| − | :*Dwyn fighting: +1 |
+ | :* Dwyn fighting: +1 |
| − | :*Owen working: +1 |
+ | :* Owen working: +1 |
| − | :*Free drinks: +1 |
+ | :* Free drinks: +1 |
| + | |||
| ⚫ | |||
| ⚫ | |||
| ⚫ | |||
| ⚫ | |||
| ⚫ | |||
| ⚫ | |||
| ⚫ | |||
| ⚫ | |||
| ⚫ | |||
| − | :*Owen's stash denied: -1 |
||
| ⚫ | |||
| ⚫ | |||
| ⚫ | |||
| ⚫ | |||
| ⚫ | |||
| ⚫ | |||
[[Category:Dragon Age: Origins quests]] |
[[Category:Dragon Age: Origins quests]] |
||
[[Category:Redcliffe side quests]] |
[[Category:Redcliffe side quests]] |
||
Revision as of 15:47, 14 May 2018
“We aren't going to turn aside anyone who wants to help, though. Don't take me for being an ingrate or nothing.” ―Murdock
A Village Under Siege is one of the main plotline sub-quests in Dragon Age: Origins. It is activated upon arriving at Redcliffe Village - while pursuing The Arl of Redcliffe questline - and speaking with Bann Teagan.
Background
Every night, undead corpses descend from Castle Redcliffe to attack the village. No one in the village knows where the creatures come from, and no one has been able to reach the castle. The attacks grow worse each night and Bann Teagan predicts tonight will be the worst. He pleads for the Warden's assistance. The Warden may choose to help Redcliffe Village defend itself. The more help the village has, the easier it will be to defend. Alternatively, the Warden may abandon the village and let it fend for itself. When the Warden returns, Redcliffe Village will be a ghost town, all inhabitants presumed dead.
Walkthrough
Bann Teagan asks the Warden for assistance in fending off the undead. Agreeing to help fight off the undead without reservations will result in approval from:
- Alistair
 (+7)
(+7) - Leliana (+4)
- Wynne (+2)
- Oghren
 (+4)
(+4) - Morrigan (-5)
- Sten (-5) (although Sten can be persuaded that helping the village is a good idea, in which case Sten approves (+2))
Bann Teagan sends the Warden to talk with the mayor, Murdock, and Ser Perth about the militia and the knights, respectively.
- Alistair disapproves (-5)
- Morrigan approves (+4)
- Oghren disapproves (-3)
- Sten approves (+4)
- Wynne disapproves (-3)
- Leliana does not want to leave the villagers to their fate
- If you persuade her that you are doing all you can Leliana approves (+1)
- If you tell her it is not open for discussion Leliana disapproves (-15)
- If you persuade her that you are doing all you can
Help the militia
Murdock is found right outside the chantry. He makes two requests, convince blacksmith Owen to make armor repairs and get veteran dwarf Dwyn to assist in the defense of the village.
If you continue to question Murdock, he explains that he is stationed outside the chantry in order to protect the women, children and elderly within. If Sten is present he will object to this, saying that no Qunari would act in this manner - that all would fight (if Leliana is also in the group, she will interject that the comment is unworthy of him). Murdock will point out that the villagers are not Qunari; the end result is ![]() (-3) from Sten.
(-3) from Sten.
Owen is located inside his store, but you will have to find a way past his locked door (coerce him to open, pick the lock, or break the door down). In order to convince him to help the cause, you can agree to help find his daughter, which annoys Morrigan and Sten (![]() (-5) each) but impresses Leliana
(-5) each) but impresses Leliana ![]() (+1) and Wynne
(+1) and Wynne ![]() (+4). See Lost in the Castle for further details.
(+4). See Lost in the Castle for further details.
If you'd rather not help Owen, you can kill him. This loses ![]() (-5) from Alistair and Leliana and
(-5) from Alistair and Leliana and ![]() Wynne disapproves (-10) if performed through dialogue, or none if he is provoked by the Warden's inspection of his locked floor trapdoor under a crate. If he is killed, retrieve a key from his corpse. This will open a secret cache where you will find equipment for the militia. Killing him gains
Wynne disapproves (-10) if performed through dialogue, or none if he is provoked by the Warden's inspection of his locked floor trapdoor under a crate. If he is killed, retrieve a key from his corpse. This will open a secret cache where you will find equipment for the militia. Killing him gains ![]() (+4) from Zevran.
(+4) from Zevran.
Convince Dwyn


Dwyn
Head to Dwyn's Home in the village. Gain entrance by picking the lock (having a companion with such skill in party doesn't help) or breaking the door down. You can do one of four things to convince Dwyn to defend the village: persuade, intimidate, or bribe him for a sovereign (50 silvers with persuasion). A female Dwarf Warden can offer sex in exchange for his assistance, but must still pass a persuade check to seduce him.
If you ask him why he shut himself in there and call him a coward this nets ![]() (+1) if Oghren is in the party. Successfully intimidating Dwyn into joining the militia nets an additional
(+1) if Oghren is in the party. Successfully intimidating Dwyn into joining the militia nets an additional ![]() (+2) for Oghren (with no approval change for either persuasion or bribery). A non-dwarf female Warden can suggest sex with Dwyn in order to convince him to fight, but the proposal will never be accepted; he'll just say that it is a tempting offer. Furthermore, the conversation with a dwarven Warden will be slightly different.
(+2) for Oghren (with no approval change for either persuasion or bribery). A non-dwarf female Warden can suggest sex with Dwyn in order to convince him to fight, but the proposal will never be accepted; he'll just say that it is a tempting offer. Furthermore, the conversation with a dwarven Warden will be slightly different.
If Dwyn is not convinced to help before the battle starts, he will not participate. If the Warden kills Dwyn and then tells Murdock that they did so, the milita's attack score will suffer.
Lloyd

Redcliffe militia
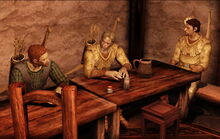
The bartender, Lloyd, has been charging the militia for ale. As they have very little coin remaining and are fighting just to survive, they believe they should drink for free.
Talk to the Redcliffe Militiaman seated on the far left at the table in the tavern (the redhead), and complete the conversation tree associated with him. (Quest journal will update to start this optional sub-quest.)
You can either:
1. Pay Lloyd 100![]() to cover the militia's drinks. (
to cover the militia's drinks. (![]() Oghren approves (+2))
Oghren approves (+2))
2. Persuade Lloyd to give the militia drinks for free (high persuasion required).
3. Have someone else take charge of the bar (the waitress or you), and then, give out free ale.
- The waitress, Bella, can takeover if Lloyd joins the militia or is killed.
- If Lloyd goes outside to fight, speak to her to confirm that she is in charge now. Then, ask her to serve the militia free ale (Oghren (+2)).
- If Lloyd is killed via dialogue options (Alistair (-3), Leliana (-5), Wynne (-10), unless persuaded, then, (-3), Zevran (+2)), talk to Bella afterward. Then, tell her to run the place (Sten (+4)).
- If Lloyd goes outside to fight, speak to her to confirm that she is in charge now. Then, ask her to serve the militia free ale (Oghren
- The Warden can gain ownership by intimidating or killing Lloyd.
- To gain ownership of the tavern via intimidation, speak to Lloyd about him charging the militia for ale. When he responds, state that his customers' money won't help when he's dead, and then, ask him if anyone would miss him. He offers you 80 to protect him. Don't accept. Intimidate him to make you the full owner of the tavern (medium difficulty) and give you the 80 as a share of the profits. An additional 20 can be collected by asking him how YOUR business is and that you want a cut of the profits now (Wynne (-3), Zevran (+2)).
- Otherwise, kill Lloyd outright (Alistair (-3), Leliana (-5), Wynne (-10), unless persuaded, then, (-3), Zevran (+2)), then, talk to Bella and declare that it is your tavern now.
- To gain ownership of the tavern via intimidation, speak to Lloyd about him charging the militia for ale. When he responds, state that his customers' money won't help when he's dead, and then, ask him if anyone would miss him. He offers you 80
4. Take Lloyd's "protection" money (after you threatened his welfare) and walk away or try other options, i.e. force him to join the militia.
5. Agree with him about not giving away ale for free and drop the subject. (And, not complete this optional sub-quest.)
Initially, Lloyd is a trading merchant with a small stock, but if he goes outside to defend the village or is killed by you, Bella will open up the stores for free, but not buy anything. Also, if you take ownership of the tavern, Lloyd's inventory will shift to a non-trading free inventory, same as Bella's. (Ale is gone, Wine is added).
After dealing with the free drinks issue, Lloyd can be "convinced" to help defend the village (![]() Sten approves (+4)).
Sten approves (+4)).
This is the optimal path to be taken with Lloyd:
- Sell him all items you want.
- Threaten to kill him, which results in gaining partnership of the tavern.
- Commandeer his inventory, which he will now give you for free, although you will not be able to sell him anything now.
- Talk to Lloyd a second time, and then a third time - say "I hear you're charging the militia for ale", but this time you can follow up with "Maybe not, but I would. And this is my tavern, remember?".
- After this point, you can demand more share of the profits ("So how's business in my tavern?").
- Finally, force him to help defend the village (select "Answer a few questions").
If the militia get free drinks (from Lloyd or Bella) then the morale of the militia increases.
Help the knights
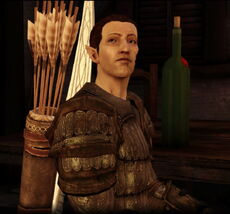
Ser Perth
Ser Perth stands watch with his fellow knights by the windmill, guarding the approach from the castle's bridge.


Mother Hannah
If you ask him what you can do to help, he will ask the Warden if Mother Hannah will bless the knights for the attack.
She will initially refuse, believing that Ser Perth wants mystical protection from the Maker - which is not within her (or anyone's) power to give. Ser Perth's request can be resolved in one of two ways:
- Coerce Mother Hannah. This requires a skill total (Intimidate or Persuade) of 50. She will provide ordinary amulets for the knights, letting them believe in their "holy" protection to raise their morale. Inform Ser Perth that they may pick up the amulets:
- Tell Ser Perth he will have to do without the blessing. He will accept the decision, and the knights' morale will be unchanged.
- If the Warden is a mage and Morrigan comes along she will have something to say about Mother Hannah's beliefs about magic
Visit the general store


Oil barrels
- Go to the general store, select the oil barrels there, then talk to Ser Perth and he'll agree to set up a flame trap for the undead on the upper-level path.
This will add fire to the village defenses and increase the morale of the knights. (See The Attack at Nightfall regarding potential drawbacks to this strategy).
If you discover the oil barrels, but choose not to tell Ser Perth of them, he can still have an active quest marker after you finish this quest.
Additional assistance
Berwick
An elf named Berwick sits in the tavern, avoiding attempts at conversation. Once you expose him you can tell him to leave, help defend the militia, or kill him. There are several ways to recruit Berwick:
Berwick
- A Warden with enough cunning can point out Berwick's suspicious behavior and reveal him as a spy without outside help.
- With Leliana or Zevran in the party:
- Talk to Berwick. Leliana will notice he's a spy. Zevran will simply point out that he's acting extremely suspiciously; Berwick's nervous reaction reveals that he has something to hide.
- Ask him about what he's been told to do.
- Ask him for proof, which can be done after using coercion to get him tell the Warden everything "because that will make things easier".
- Pickpocket Berwick for a letter.
- Call Berwick by his name.
- Ask about the letter.
- If the Warden has enough coercion they can talk him into defending the village.
- Talk to Bella or Lloyd to learn Berwick's name.
- Call Berwick by his name.
- Ask him for proof, which can be done after using coercion to have him reveal everything "because that will make things easier".
- If the Warden has enough coercion they can talk him into defending the village.
If you convince him to defend the village:
Done preparations
When you are done with preparations, you can end the quest and start The Attack at Nightfall by talking to either Ser Perth or Murdock and saying "I am ready."
Abandoning Redcliffe
The Warden can initially refuse to help the villagers defend Redcliffe Village. However, speaking with Bann Teagan allows a chance to offer aid. If the Warden leaves Redcliffe and moves to any location in the World Map, except the Party Camp, then Redcliffe will be marked as abandoned, even if the Warden offered aid. When the Warden returns, the village is a ghost town. Most buildings are empty with exception to the blacksmith shop where Far Song can be purchased and a scavenger outside. The scavenger directs the Warden to the Chantry, where the only survivor is a wounded Bann Teagan. The Warden heals Bann Teagan's wounds and he hastily runs away. Things will then proceed as if the Warden had saved Redcliffe, except for minor dialogue changes.
Later, when infiltrating Castle Redcliffe, the Warden will find most of the named villagers from Redcliffe turned undead. They present no more of a threat than the normal corpses found there and none contain any special loot.
Refusing to help also removes the Chanter's Board, The Mages' Collective, and the Blackstone Irregulars from Redcliffe Village, including their respective quests. There is no way to obtain these quests in-game if this route has been chosen. However all preparation quests for the battle against the undead can be completed for experience, just don't tell Murdock you're ready after completing them all and instead leave the village.
The following quests are unique to Redcliffe and will not be available if Redcliffe is abandoned:
Result
Completing this quest by waiting for the nightfall, The Attack at Nightfall quest will begin. Based on the choices you made on this quest this may have an impact on the performance of your forces.
Rewards
Help the militia
- 100 XP - for convincing Owen to fix the militia's armor.
- 100 XP - for giving Murdock the Bundle of Equipment from Owen's Blacksmithy to arm the militia (if you pickpocket Owen).
- 150 XP - for getting Dwyn to defend the village.
Help the knights
- 100 XP - for convincing Mother Hannah to provide holy symbols (whether Mother Hannah provided holy symbols or not).
- 100 XP - for reporting to Ser Perth about oil barrels from the General Store.
Notes
- Any person you recruit to fight can be stolen from again once they are outside. This includes: Dwyn and his two men, Lloyd, and Berwick.
- Affecting morale of militia and knights:
- Morale starts at 0.
- If Murdock is convinced that victory is possible (either after equipping the militia and telling him "We're not only ready, Murdock. We're going to win." (high Persuasion required) or saying, "Have faith, good man. We will defeat this evil together." (medium Persuasion required): +1
- Dwyn fighting: +1
- Owen working: +1
- Free drinks: +1
- If Murdock is convinced that they will be defeated (by replying "That sounds likely" to his line, "Name's Murdock, mayor of what's left of the village--providing we aren't all killed and hauled off to the castle tonight.": -1
- Dwyn dead: -1
- Owen dead: -1
- Owen's stash denied: -1
- If the militia's morale is +2 or higher, it is considered to be High.
- If it is -2 or lower, it is considered to be Low.
- The knights' morale is supposed to increase by 1, if you give Ser Perth the holy amulets. However on , their morale is fixed at 0 (due to scripting error), whether the amulets are given to him or not.