“It is not my place to decide your worthiness. The Gauntlet does that.” ―Guardian
A Test of Faith is a quest that is part of the Urn of Sacred Ashes quest line. It entails a series of challenges in The Gauntlet that test the Warden's faith to ensure he/she is worthy of finding the Urn of Andraste. The ancient temple is found on the Mountain Top after the Warden has battled through the Ruined Temple and the Caverns dominated by the Disciples of Andraste dragon cult.
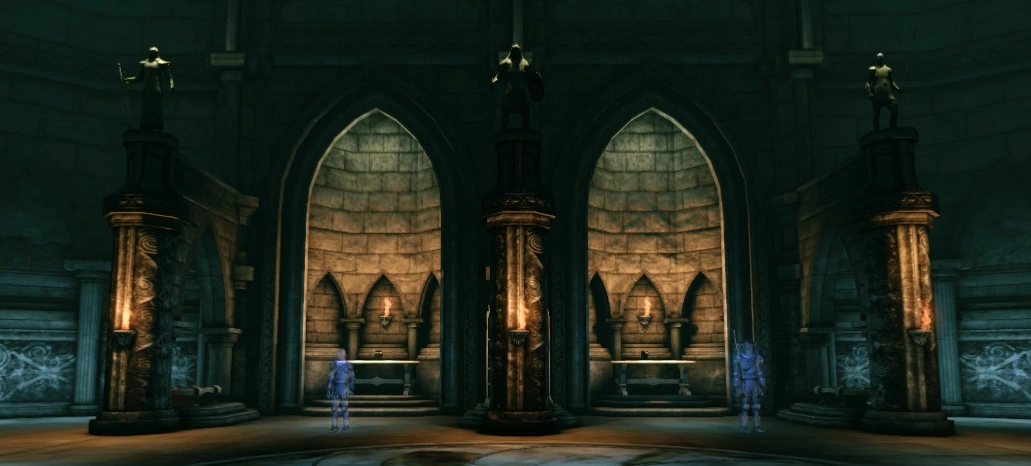
The test consists of the following: A chamber containing the spirits of eight prominent people in Andraste's life and time, each with a riddle that the Warden must answer; a battle with spiritual copies of their present companions; a bridge puzzle which must be solved by stepping on eight tiles; and finally one last riddle that is quite literally a trial by fire.
Walkthrough
A Test of Faith can be started by entering into the door atop the mountain and talking to the Guardian. The conversation does not influence whether or not you are able to pass, but there are effects on companion approval.
The Guardian will divine the Warden's personal history and ask him/her a question based on your Origin. For example, if the Warden is of City Elf Origin, then the Guardian will ask if you failed Shianni, and if he/she is from the Human Noble Origin, he will ask if you feel like you abandoned your parents to die. Regardless of how you answer, the conversation will result in ![]() (+2) from Sten, if he is in your party (no change to Morrigan or Wynne). However, refusing to answer will have effects (see below). Each companion will be asked a question by the Guardian after your question is answered:
(+2) from Sten, if he is in your party (no change to Morrigan or Wynne). However, refusing to answer will have effects (see below). Each companion will be asked a question by the Guardian after your question is answered:
- Alistair is asked if he believes that Ferelden would be better off had he died at the Battle of Ostagar, instead of King Cailan and/or Duncan. He says yes.
- Morrigan cuts the Guardian off after he mentions her as the "daughter of Flemeth," refusing to "play his game."
- Leliana is questioned about her vision, accused of inventing the story for attention and if she considers herself equal to Andraste. She vehemently denies this, stating that she "knows what she believes."
- Sten is questioned about his actions in Lothering, and failing his people by allowing a Qunari to be seen negatively. He reaffirms that he has never denied his failure.
- Wynne acknowledges that she doubts her own knowledge and role as a Circle mage, but follows up by saying, "Only a fool is truly certain of himself."
- Zevran is shocked that the Guardian knows about the one kill he regrets most, and cuts him off with an angry "yes" before he can mention any more to the party.
- Oghren already knows what the Guardian will discuss and decides to "save some time." He rattles off his mistakes and regrets, and wishes he'd been a better husband in the hopes it would have kept Branka from going after the anvil. He laments losing his caste, his home, and his honor as a warrior, and states he has "nothing left to lose."
- The Guardian is able to read Shale's history of struggle and determination, to which Shale responds with a mocking "Good for you."
First trial

The first trial
For the first challenge, a total of eight riddles must be answered in order to pass. Incorrect answers will result in the appearance of an ash wraith, which will need to be defeated, yielding less XP than simply answering correctly. Some of the spirits will accept "I don't know" in addition to the correct answer without summoning an ash wraith.
The amount of experience may vary depending on your character's level, up to 80 XP encountered, e.g., at level 17, the experience gains were 61 for correct answers and 55 for killing the wraith.
- Brona: "Dreams".
- Ealisay: "A tune".
- Thane Shartan: "Home".
- Lady Vasilia: "Vengeance" or "I don't know".
- General Maferath: "Jealousy" or "I don't know".
- Disciple Havard: "The mountains" or "I don't know".
- Archon Hessarian: "Mercy".
- Disciple Cathaire: "Hunger" or "I don't know".
Once this part is completed, the door will open allowing the Warden to proceed to the next stage of the trial.

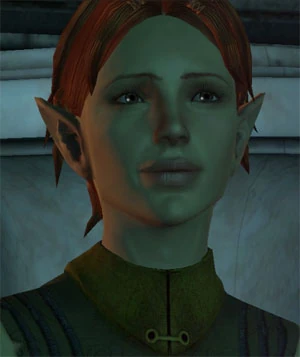
Shianni
You will have a brief encounter with someone from the Warden's past depending on his/her Origin. If you look back on your origins and reminisce about those days, you will be given Reflection. However, if you refused to answer the Guardian before, you will not receive the amulet.
- Human noble encounters Bryce Cousland.
- Dwarf noble encounters Trian Aeducan.
- Dwarf commoner encounters Leske
- City elf encounters Shianni.
- Dalish elf encounters Tamlen.
- Circle Mage encounters Jowan.
Second trial

The second trial
The next challenge is a fight that pits your party against itself. You will need to defeat spectral versions of all current party members to continue. The spirit versions will all have the same level as the Warden, even if the originals are of lower level. They can use any spell or talent that the original characters have, although they will not use spell combinations or ranger summons/pets. Also, they can use talents the originals do not have. In one run through, the Spirit Wynne used Cleansing Aura when the real Wynne did not. If the original characters have any unassigned points, the game will assign those for the spirit doubles. In effect, they are really not dopplegangers, just level and class matches for each member of the party.
Sample Tactics:
- Go through the Gauntlet alone and therefore face only yourself.
- Hold the rest of the party back in the chamber where you met someone from your past. Send forward a rogue with good hiding talent to spy the area. Once you've got the area in vision, have your mage lay down an area of effect spell, ideally Blizzard (which not only knocks the opposition off their feet but also has chance of freezing them). Immediately after Blizzard takes effect, have your rogue shoot their mage with the best arrows you have available. Ideally, have your mage lay down a second area effect spell, e.g., Tempest. By the time the doubles make it through to the chamber where your party is they will have taken considerable damage and are thus easier to defeat.
- If you have two mages in the party, you can do something similar to the above. However, pull your rogue back out of the room and have the party assemble behind the wall between the two entryways. Quickly drop a Storm of the Century against the doubles, then immediately follow up with Glyph of Repulsion on both entrances. Even if you don't have Spell Might to enable Storm of the Century just having both mages cast overlapping Blizzard spells then overlapping Tempest spells can be very potent. Further retreat the party into the hall of riddling ghosts so that survivors can only come at you from one direction.
- If you have a party of mainly mages (e.g., your main character is a mage plus Wynne and Morrigan plus another melee character), the easiest option to pass this trial is to cast Mana Clash on your spirit doubles—this will most likely instantly kill three out of four enemies and leaves you with just one foe to fight off.
- It is possible to hold the party back and use a rogue with Combat Stealth to separate the enemies enough (while sacrificing the stealth character for the battle) to lure them back with magic or ranged attacks. Taking this further, it is still possible with some luck to separate the group to the point only one will charge to your allies, leading to an advantageous 3-on-1 battle.
- Having multiple Two-Handed Warriors will make this battle much more difficult, as the copies will have access to all defense-piercing talents of the Two-Handed tree and will deal a great deal of damage, even to your better-armored originals. Therefore, it is best to enter the Gauntlet with either one of every class or all mages and rogues.
Third trial
The third part of the trial is a true puzzle, in which you have to get 3 of your party to stand on either the left or right floor tiles to make 1 block of the bridge solid, this will allow the last party member to walk onto it without falling. As with all adventure games there is 1 particular set sequence which you can find below. Be sure to set your party stance into hold position. Move only the character on the specified tile, leaving the other two where they are.
If your party does not consist of 4 members, ash wraiths will join as temporary companions and once the bridge is complete and the party moves to the next trial, they will vanish. The ash wraiths have Heavy Chainmail equipped on them which can be moved to the inventory and will remain there even when they vanish.
As seen in the screenshots, the following instructions are written from the perspective of the entrance, looking towards the exit.
Place 3 party members on the following tiles:
Right 2, Left 6, Left 3.
Move character from Right 2 to Left 1.
Move character from Right 4 to Left 2.
Finish crossing the bridge.
Once the Warden is across, the bridge will turn solid allowing the other members to cross.
Here is the list about which square is activated on the bridge:
L1- 3rd slot ;R1 - 3rd slot
L2 - 4th slot ;R2- 1st and 2nd slot
L3 - 1st slot ;R3 - 1st slot
L4 - 4th slot ;R4 - 2nd and 3rd slot
L5 - 4th slot ;R5 - 3rd and 4th slot
L6 - 2nd slot ;R6 - 2nd slot
R- Right ; L - Left
-An alternate way to avoid the puzzle part is to place one member of the party on the first square and hold position, then use another party member to run across the whole other side then move the original party member to the second square and repeat the process. After you have turned one part of the bridge solid it will stay that way allowing you to avoid the whole puzzle part and reduce the time it takes to solve it.
The last trial

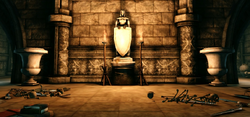
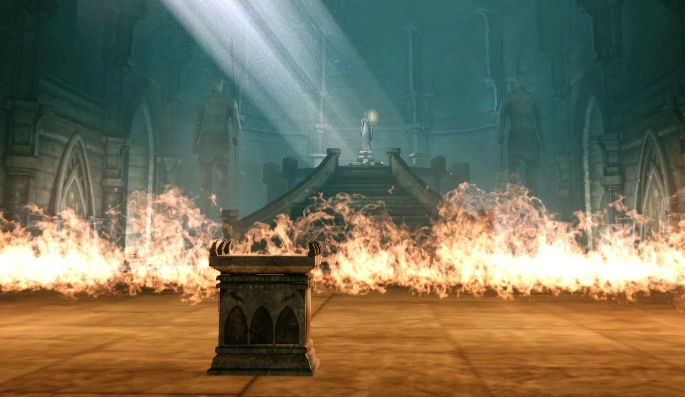
The last trial
The last chamber contains a wall of fire and an altar with a riddle. Upon clicking on the altar, the Warden will be given a choice to remove their equipment. Once you do that, you may then walk through the fire. The Guardian will now appear and congratulate you on proving your worth in the eyes of Andraste.
It is possible to pass through the fire while wearing an armor and equipping weapons and not taking damage, but the Guardian will come to fight you. Approach the altar from the fire side. When the prompts come up, choose the option, "Leave the altar alone." If you position yourself correctly, you will remain on the entrance side, but your companions will be behind you, and thus past the flames. This is because when you exit the altar your companions are "warped" into formation behind you. Then, direct your companions toward the urn. As soon as they do so, the Guardian will appear and demand to know why you are approaching the urn with your armor on. In the cutscene, the Warden is now warped past the flames (toward the urn) while the companions are back behind the flames. You can choose to apologize, or brashly insist on keeping your armor on. If you do so, the Guardian as well as two elite ash wraiths will attack you. It may help to have all your companions attack the Guardian with ranged attacks to keep him busy while the Warden deals with the ash wraiths. Killing the Guardian and his wraiths does not result in any loss of approval with Wynne or Leliana. The quest proceeds normally after this.
After the Guardian finishes talking, you can approach the statue and take a pinch of ashes for healing Arl Eamon.
If you accepted Kolgrim's quest to defile the ashes, you can still choose not to do so. If you simply take the pinch and leave, nothing happens inside the chamber (but you will face a battle on the Mountain Top). If you choose to do so, the Guardian will attack you with two ash wraiths. If Leliana or Wynne witness you defiling the ashes, they will attack as well. If they are not in your party while you defile the ashes, they will turn hostile when you return to camp and may leave your party. If Leliana is hardened and you have a high Coercion skill, you can Intimidate her into staying in line with a disapproval loss. You can defile the ashes without provoking Wynne if you complete the Urn of Sacred Ashes quest before Wynne joins your team in Broken Circle.
Either way, grab the loot from the adventurer's corpse and the chests before leaving.
Rewards
- 500 XP for passing all four tests successfully.
- 750 XP when exiting onto Mountain Top via the doors in the urn room.
![]() Pinch of Sacred Ash, source: Urn of Andraste
Pinch of Sacred Ash, source: Urn of Andraste
Bugs
- It is possible to defile the ashes and avoid killing Leliana or Wynne by running to the entrance of the temple. This may take a few attempts, but with the narrow corridors it is possible to leave most or all of the enemies behind. However, they will not return to your party and are treated as hostile enemies.
- When facing the spirits who copy the members of your party, the spirit copying Shale will only be normal rank while most of the spirits will be of elite rank.
 Once you have completed the quest, you will find exits at both sides of the urn. Going through will yield 750 XP and bring you back at the tomb entrance. You can turn around, reenter the tomb, and exit again by either door to obtain an infinite amount of experience points. (Fixed in Patch 1.04 on ).